Lab Website Local Development and Publishing Guide
Jump to:
This guide explains how to set up your local development environment to build, edit, and publish updates to the hpelabs.github.io lab website.
It walks you through installing the required tools (Git and Docker) on a Windows machine, running the website locally using a Docker-based Jekyll environment, previewing your changes in real time, and publishing updates to GitHub.
Once configured, you will be able to:
- Clone the repository locally
- Preview lab guide changes instantly
- Edit content using VS Code
- Publish updates to the public website
The setup only needs to be completed once. After that, your workflow will be limited to pulling updates, editing content, and pushing changes.
Installation Guide
1. Install Required Software
- Install VS Code: https://code.visualstudio.com/docs/?dv=win64user
- Install Git for Windows: https://github.com/git-for-windows/git/releases/download/v2.53.0.windows.1/Git-2.53.0-64-bit.exe
- Install Docker Desktop for Windows (make sure the WSL option is enabled during installation): https://desktop.docker.com/win/main/amd64/Docker%20Desktop%20Installer.exe?utm_source=docker&utm_medium=webreferral&utm_campaign=docs-driven-download-win-amd64
Restart your laptop when prompted.
2. First Docker Launch
After restarting:
- Docker will automatically install WSL if it is not already installed.
-
When Docker starts:
- Accept the license agreement.
- Skip the registration step.
- Wait for the Docker engine to fully start.
3. Clone the Repository and Start Docker
- Open VS Code.
- Open a terminal inside VS Code (
View → Terminal). - Navigate to the folder where you want to clone the website.
-
Run the following commands in the VS Code terminal:
 git clone https://github.com/hpelabs/hpelabs.github.io.git .

 docker build -t myjekyll:latest .

 docker run --rm -it -p 4000:4000 -p 35729:35729 -v "${PWD}:/srv/jekyll" myjekyll:latest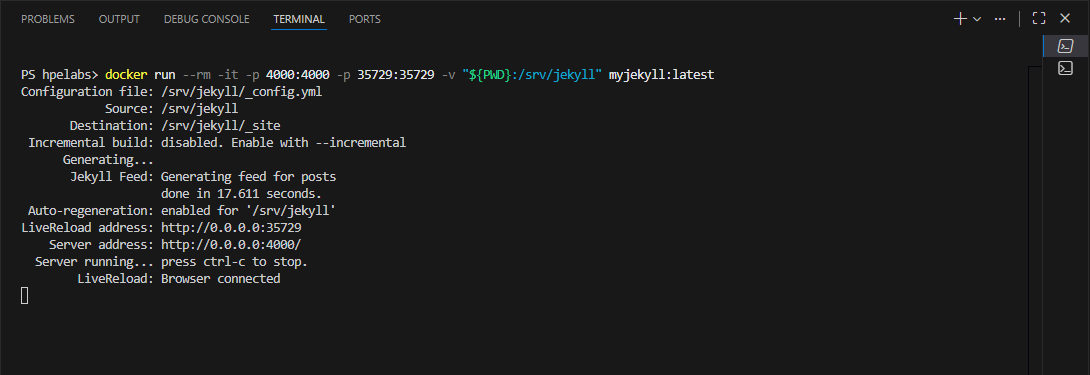
Tip: Running Docker in the VS Code terminal keeps your workflow in a single environment and allows you to see logs and errors immediately.
4. Access the Website Locally
Once the Docker container is running, open your browser and go to http://localhost:4000
You can now browse a live copy of the website locally.
⚠️ Troubleshooting
If the website does not load, replace
${PWD}in thedocker runcommand with the full path to your cloned repository, for example:C:\Users\YourName\hpelabs.github.io
5. Configure Git for GitHub
Before you can push edits, Git must be configured with your GitHub credentials.
Important: Make sure you have shared your GitHub username with me so I can add you as a collaborator.
Note: If you do not yet have a GitHub account, create one using your HPE email address.
Configure Git
Run the following commands in the VS Code terminal:
git config --global user.name "<github_user>"
git config --global user.email "<github_email>"
Run a first Push to force the authentication
After configuring Git, you can run a git push:
git push
A window will appear prompting you to authenticate with GitHub. Follow the instructions.
6. Sync Your Local Repository
Before editing, make sure your local repository is up to date:
git pull origin main
- This fetches the latest changes from GitHub and merges them into your local branch.
Tip: Always pull before starting new edits to avoid conflicts.
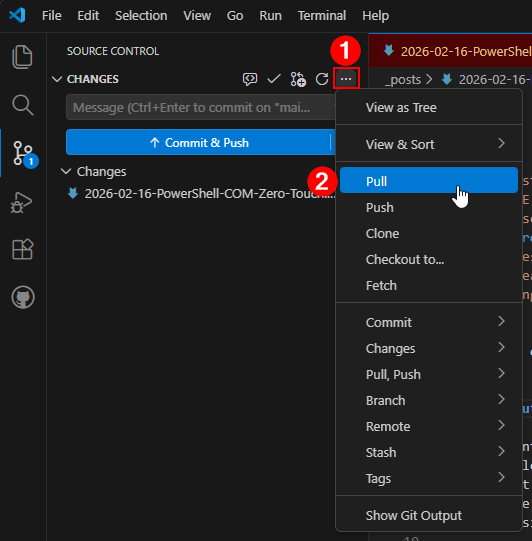
You can also use VS Code Source Control:
- Open the Source Control panel (
Ctrl + Shift + G). -
Click the … → Pull (or Sync Changes if you have local commits).
7. Edit Your Lab Guide
- Open the markdown file of your lab guide, or create a new one using an existing guide as a template.
- Make the necessary edits to update or add your content.
Tip: Each time you press CTRL + S (or File > Save), the website will automatically refresh in your browser.
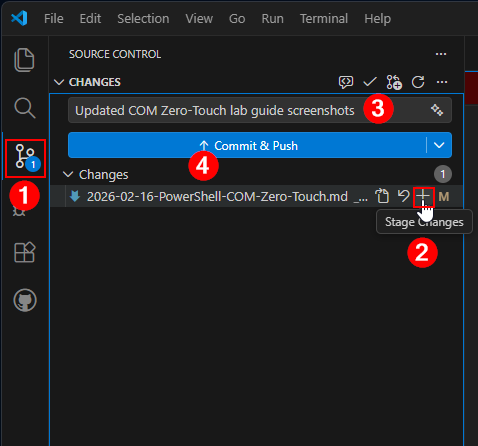
8. Publish Your Changes Using VS Code Source Control
- Open Source Control (
Ctrl + Shift + G). -
Stage Your Changes
- Click the + icon next to individual files, or
- Click + (Stage All Changes) at the top.
-
Provide a Commit Message
- Enter a meaningful commit message (e.g., “Updated COM Zero-Touch lab guide screenshots”)
-
Commit and Push Your Changes to GitHub
- Click Commit & Push.
- Authenticate with GitHub if prompted.
⚠️ Remember
Always pull the latest changes before editing and commit/push frequently.
Folder Structure
Lab Guide Markdown Location
Lab guides must be created in \_posts\<date>-<lab-title>.md
Where:
<date>format:YYYY-MM-DD<lab-title>: lab title without spaces (use - instead)-
Example
\_posts\2026-02-16-PowerShell-COM-Zero-Touch.md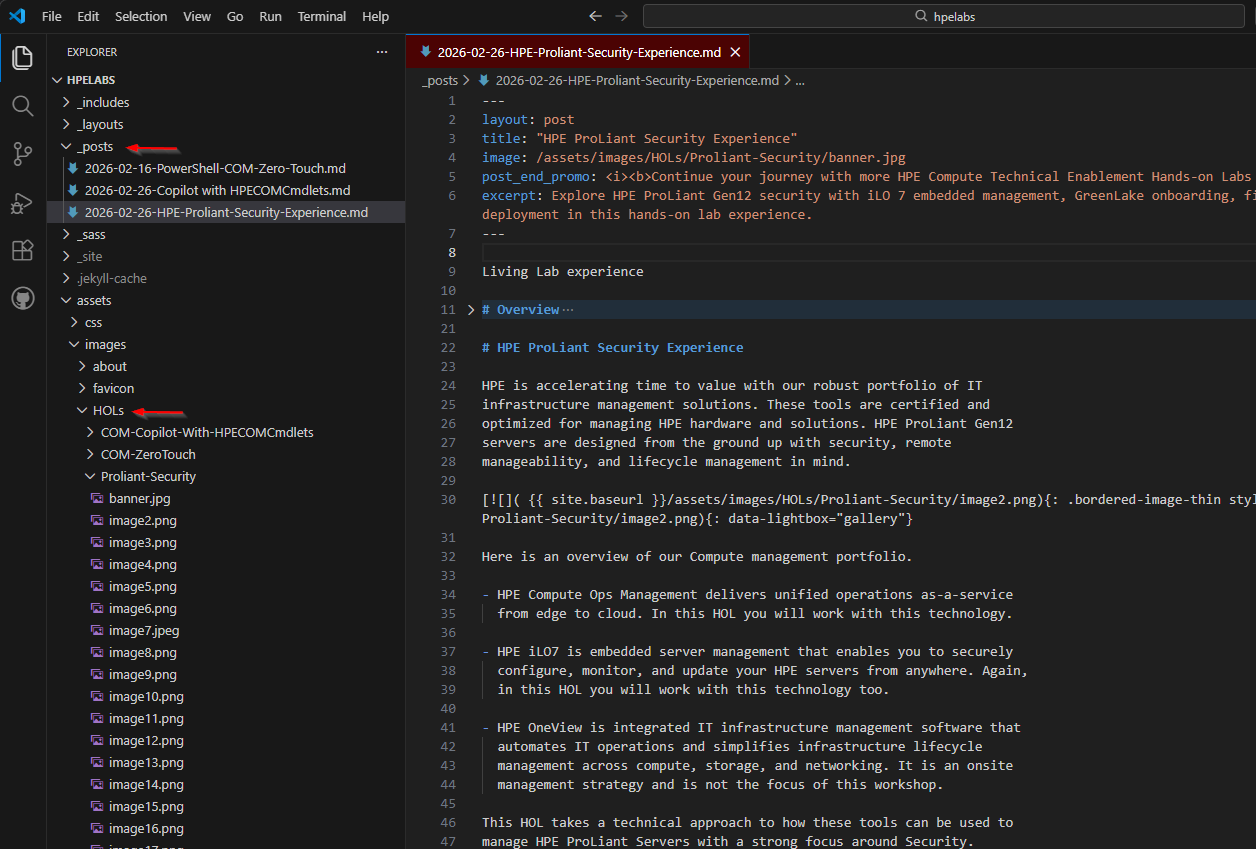
Image Storage
All lab guide images must be stored in \assets\images\HOLs\<lab-name>\
Note: Create a new
<lab-name>folder in\assets\images\HOLs\for each lab guide to organize all related images. Use a clear, descriptive name that matches your lab guide title (e.g.,COM-ZeroTouchfor “HPE Compute Ops Management Zero-Touch Automation”).
Example folder structure:
\assets\images\HOLs\
                ├── COM-ZeroTouch\
                │   ├── banner.jpg
                │   ├── image1.png
                │   └── image2.png
                └── Proliant-Security\
                    └── ...
Markdown Edition
Markdown is a lightweight markup language used to format the lab guides on this website. It uses simple text-based syntax to create headings, lists, links, and formatted text that renders beautifully in a browser.
⚠️ Markdown is Sensitive to Indentation
Proper indentation is critical in Markdown. Incorrect spacing can break formatting, cause lists to fail, or prevent code blocks from rendering. Always pay careful attention to:
- Spaces before list items (use consistent spacing: typically 2 or 4 spaces for nested lists)
- Indentation within blockquotes and nested structures
- Line breaks between different block elements
When in doubt, preview your changes in the live browser to catch formatting issues immediately.
Markdown Style Guide
Follow these rules when editing lab guides:
-
Use heading levels 1-6 (
#to######) with the following conventions for lab guides:Level Syntax Usage H1 # textSteps and top-level sections — one per step (e.g., # Task 1 - Install) or top-level post-step sections (e.g.,# Summary,# Want more?)H2 ## textTasks within a step (e.g., ## Step 1 - Onboard a server)H3–H6 ### text…Sub-sections within a task 💡 The page title is rendered automatically from the front matter
title:field — do not add it as a#heading in the body.Example structure:
# Task 1 - Onboarding devices ## Step 1 - Onboard one server ## Step 2 - Set device location and tags # Task 2 - Configure settings ## Step 1 - Apply firmware policy-
The table of contents is automatically generated by Jekyll from the headings in your page.
-
-
Use bullet points (
-or*) for lists; use numbered lists (1.,2.) for sequential steps.1. The first step is to install the library on your Windows virtual machine. 2. Type `Y` when prompted and press Enter to continue with the installation -
Use bold for UI elements, file names, and important terms using
**text**. -
Use code blocks (triple backticks
```) for commands and code snippets. Specify the language type:```bash,```powershell,```text, or```yaml.- Supported language types:
bash,shell,powershell,text,yaml,json,markdown,python,javascript,typescript,html,css,xml. If a language isn’t recognized, usetextas fallback. -
Syntax:
```bash git clone https://github.com/example/repo.git ``` -
Disabling the Copy button — By default, every code block displays a Copy button. To suppress it for a block that lab users should not execute (e.g., reference-only commands, output examples, or informational snippets), add
{: .no-copy}on the line immediately after the closing triple backticks:```powershell $SubscriptionKey = Get-HPEGLSubscription ... ``` {: .no-copy}This also works for an entire blockquote containing multiple code blocks — place
{: .no-copy}after the last>line of the blockquote (at the same indentation level as the blockquote itself):> Here are some reference commands (do not run): > ```powershell > Get-HPECOMServer -Region $Region > ``` > ```powershell > Get-HPEGLDevice > ``` {: .no-copy}💡 Tip
Use
{: .no-copy}for commands provided for illustration only — such as Secure Gateway examples, environment-specific snippets, or expected output samples — to prevent lab users from accidentally running them.
- Supported language types:
-
Use inline code (backticks
`text`) for variables, paths, and terminal commands within text. For example:$variable - Use blockquotes (
>) for tips, warnings, and important notes.- Add emojis for visual clarity, see Emoji Reference Guide:
- ⚠️ for warnings
- ℹ️ for information
- 💡 for tips
- ✅ for success/checkmarks
-
For better line break rendering in blockquotes, use
{: .small-space}:> ⚠️ **Important note** > >{: .small-space} > > Your content here with proper spacing.
- Add emojis for visual clarity, see Emoji Reference Guide:
- Use underline for emphasis on critical terms (e.g., IMPORTANT).
- In standard Markdown, there is no native underline syntax. However, you can use
**<u>IMPORTANT</u>: Please note...**to return IMPORTANT: Please note…
- In standard Markdown, there is no native underline syntax. However, you can use
-
Always add back to top links before each level 1 or 2 heading using:
[↑ Back to Top](#)
-
To add a line across the page, you can use:
***, it will display like:
-
Table can be defined using:
  | Team Name & Number | HPE iLO7 FQDN | Username | Default Factory Password |
  |---|---|---|---|
  | **Team-01** | hol1-ilo.local | Administrator | whatever |
  | **Team-02** | hol2-ilo.local | Administrator | whatever |
  | **Team-03** | hol3-ilo.local | Administrator | whatever |
Output:
Team Name & Number HPE iLO7 FQDN Username Default Factory Password Team-01 hol1-ilo.local Administrator whatever Team-02 hol2-ilo.local Administrator whatever Team-03 hol3-ilo.local Administrator whatever - Always include photos with proper formatting when inserting images (see “Adding Images in Markdown” section).
Step Progress Badge
Each numbered step in a lab guide can display a step progress badge showing the step number and an estimated reading/completion time.
The badge is placed directly below the # Task N heading using:
# Task 6 - Configuration of Compute Ops Management

<p class="step-meta">(Task 6 of 12) ⏱️ ~9 min</p>
Which renders as a styled badge like:

Important rules:
- The
<p class="step-meta">element must immediately follow the# Task Nheading with no blank line between them. - The static time value (e.g.,
~9 min) you write in the markdown serves as a fallback when JavaScript is disabled. - The time is automatically recalculated at page load based on the word count of the step section (at 140 words/minute). You do not need to manually maintain an accurate value.
- Use the format
(Task X of Y) ⏱️ ~N minto keep badge styling consistent across all lab guides.
Adding Images in Lab Guides
Always use the following format when inserting images
(includes border styling, zoom capability, and size control):
[{: .bordered-image-thin}]( /assets/images/HOLs/COM-ZeroTouch/image7.png){:class="img-500"}{: data-lightbox="gallery"}
Supported Image Sizes in {:class=”img-xxx”}:
img-300img-400img-500img-600img-700img-800img-900img-100pct(full width)
Mandatory Markdown Metadata (Front Matter)
The first section of every lab guide markdown file must contain metadata.
This section is mandatory and controls how the website displays your lab.
---
layout: post
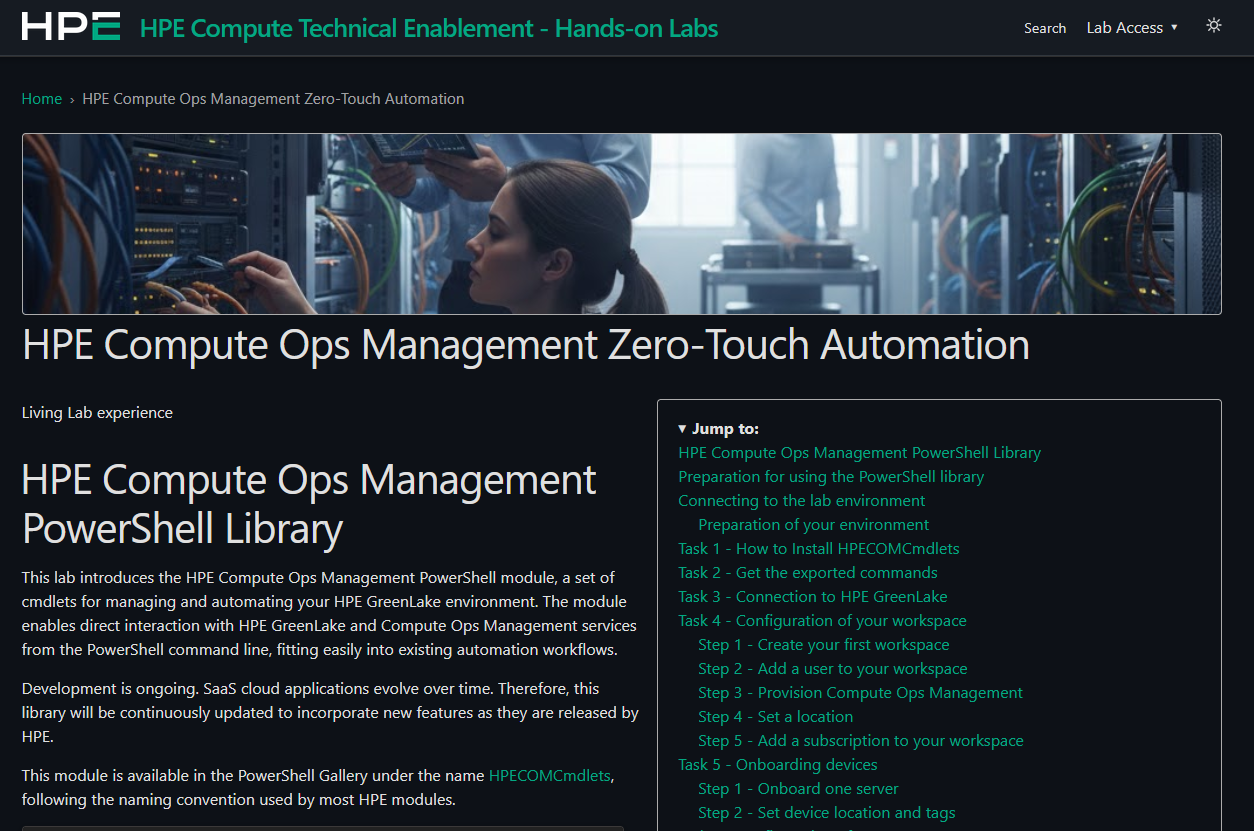
title: "HPE Compute Ops Management Zero-Touch Automation"
image: /assets/images/HOLs/COM-ZeroTouch/banner.jpg
post_end_promo: <i><b>Continue your journey with more HPE Compute Technical Enablement Hands-on Labs for infrastructure, security, technologies, and solutions.</b></i>
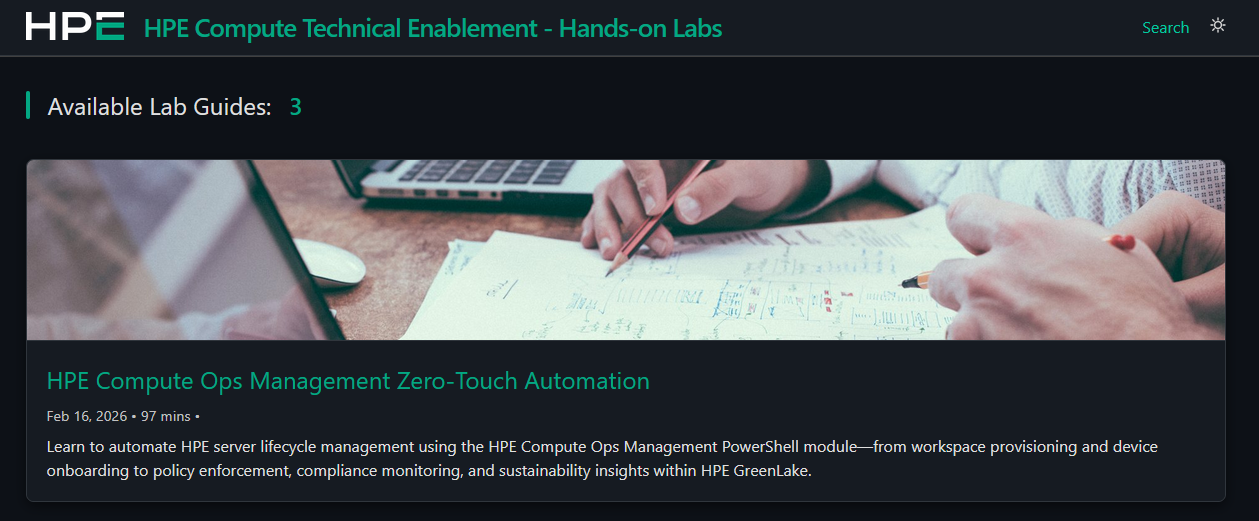
excerpt: Learn to automate HPE server lifecycle management using the HPE Compute Ops Management PowerShell module—from workspace provisioning and device onboarding to policy enforcement, compliance monitoring, and sustainability insights within HPE GreenLake.
last_modified_at: 2026-06-29
tags:
- greenlake
- com
- scripting
room: 2 # Set to 1 or 2
exclude: false
hide_read_time: false
---
Metadata Fields Explained:
-
excerpt
Adds a short introduction displayed on the homepage.
-
exclude
Set to
trueto remove a post from all listing pages (homepage, room pages, and demos page) without deleting the file. The page itself remains accessible via its direct URL.exclude: true # Hidden from all listings -
hide_read_time
Set to
trueto suppress the estimated read time shown on the homepage card for this lab.hide_read_time: true -
image
Banner image displayed:
- In the header of your lab guide
- On the homepage preview card
-
last_modified_at
Set the date a lab guide was last updated. When this date is later than the publication date (derived from the file name
YYYY-MM-DD), an Updated date is automatically displayed in two places:- On the homepage card, next to the publication date — e.g.
Feb 16, 2026 [Updated: Jun 22, 2026] - At the top of the lab guide, just below the title — e.g.
Updated: Jun 22, 2026
last_modified_at: 2026-06-22 # Use YYYY-MM-DD format💡 Tip
Update this field whenever you make meaningful changes to a published lab guide so attendees can see at a glance that the content is current. If omitted (or not later than the publication date), no Updated date is shown.
- On the homepage card, next to the publication date — e.g.
-
post_end_promo
Adds a final promotional line at the end of your lab guide.
-
room
At events like HPE Tech Jam, lab sessions are typically split across two rooms, each running a different set of labs. The
roomfield lets you assign each lab guide to a room so attendees can quickly find the labs available in their room.The homepage (https://hpelabs.github.io) always shows all available labs, while two dedicated room pages show only the labs assigned to that room:
- Room 1: https://hpelabs.github.io/room-1/
- Room 2: https://hpelabs.github.io/room-2/
To assign a lab to a room, set
room: 1orroom: 2in its front matter. Leave it empty to keep the lab on the homepage only.room: 1 # Room 1 only room: 2 # Room 2 only room: # Not assigned to any room (homepage only) -
tags
Keywords that categorize your lab guide. Tags are displayed in two places:
- On the homepage card, after the date and read time
- At the top of the lab guide, just below the title
Each tag is rendered as a clickable link. Clicking a tag runs a site search (
/search/?q=<tag>) that lists every lab guide sharing that tag — making it easy for attendees to discover related labs.Define tags as a YAML list (one per line, indented with two spaces and a dash):
  tags:
    - greenlake
    - powershell
    - automation
💡 Tip
Use lowercase, single-word tags and reuse the same tags across related labs so the search groups them together. Avoid spaces in a tag (use
secure-gatewayrather thansecure gateway). Leave the field empty (tags:) if the lab has no tags. -
type
Set to
demoto assign a post to the Demos page instead of the labs homepage and room pages. Demo posts are automatically excluded from the labs homepage.type: demo # Shows on the Demos page, hidden from labs homepage and room pagesLeave unset (or omit entirely) for regular lab guides.
Generating a Banner Image
You can use Google Gemini to generate your own banner image.
Example prompt:
Generate a photorealistic image of [subject].
Shot with a DSLR camera, 50mm lens, natural lighting, high dynamic range, ultra-detailed, realistic skin texture, sharp focus.
Export as JPEG with high compression, optimized for web.
Target file size under 300 KB and sized 1920 x 1282.
After generation:
-
Save the file as
banner.jpg -
Store it in
\assets\images\HOLs\<lab-name>\
Emoji Reference Guide
Here is a list of Emoji you can use to improve your lab guide:
Severity & Status
| Emoji | Meaning / Usage |
|---|---|
| ⚠️ | Warning, caution, potential risk |
| ⛔ | Forbidden, access denied, not allowed |
| ❌ | Error, failure, invalid action |
| 🛑 | Stop immediately, critical halt |
| ℹ️ | Information, guidance, reference |
| 🔔 | Alert/notification, attention needed |
| 🚧 | Work in progress, maintenance window |
| 📝 | Note, annotation, manual step |
General Documentation
| Emoji | Meaning / Usage |
|---|---|
| ✅ | Completed tasks, success, confirmation |
| 🎯 | Goals, objectives, focus |
| 📌 | Important note, pinned item |
| 💡 | Idea, tip, insight |
| 🔍 | Search, analysis, review |
| 🛠️ | Configuration, troubleshooting |
| 🚀 | Launch, progress, innovation |
| 📂 | Documentation, files |
| 🖥️ | Technical topics, systems |
| 🔒 | Security, privacy, protection |
| ✨ | Tip |
Process & Workflow
| Emoji | Meaning / Usage |
|---|---|
| ⏳ | Pending, waiting, in progress |
| 🔄 | Refresh, retry, synchronization |
| ▶️ | Start, play, begin process |
| ⏹️ | Stop process, end task |
| 📤 | Upload, send, outbound action |
| 📥 | Download, receive, inbound action |
| 🗂️ | Organize, categorize, workflow steps |
| 🔁 | Repeat, loop, recurring process |