Security Session Demo - HPE ProLiant Compute
Jump to:
- HPE ProLiant Security Demo – Purpose
- HPE ProLiant Security Demo – Demonstration
- Configure iLO7 to use Thales CTM
- Configure the MR Controller to request a key from the External Key Manager
- Configure the SED Devices to Unlock Encryption via Postman
- Resetting the security demonstration environment
- Summary of what was shown
- Want more?
Live demo Environment – 2026 Security Sessions (TechJam, RSA, Discover)
HPE ProLiant Security Demo – Purpose
The Purpose
The purpose of this demonstration is to show how to configure an HPE ProLiant Gen12 server with SED‑enabled storage devices and SED‑enabled hard‑drive controllers, and how to connect each of them to an External Key Manager.
During the demonstration, you will connect to the Thales Cypher Trust Manager server and observe a user being created as part of the iLO joining the key manager. You will then see keys being issued as we successfully request a key to enable encryption on the devices.
A challenge in the demonstration environment is that, when you log in to use the equipment, you may find the system in one of two states. The system may already have encryption enabled and be connected to the External Key Manager, or—preferably—you may start with the server not connected to the External Key Manager and none of the devices have encryption enabled.
To illustrate these two states, please review the screen captures of the relevant sections in iLO 7 below.
Get Connected
You will connect to a Omnissa Horizon environment. With your browser (Chrome recommended) connect to the following URLs based on your present location:
-
Outside of an HPE office use: https://16.103.2.134/
-
Inside an HPE office use: https://10.182.0.33/
With:
- Username: RSA_Security
- Password:
<email Chris.Powell@hpe.com>
Procedure:
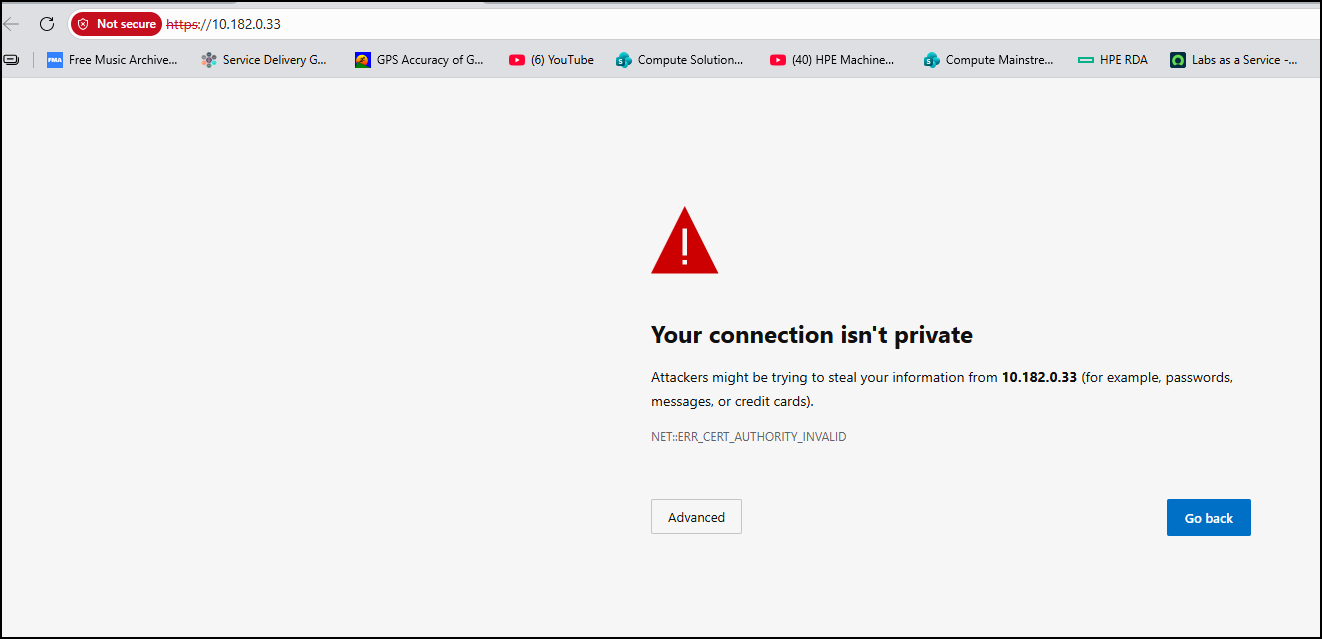
-
After clicking one of the links above, you will be presented with the “Your connection isn’t private” prompt, click on Advanced.
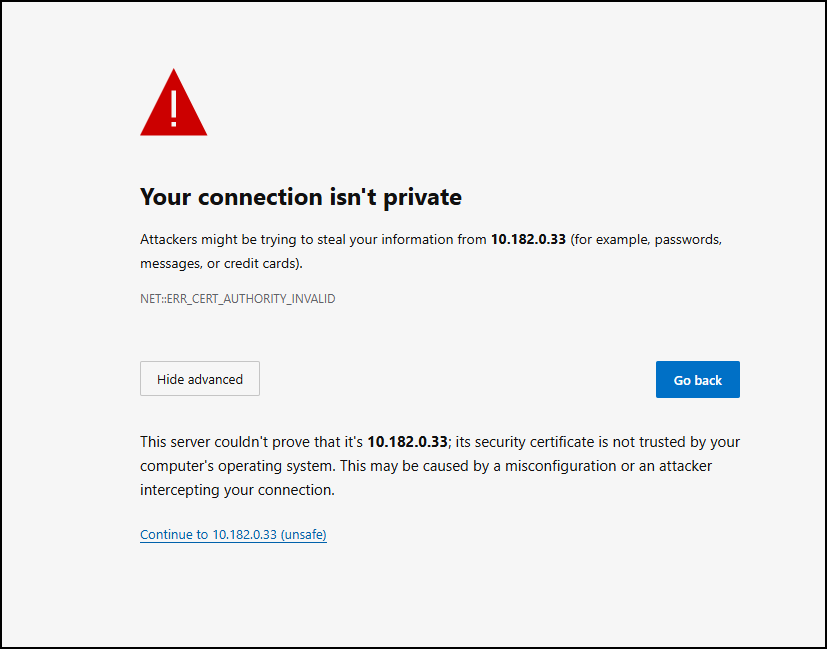
-
Click on the link to Continue to your IP address. This is not an “unsafe” thing to do in this case.
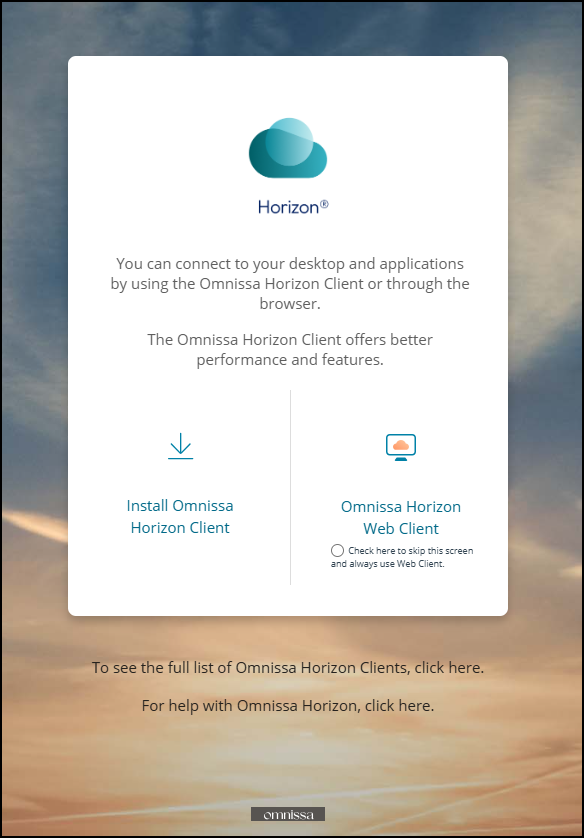
-
At the Horizon client selection screen, choose on the right side of the login box, Omnissa Horizon Web Client.
-
At the Horizon Login screen, enter the username and password listed above and click on Login.
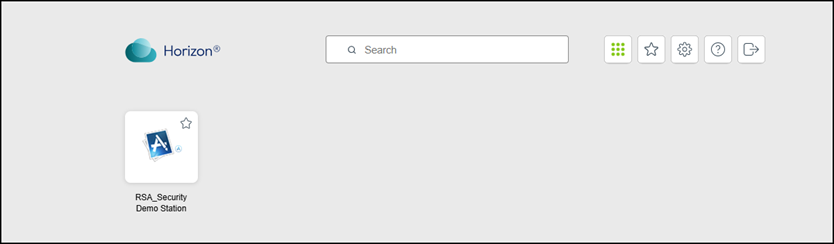
-
When successfully logged in you are presented with a clickable link that launches your demo station. This is where you will work. Make sure you stay within the VPN connection when using a browser. If you connect to a site via your own browser, you will not have a network connection to the lab. You must stay within the Horizon terminal. Click on the RSA_Security Demo Station link.
-
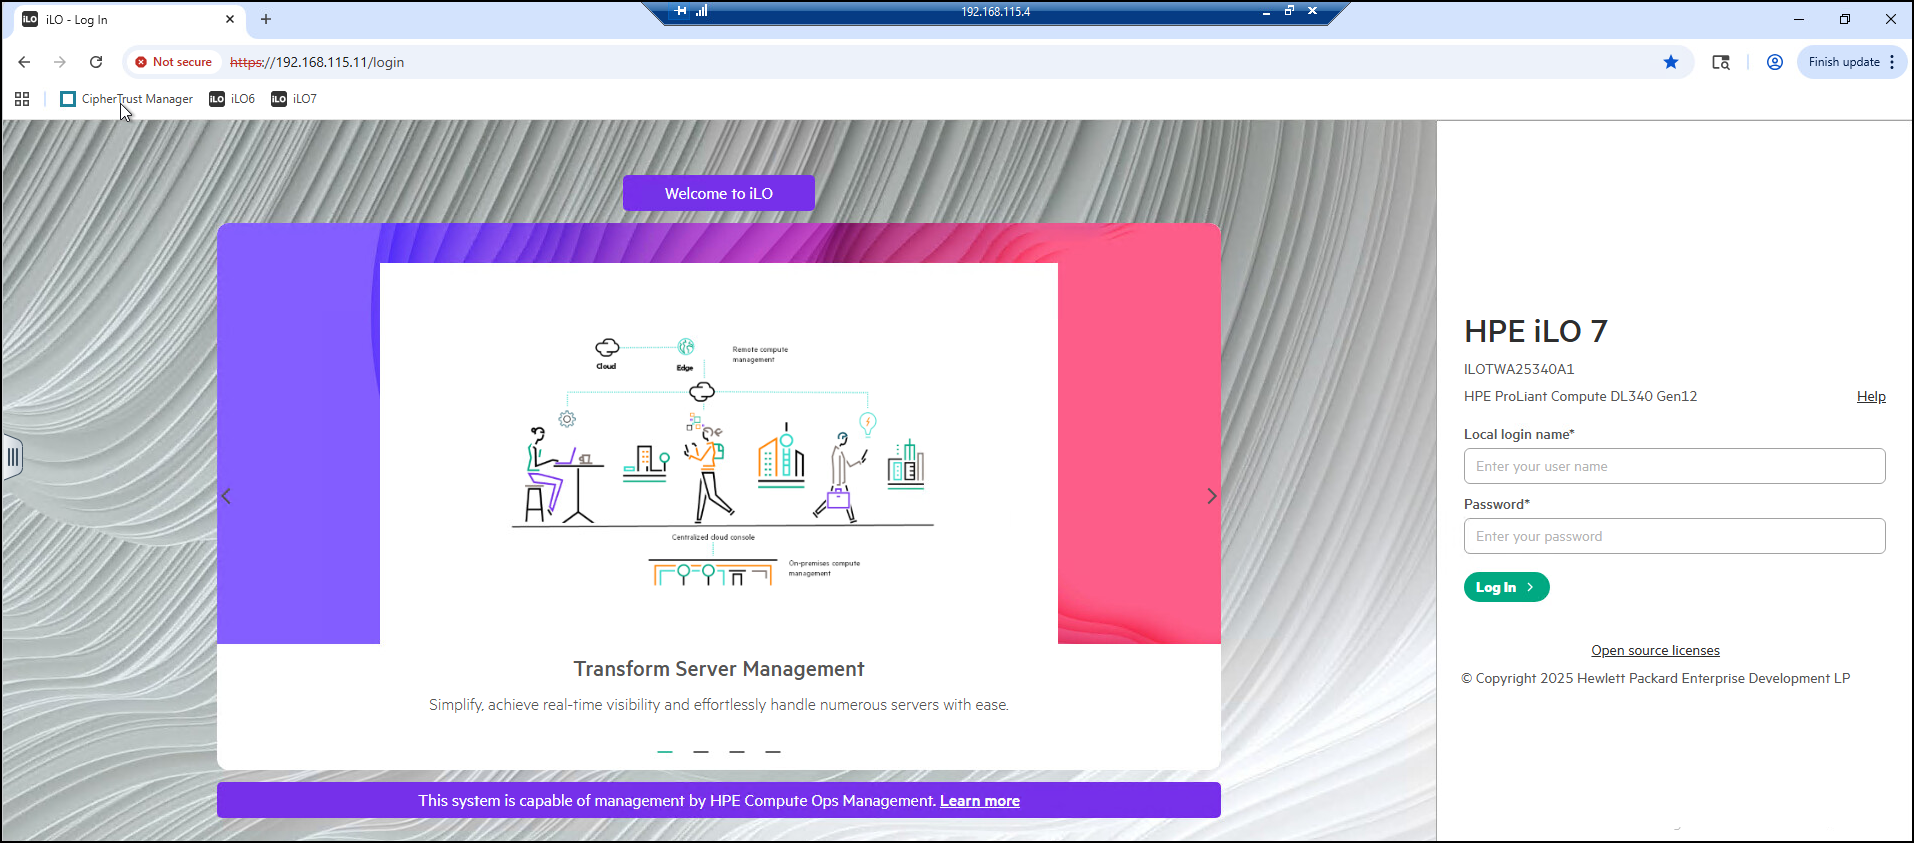
We are now going to launch some of the demo environment. First, log in to the iLO7 in your HPE Gen12 server. The server is in a pre‑production state, and you will see that warning in the ROM as you use the system. Click on Chrome in your System Tray.
-
After Chrome loads, you will see bookmarked links to the different systems used for the demos. You will see the iLO7 bookmark, the iLO6 bookmark, and of course our Thales server. Click on the iLO7 link.
-
Login with Administrator/HPent!123
-
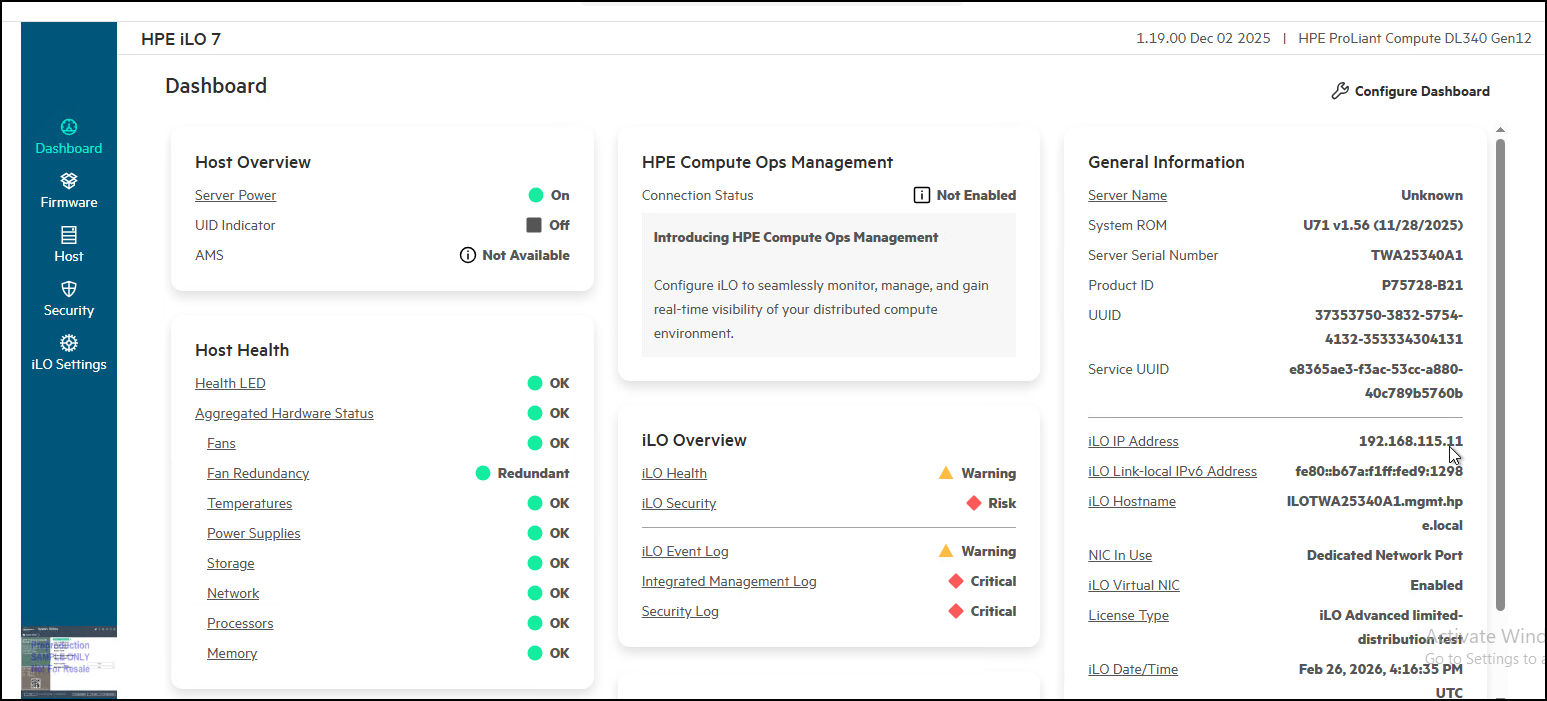
You should be presented with the iLO7 dashboard.
-
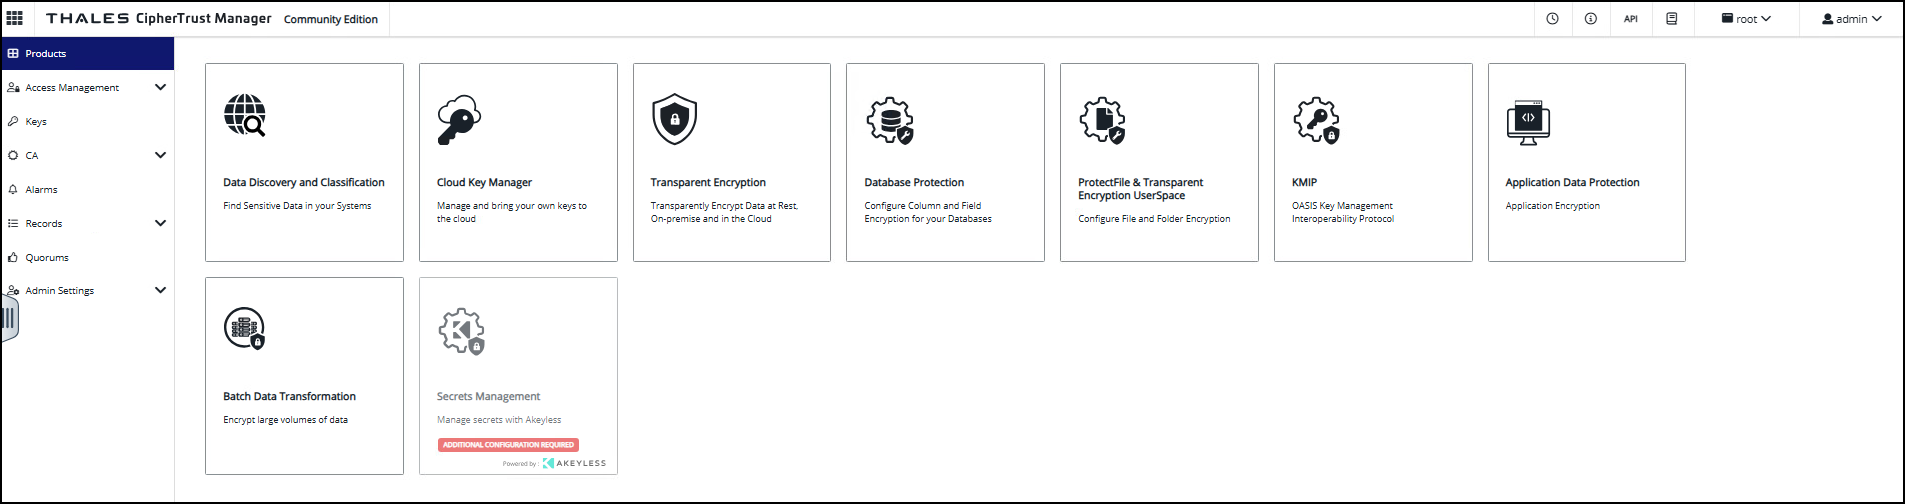
Now click on the Thales server bookmark named Cipher Trust Manager.
-
If you are presented with another security check, click on the Advanced button to accept the risk and proceed to the safe URL link.
-
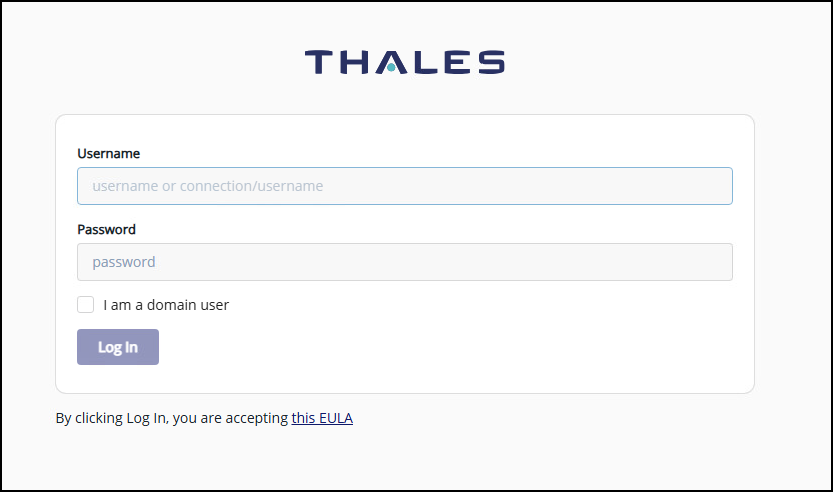
You should be presented with a login prompt like the screen shot below.
-
Enter the username of Admin/HPent!123 and login to Thales.
-
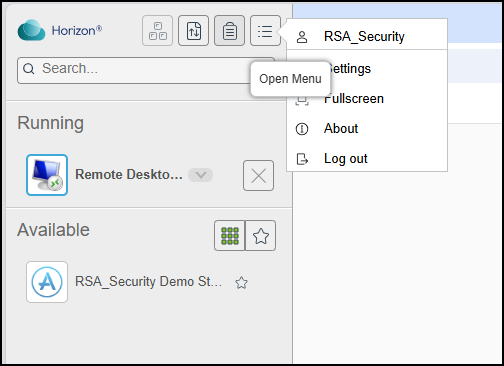
Please log out of the Horizon environment when you are done. To do this, click the three vertical bars on the left side of your VPN connection and navigate to Log Out. You can see the three vertical bars in the graphic below.

-
You are looking for the section to Log out. Click on the link to successfully log out.
This Ends this Section.
Preferred Starting State
In different sections within iLO7, you can see the various states of “encryption” for the devices installed in the computer. In each of the areas below, we are highlighting each storage controllers starting configuration before encryption capability has been enabled.
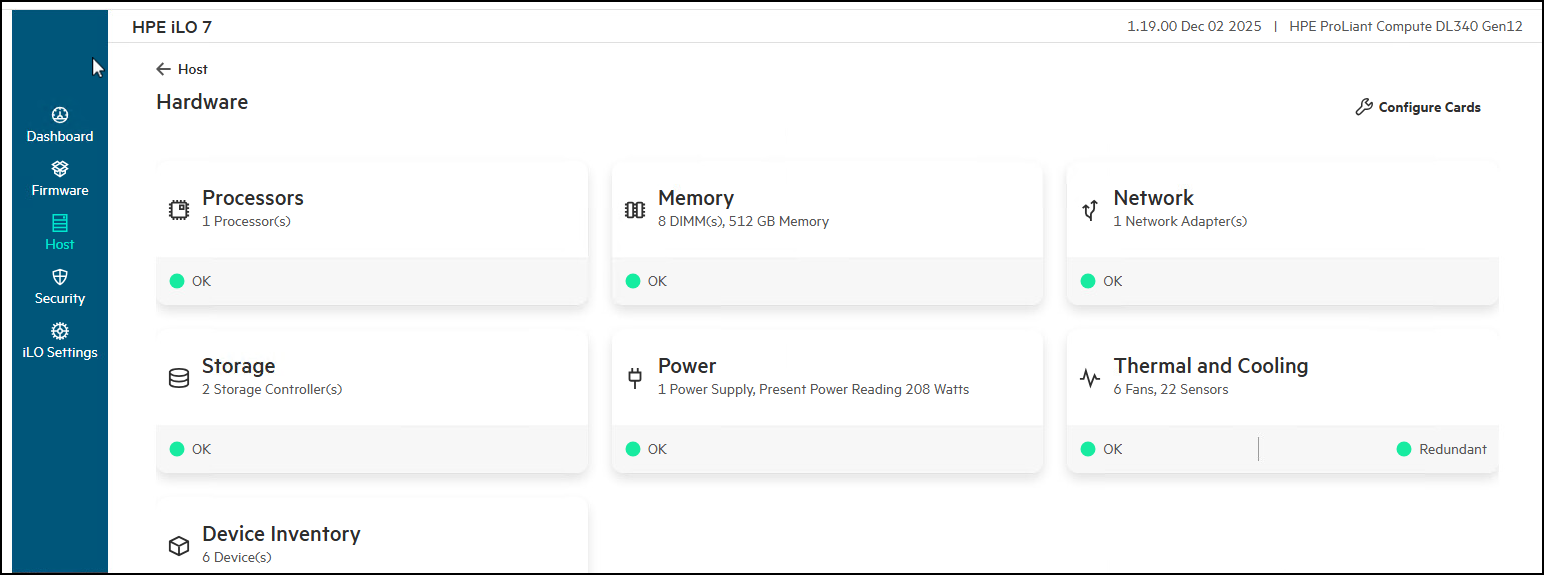
You can see each of the controllers in the iLO7 from the Dashboard in the left navigation tree.
- Select Host.
- Now select the Hardware card to see the various devices in the system. Please be aware that the server needs to boot, even if that is just to the System Configuration utility, before it will give you a list of all the devices in the computer. This need to be rebooted coupled with the configuration changes we are going to make to the devices, which means rebooting the system must occur before any changes take effect. If you don’t see what you expect, it is most likely that the system needs to be rebooted.
-
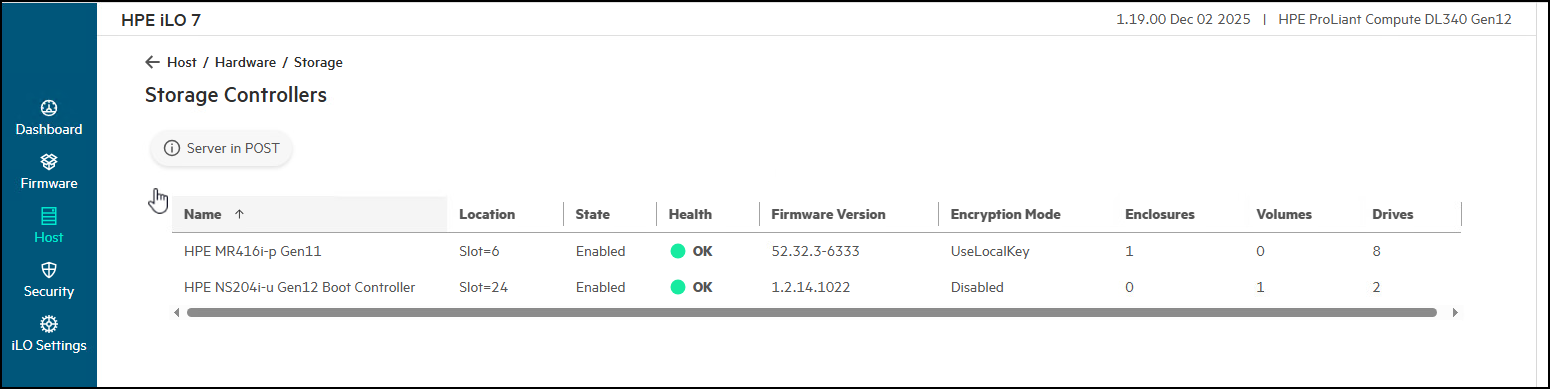
Click on the Storage card.
-
The screenshot below is the NS204i-u controller. Again, you got here by going to Host -> Hardware -> Storage -> Storage Controllers to see this. Click on View More under the controller to see that the encryption mode is
Disabled. This is expected because the NS204i-u does not provide any encryption capability at the controller level. In this case Encryption is handled at the storage device level, the 960GB storage devices themselves.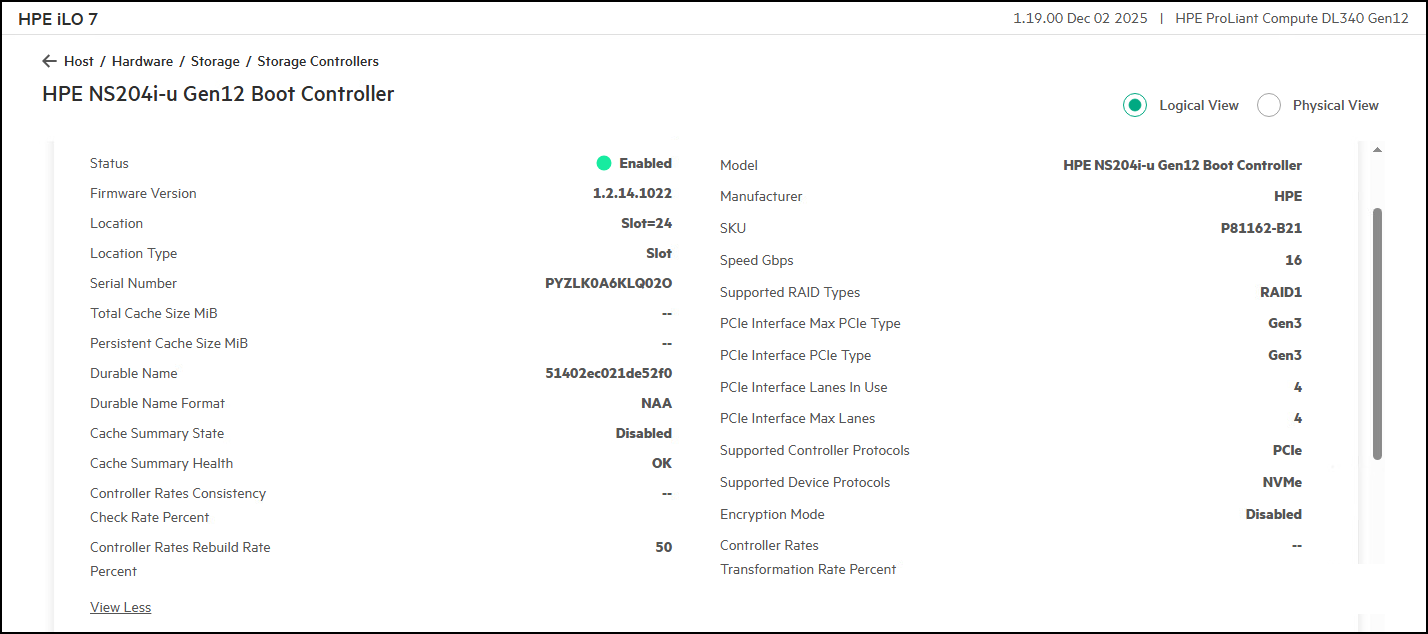
-
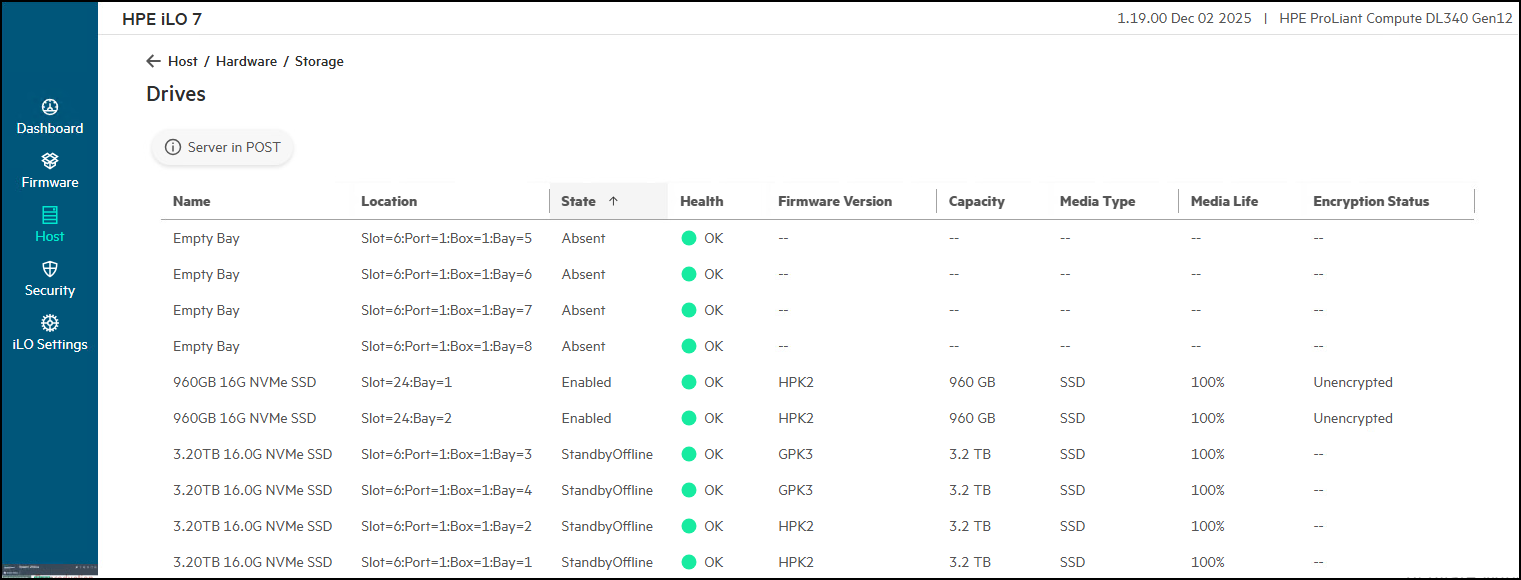
To see the status of the 960GB storage devices, move down in the screen and click on the logical volume information in the Volumes card. Note that Encrypted is
Falsein volume information, and for each 960GB device the Encryption Status isUnencrypted.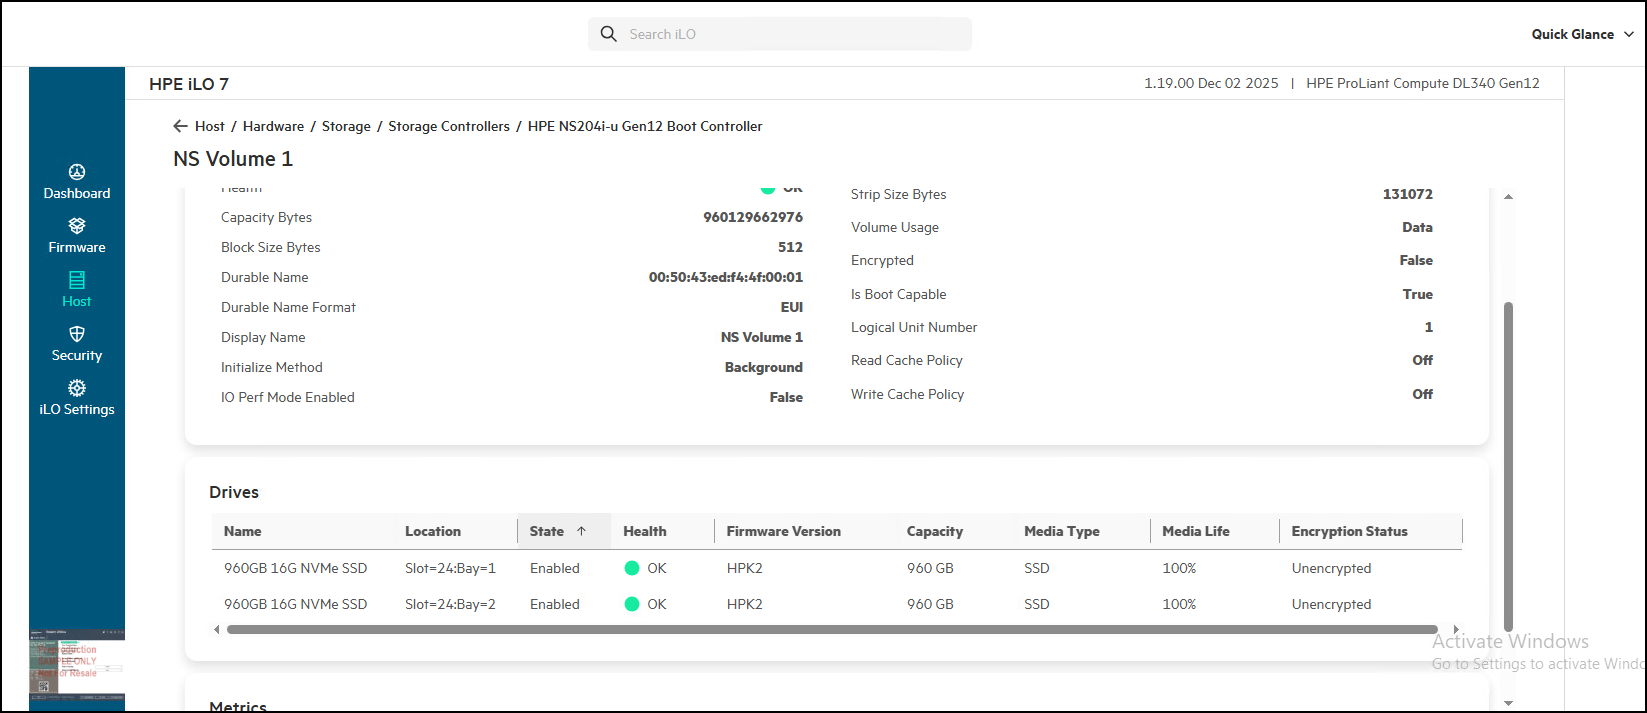
-
Now let’s look at the MR416i-p harddrive controller. Again, we return to Host -> Hardware -> Storage -> Storage Controllers and we then click on the MR416i-p information.
-
Click on View More to see the encryption area. Note that Encryption Mode is
UseLocalKey.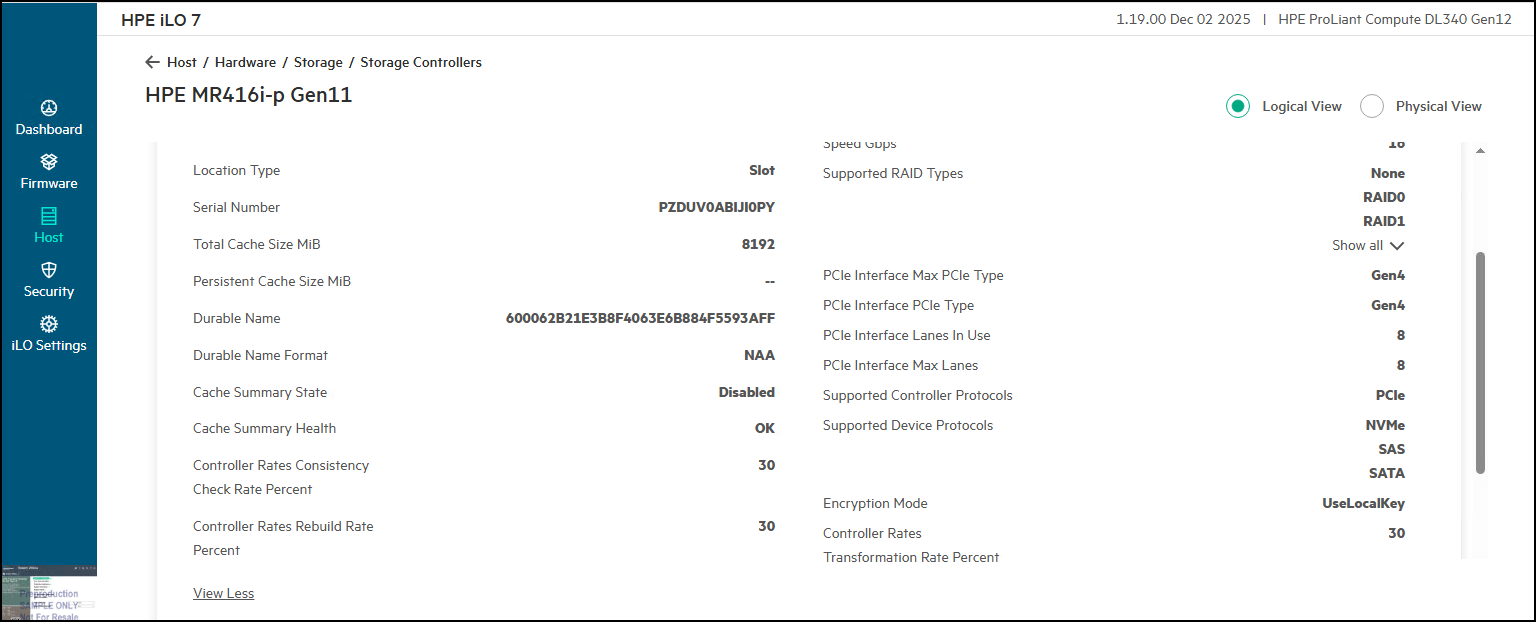
-
You can also look at the individual storage devices to see their encryption status. From Host -> Hardware -> Storage -> Storage Drives.
- The next Solution to look at is the External Key Manager that we will use for our demonstration. We are using a Thales Trust Manager system running in our lab.
This Ends this Section.
Thales Cipher Trust Manager (CTM) state before adding devices.
-
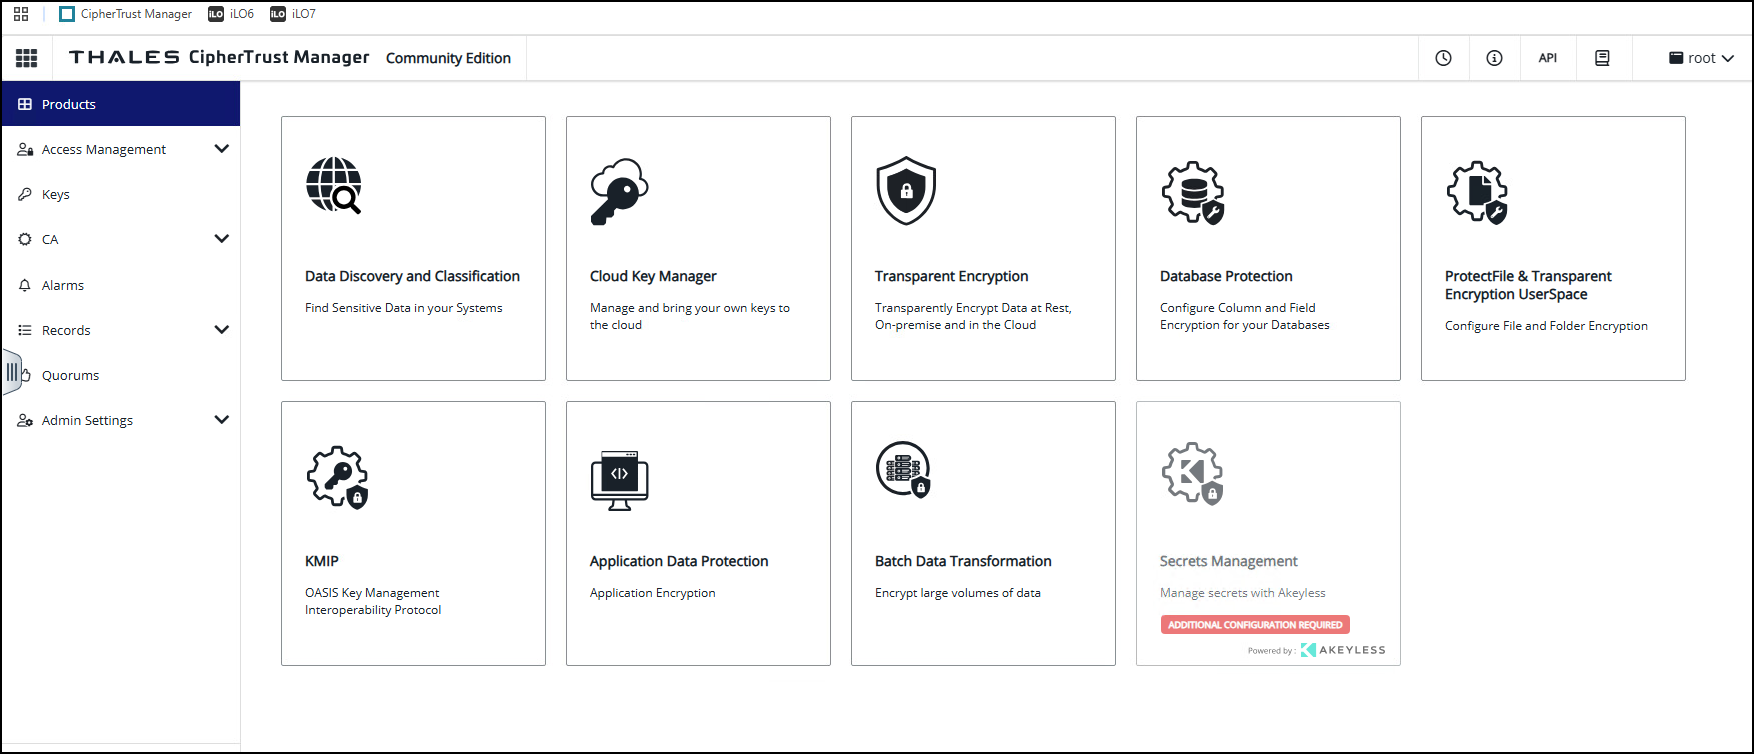
Login into Thales Cipher Trust Manager at 192.168.115.10 – Admin/HPent!123.
-
Click on Access Management.
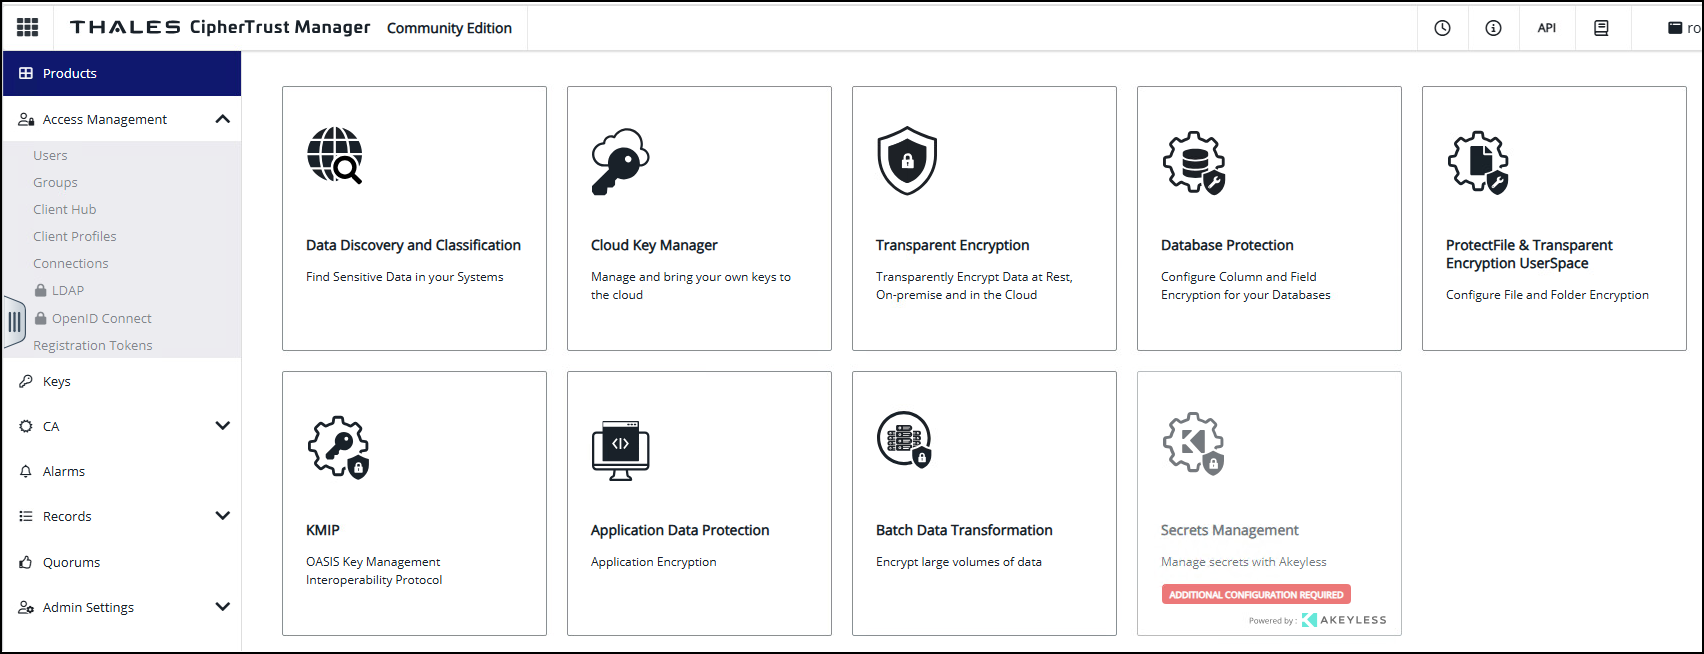
-
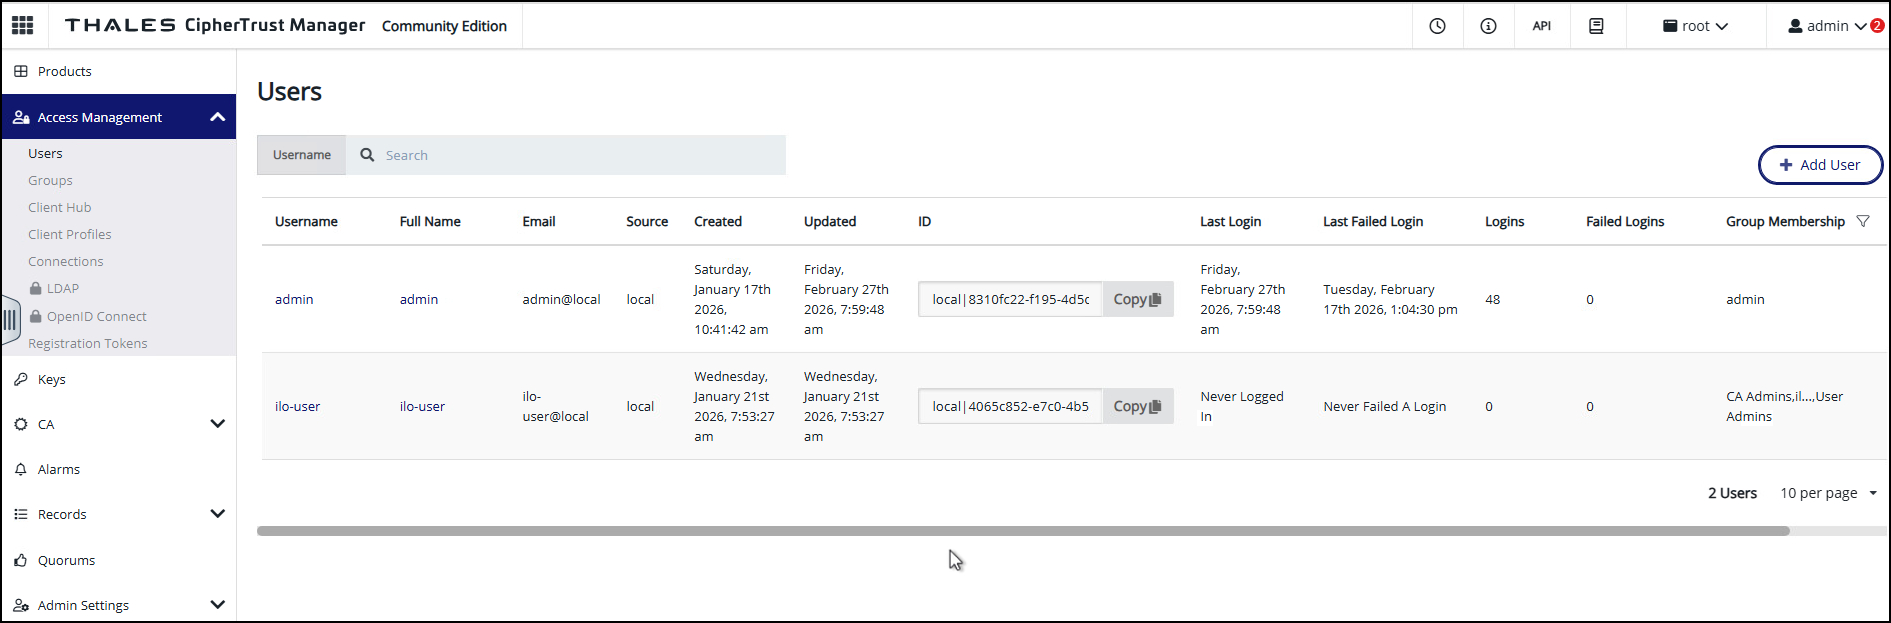
Click on Users – Show that only two users currently exist. We previously created the user called “iLO7-user”.
-
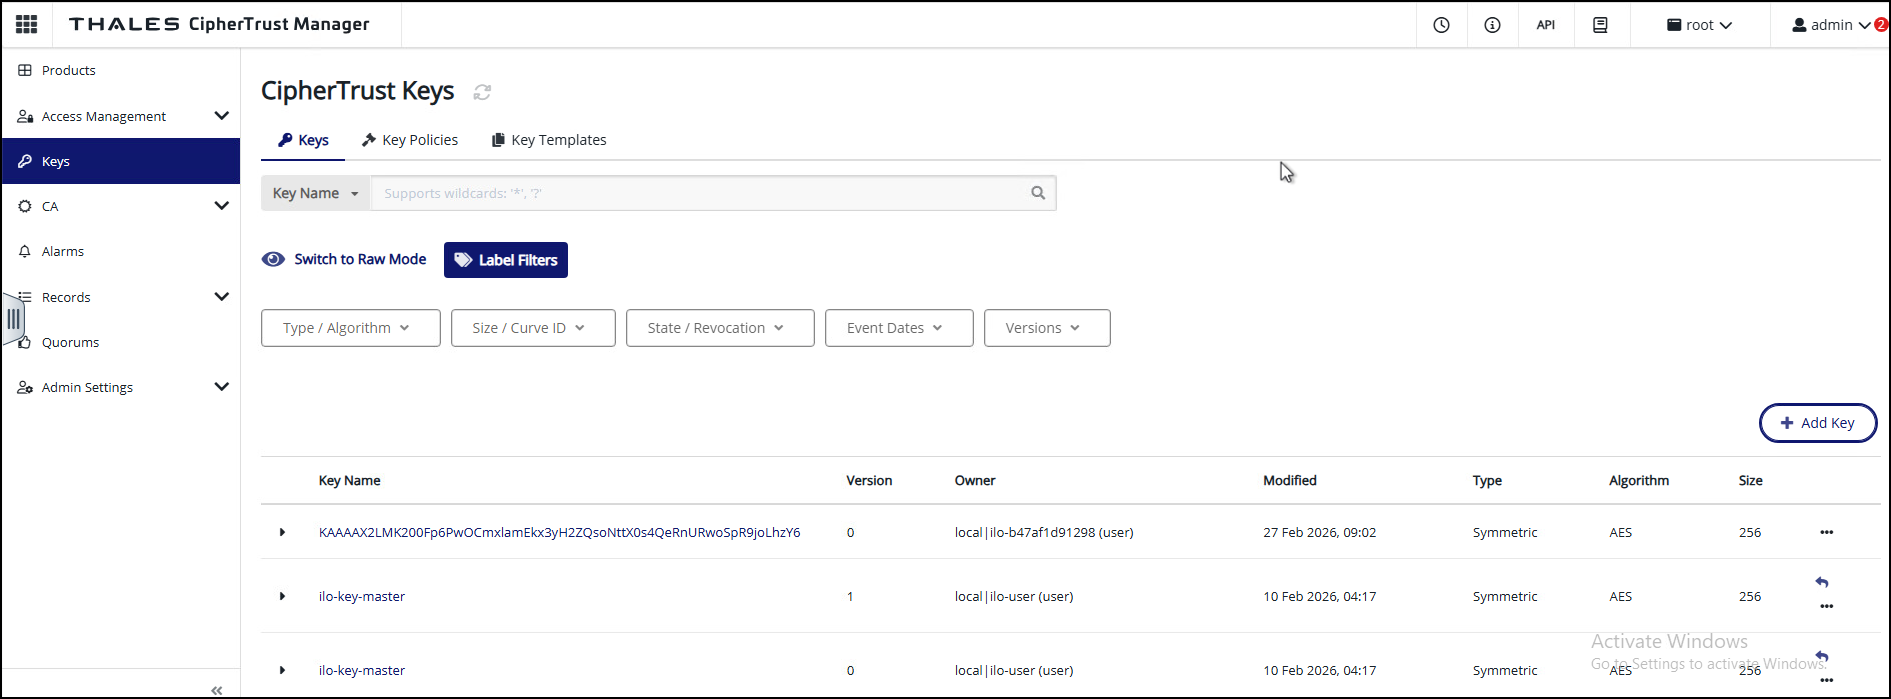
Click on Keys – This key was created prior to the demonstration and is named “iLO7-key-master”.
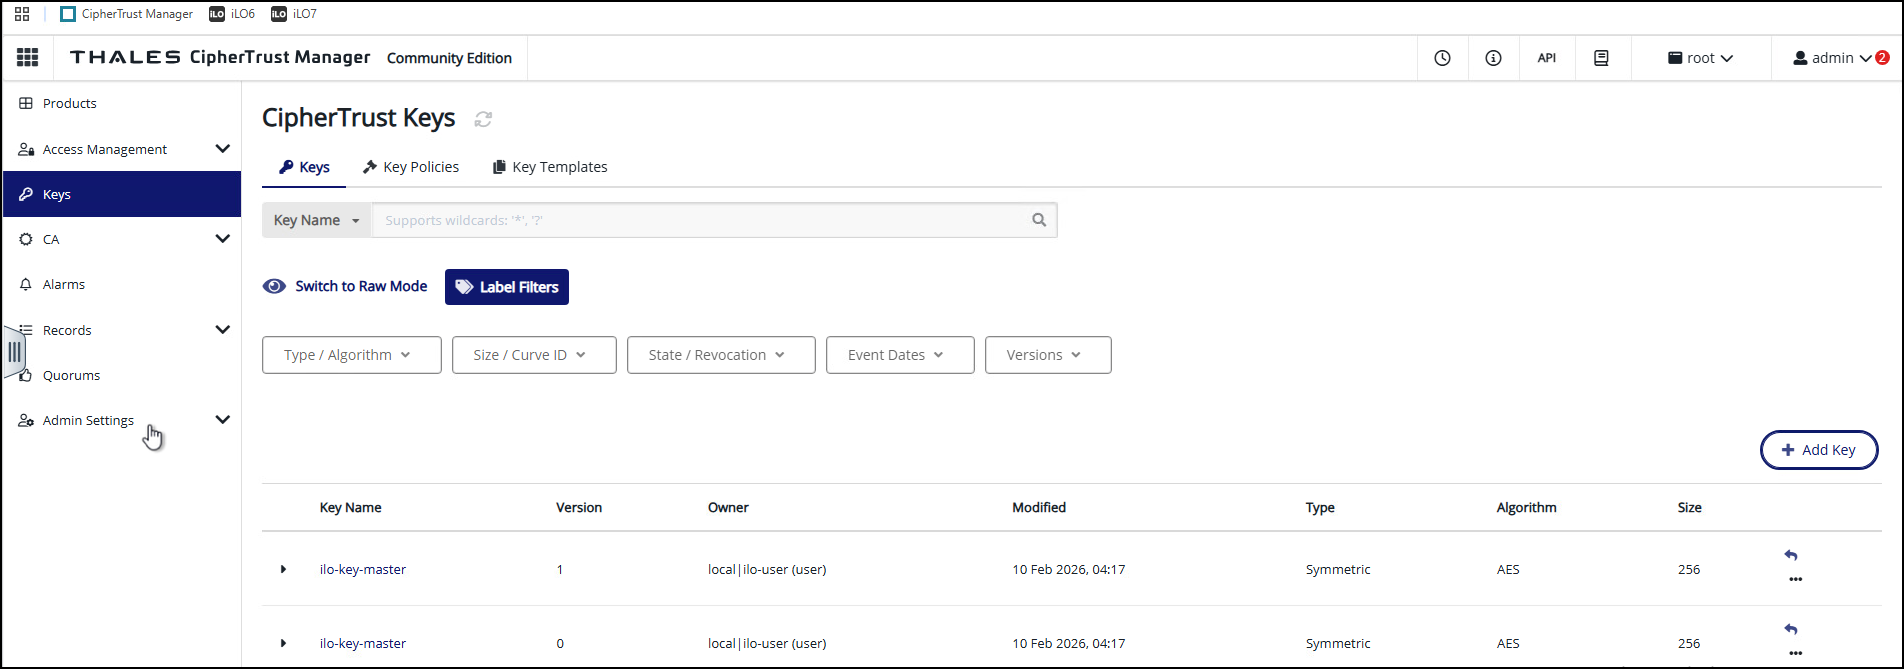
-
Click on the key itself to reveal the
IDField. This is what is needed by the iLO7 to connect to Thales.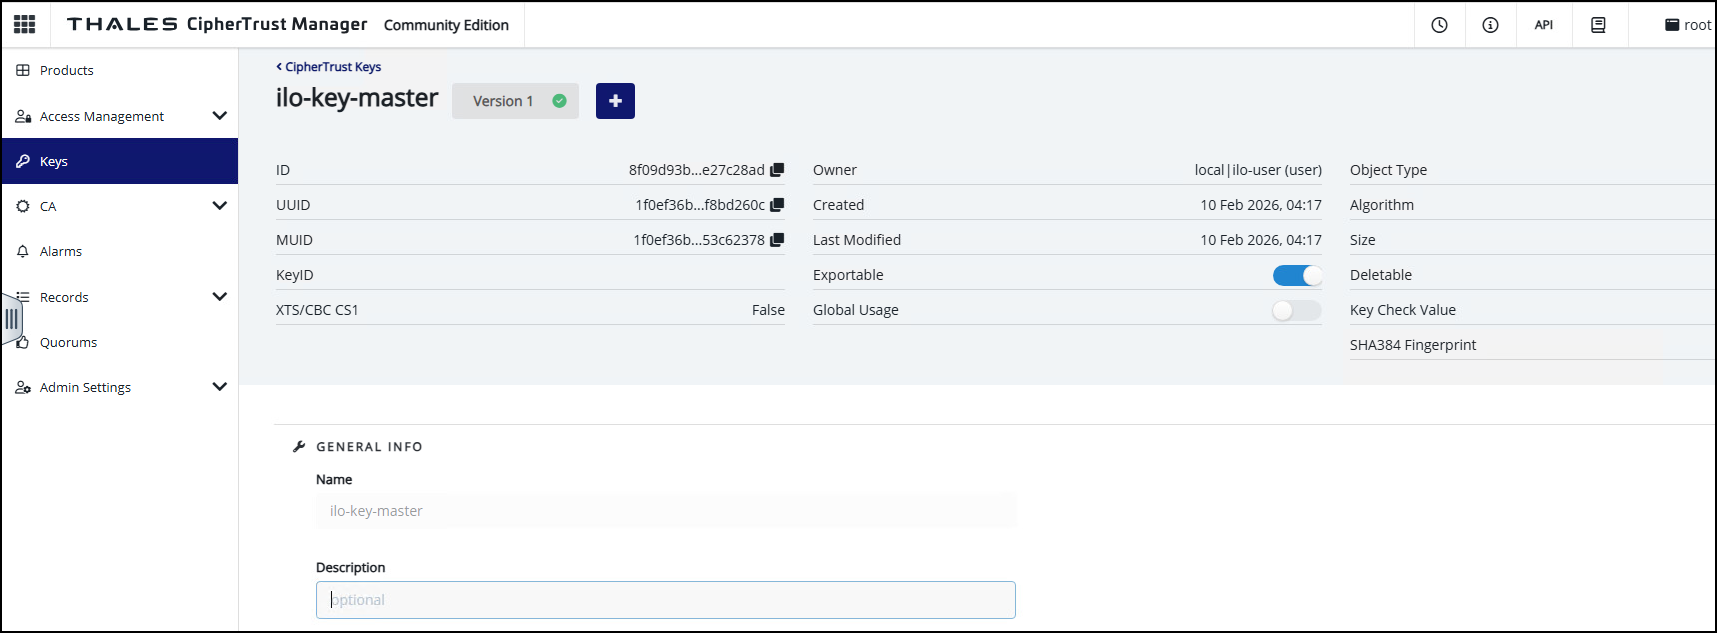
- Copy the
IDField into the clipboard. -
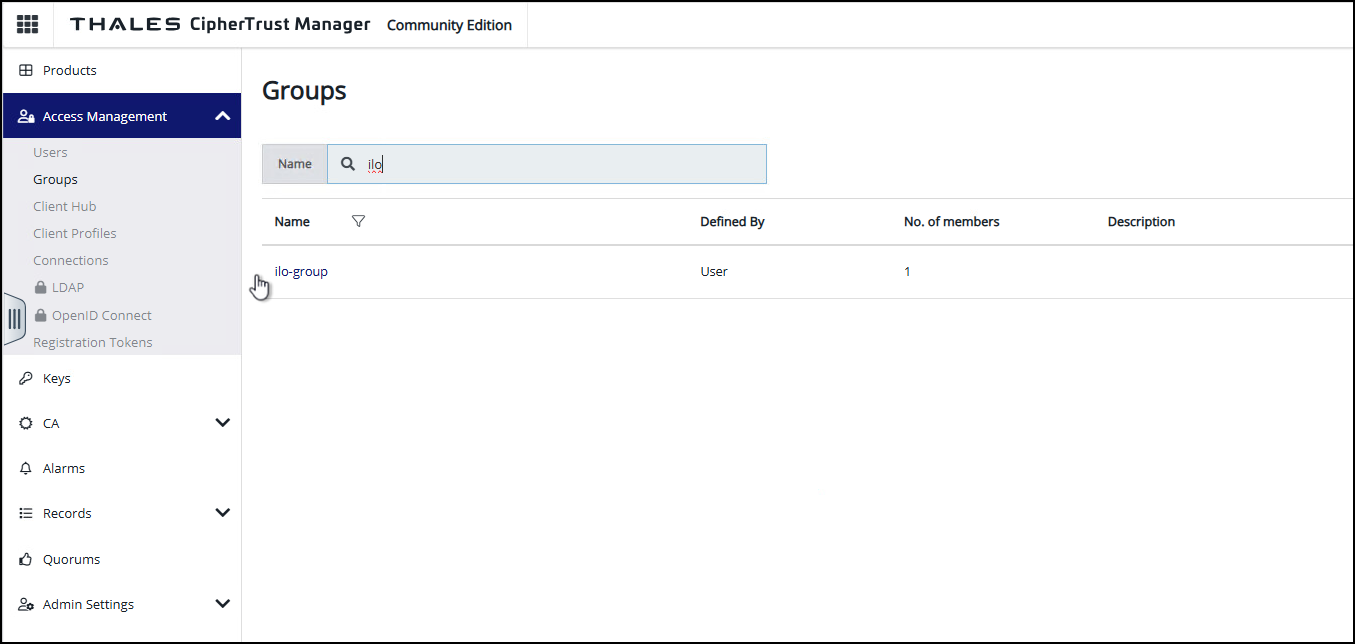
Optional – In Access Management, click on Groups and explain that the iLO7-user is in the group. You must search for “iLO” to find the group.
This Ends this Section.
HPE ProLiant Security Demo – Demonstration
Current state of iLO7 before adding it to the Thales CTM key manager
We will start by showing the participants the state of iLO7 before adding it to the Thales CTM key manager for control.
- Login to iLO7 at 192.168.115.11 – Administrator/HPent!123.
- From the Dashboard go to Security.
-
Go to Remote Key Manager card
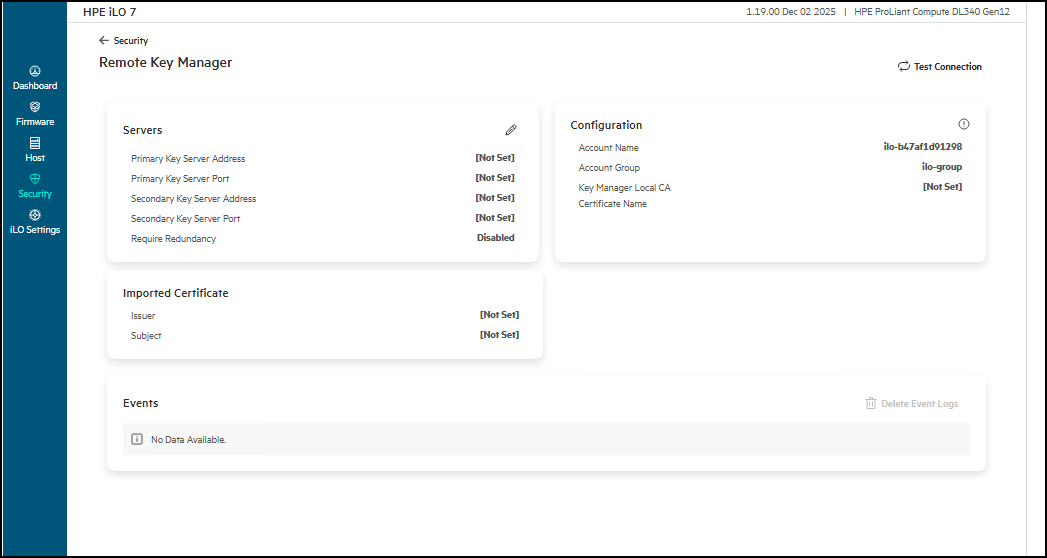
- Notice that the Servers entry is
Not Set. - Hover over the Configuration card.
- Point out the Account Name – This is derived from the MAC address of the iLO7.
- Show the iLO7 MAC address – iLO Settings -> iLO7 Network Ports -> iLO7 Dedicated Network Port to show the information for the connection.
- Return to Security -> Remote Key Manager.
This Ends this Section.
Show iLO7 encryption status of the various devices used in the Demo
- Login to iLO7 at 192.168.115.11 – Administrator/HPent!123
-
Go to Host -> Hardware -> Storage -> Storage Controllers and note that we have two controllers. The Encryption Mode for both is
Disabled.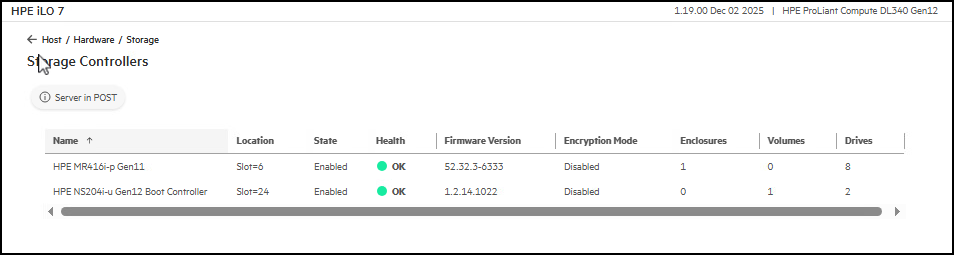
- Click on the HPE NS204i controller
- Click on the Logical Volume
-
Click on one of the 960GB physical drives. Point out the Encryption Ability and Status and that moving from
UnencryptedtoEncryptedneeds to be done before data is written to the drives for use. This is especially important for boot devices like the NS204i.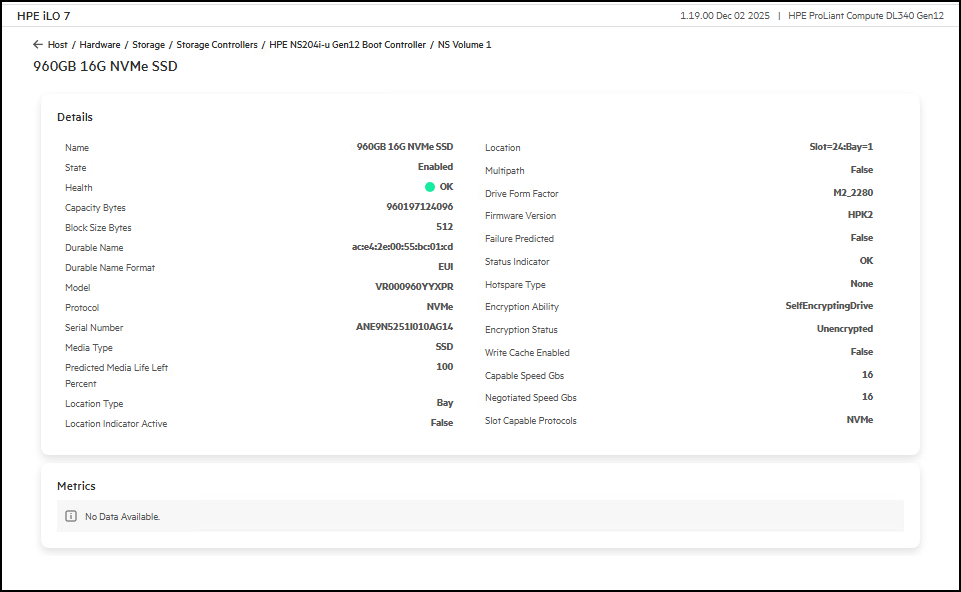
- Return to the Storage Controllers view and drill down on the HPE MR416i-p.
-
In the Details card click View More. Point out Encryption Mode as currently
Disabled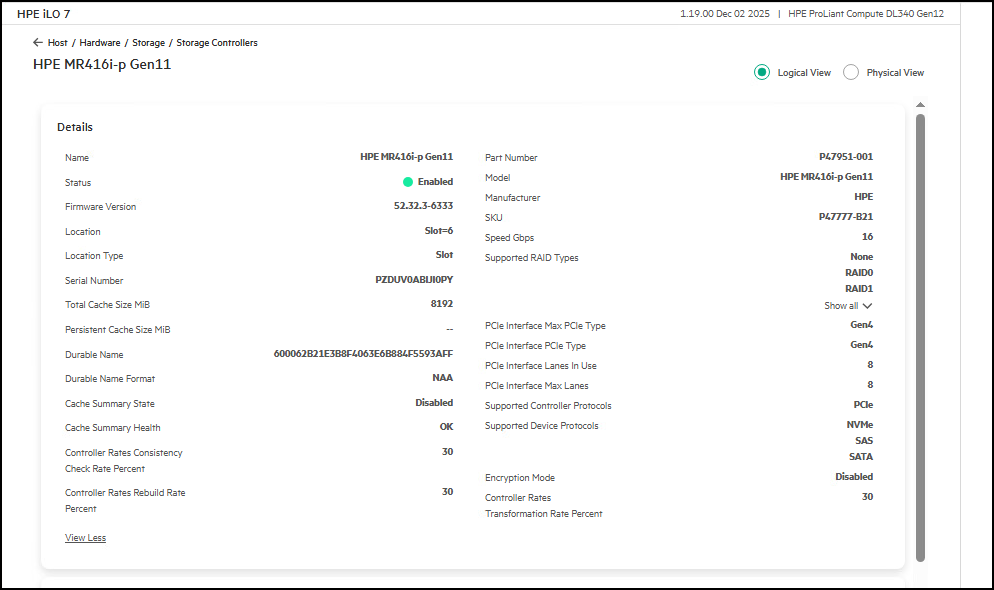
This Ends this Section.
Configure iLO7 to use Thales CTM
We will now connect our iLO7 to the Thales CTM. Follow the steps to enable this capability.
For the initial creation of this account, iLO7 uses a deployment user account that pre-exists on the key manager with administrator privileges. For more information about the deployment user account, see the key manager documentation in the HPE Compute Security Reference Guide
- Login to iLO7 at 192.168.115.11 – Administrator/HPent!123
- From the Dashboard go to Security
-
Go to Remote Key Manager card
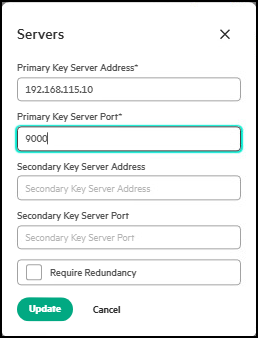
- Click in the Edit Servers Pencil icon.
- Input
192.168.115.10for Thales Server. - Use port
9000as Primary Key Server Port. -
Click Update to continue
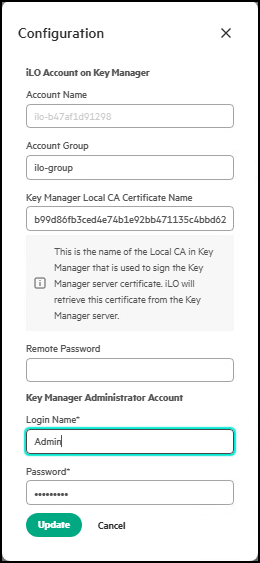
- Now click the Pencil icon to edit the Configuration card.
-
Enter the following values:
- Account Group: ilo-group
- Key Manager Local CA Certificate Name: The value is currently being held in the clipboard (Key ID Field)
- Login Name: Admin
- Password: HPent!123
Note: you cannot change the Account Name (the MAC address derived value)
-
Click Update.
- Click on the Test Connection link.
- Now, return to the Thales CTM.
-
Click on Users – Show that now three users currently exist. You should see the newly created user called “iLO” with the MAC address appended to “iLO”
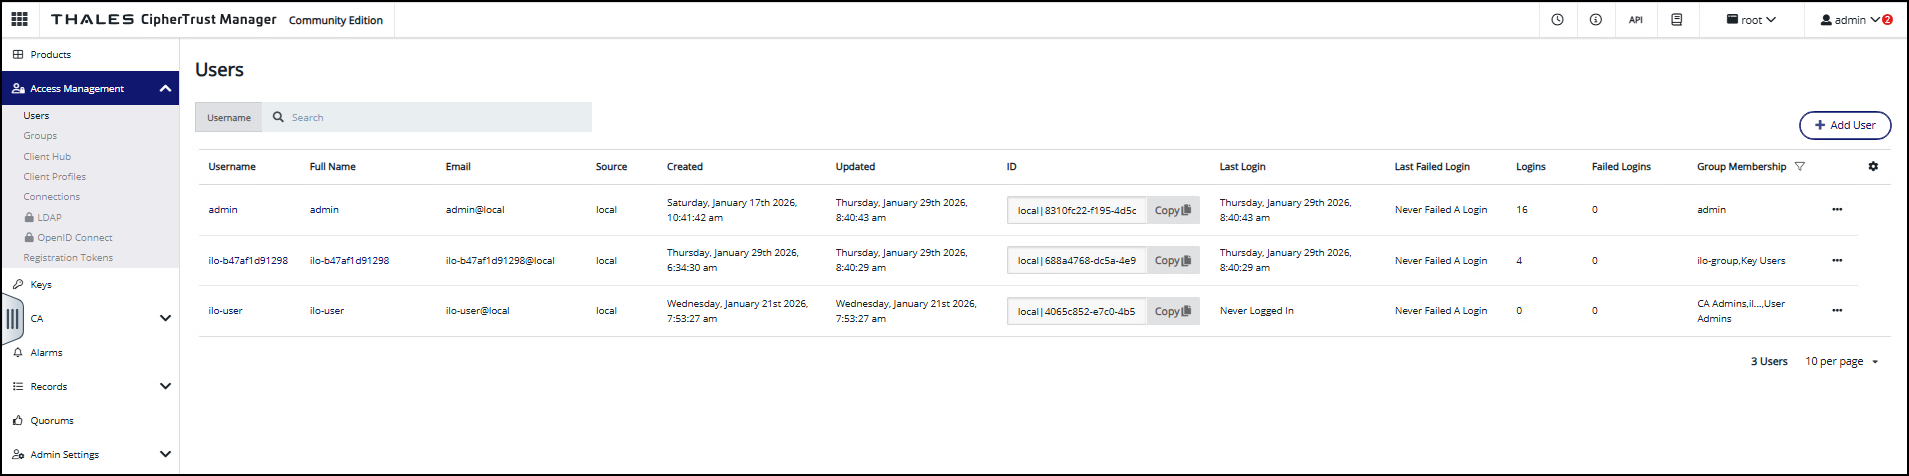
- The iLO7 is now set up to manage the key exchange between the key manager and the other devices in the computer. iLO7 uses a unique user account based on its MAC address to communicate with the key manager.
This Ends this Section.
Configure the MR Controller to request a key from the External Key Manager
We are now going to start using our newly connected external key manager. Follow the steps to get an installed harddrive controller to request an encryption key from the Thales CTM.
- Login to iLO7 at 192.168.115.11 – Administrator/HPent!123
- Open the iLO7 Remote Console
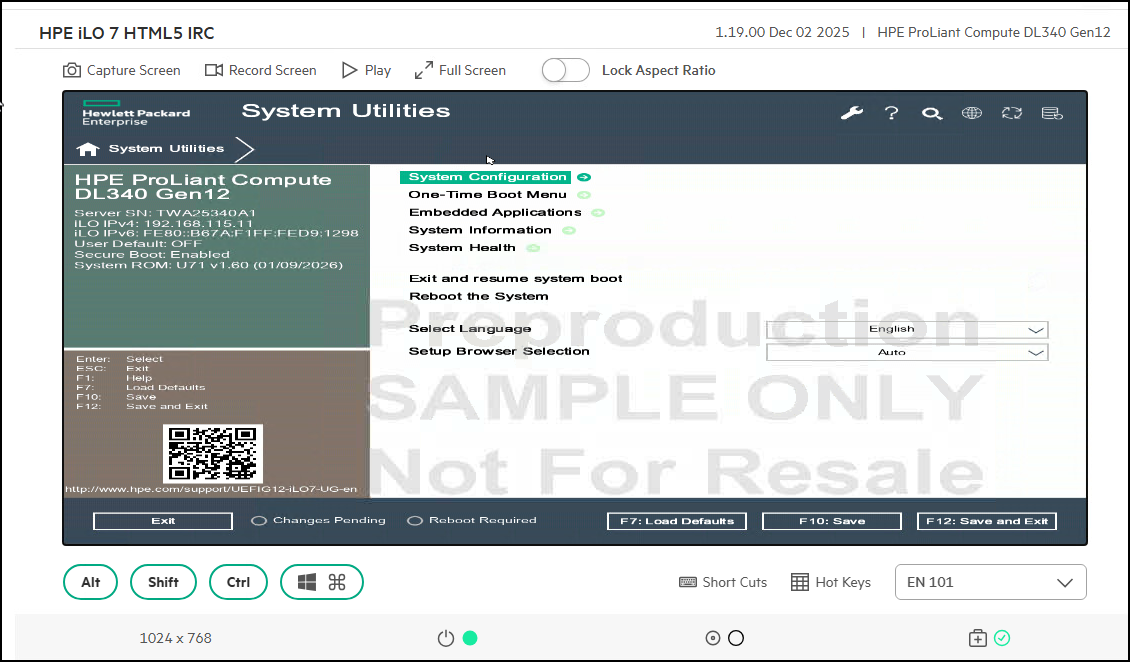
- The server should be on the UEFI System Configuration menu. If not, reboot the server and get to the UEFI prompt by clicking on
F9at the appropriate time during the computer’s boot cycle. -
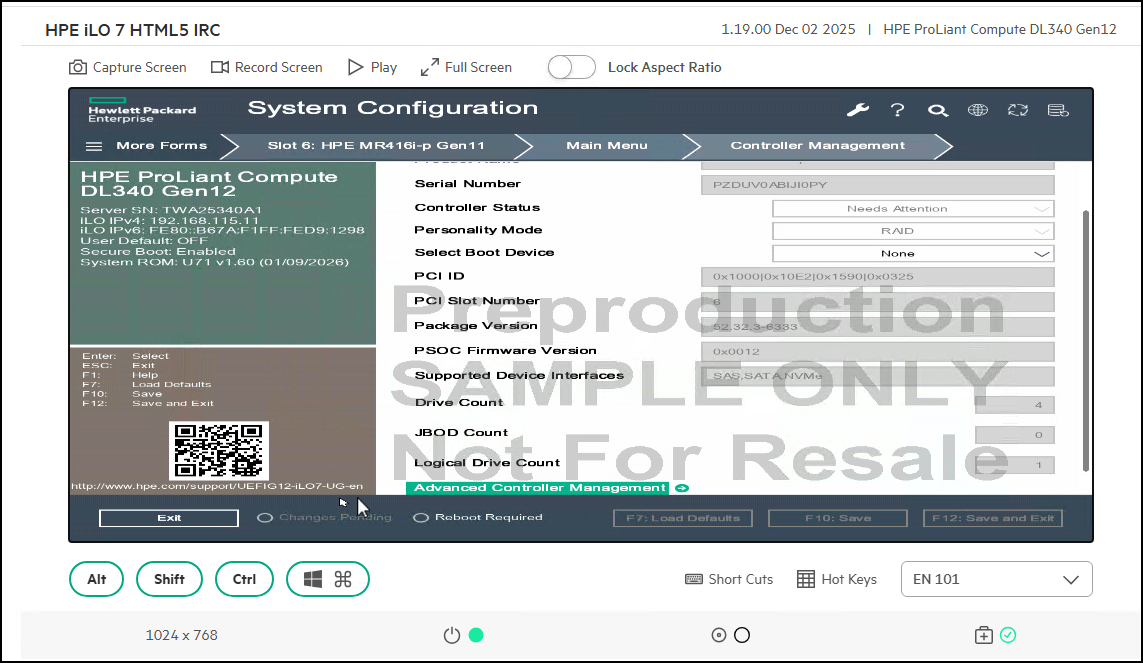
Click on System Configuration
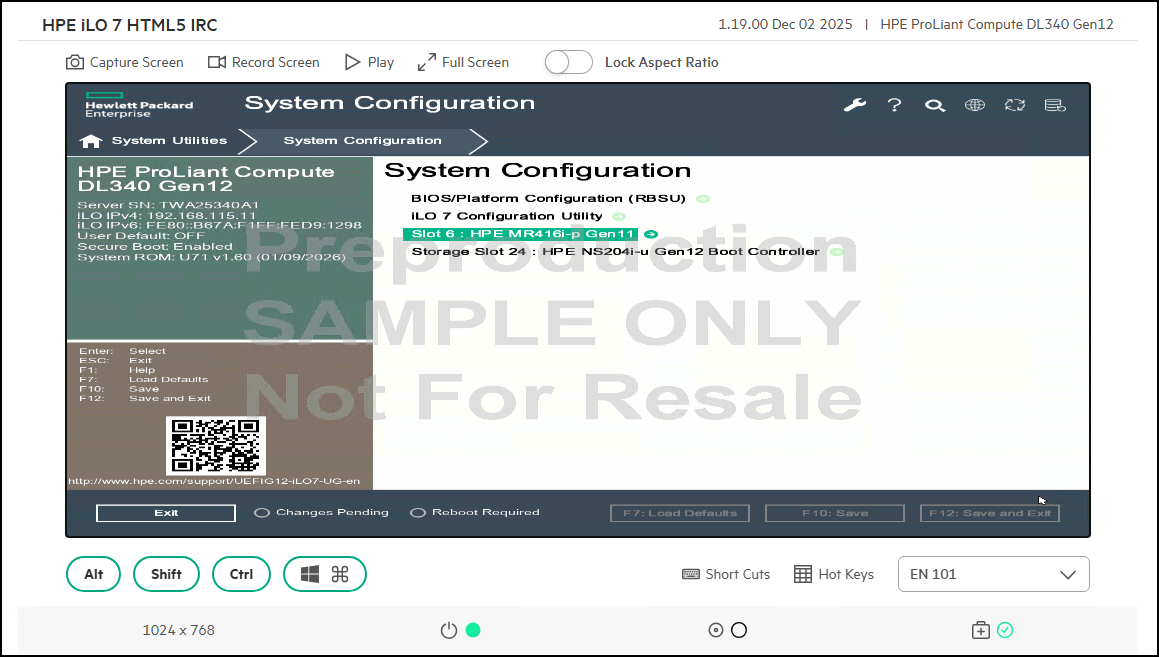
-
Click on Slot 6 HPE MR416i-p Gen11
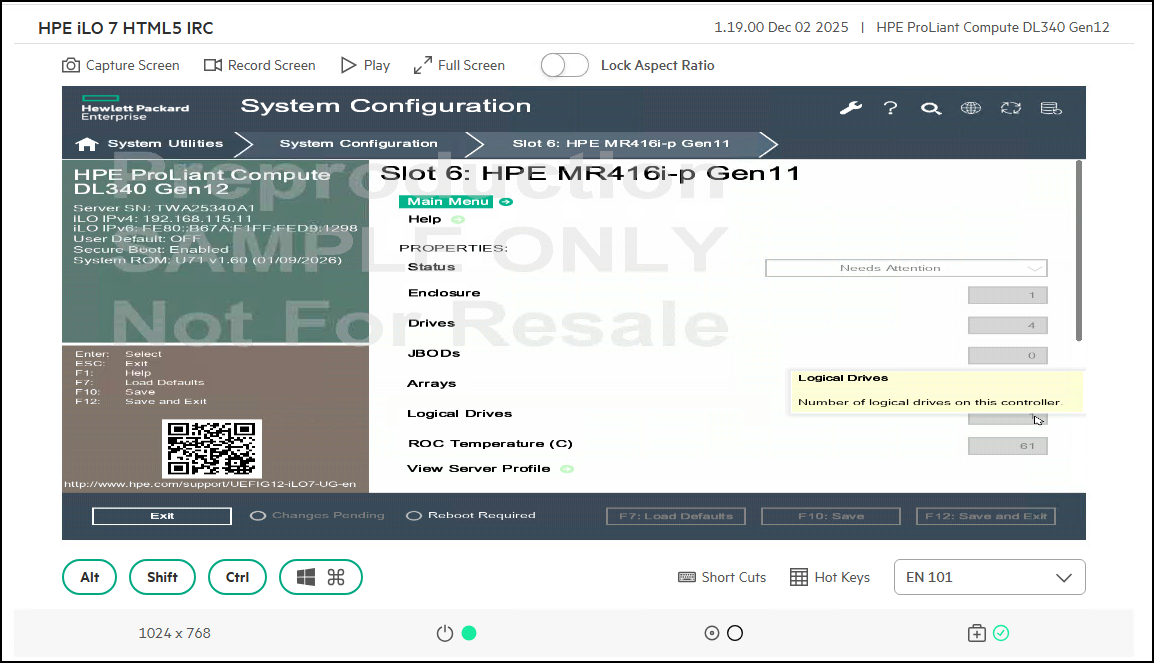
-
Click on Main Menu
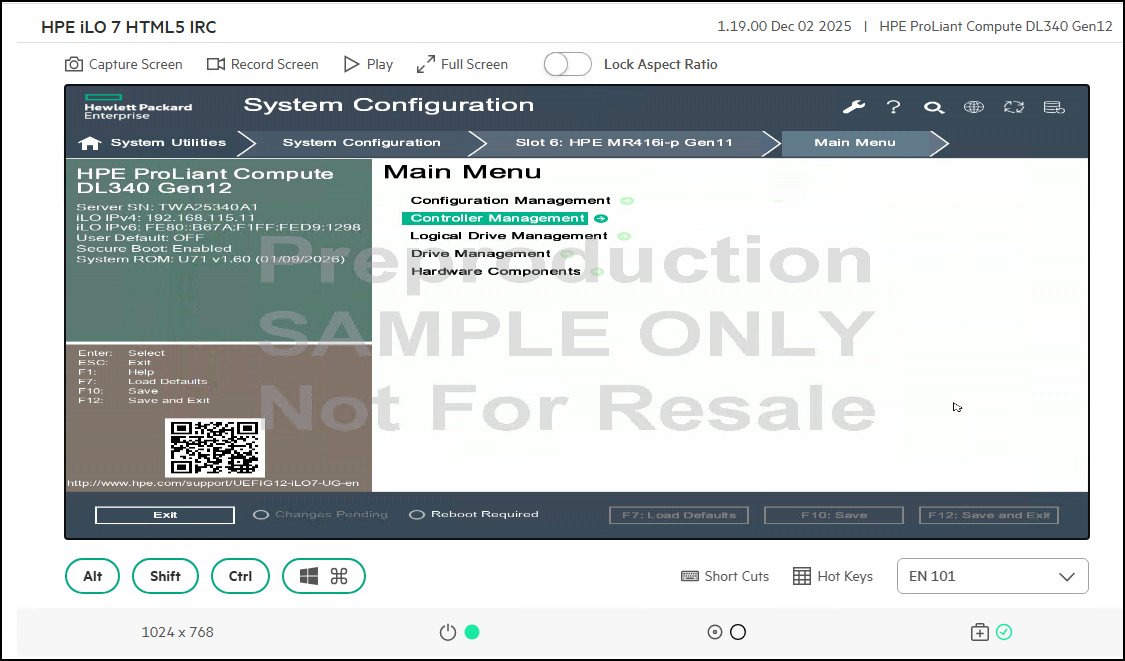
-
Move down the list and click Controller Management
-
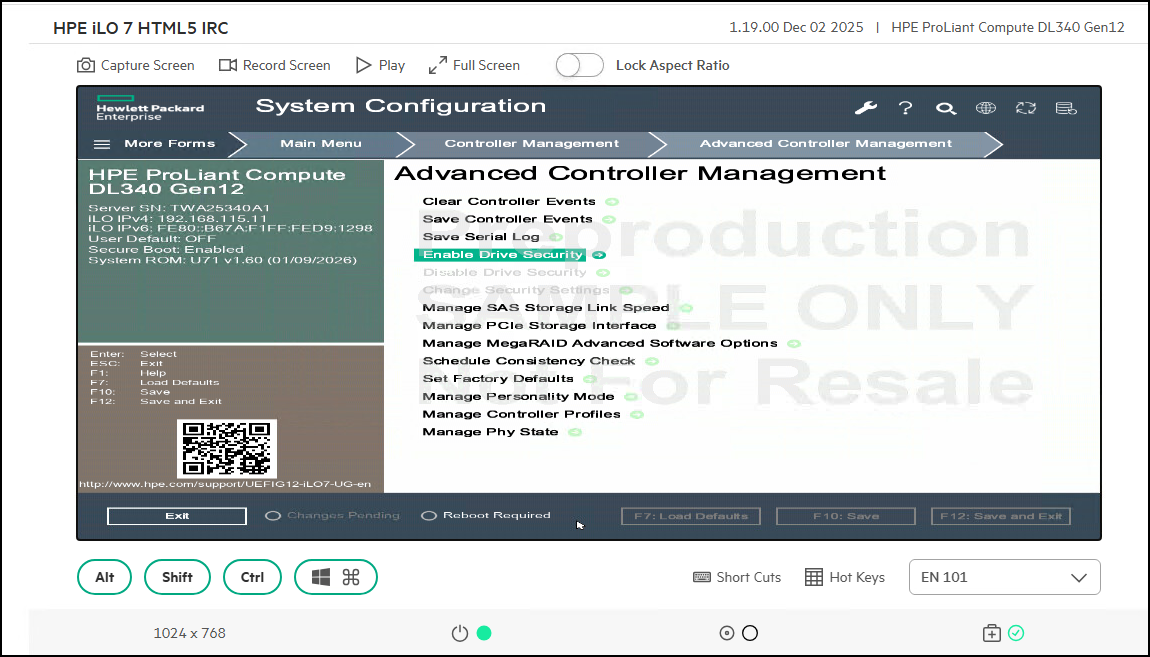
Move all the way to the bottom of the frame and click on Advanced Controller Management
-
Click on Enable Drive Security
- Choose the External Key Manager (EKM), which is the choice we want, and then click OK. These buttons need to be clicked so that other options become available. By clicking the selection
OnandOff, additional configuration can occur. -
At the Success banner, you are notified the system needs to restart for the changes to take effect. Click OK to continue

- Restart the server. Short Cuts ->
CTRL+ALT+DELThis can take some seconds, please be patient. - Return to System Configuration by selecting
F9for System Utilities at boot time. -
After the server reboots, return to the Thales server to see the key that was issued.
This Ends this Section.
Configure the SED Devices to Unlock Encryption via Postman
We will now configure the SED storage devices.
-
Return to the demonstration environment.
-
Open the Postman utility in your System Tray.
-
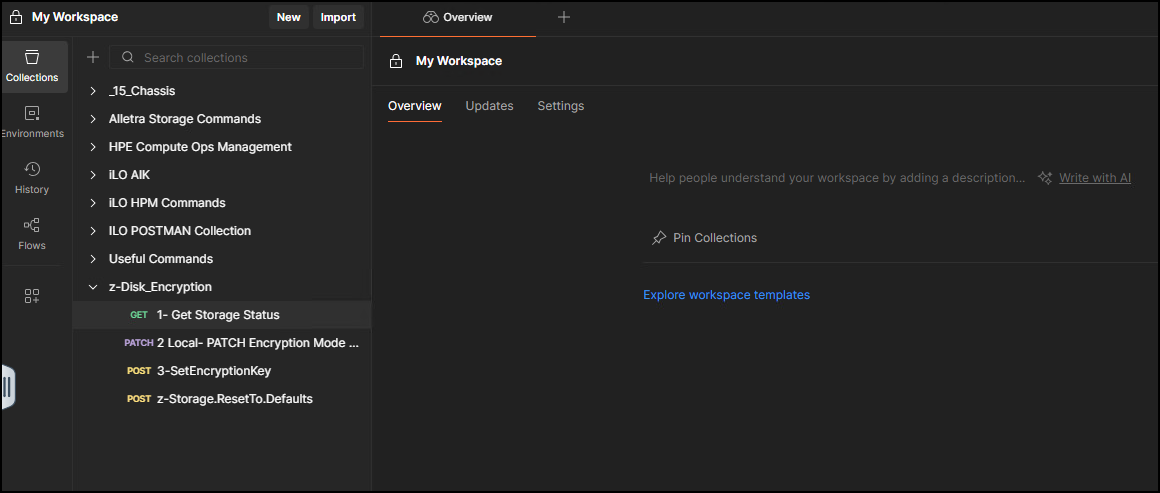
In the My Workspace area, locate the Z-Disk_Encryption section. These are the numbered scripts that will be used to change the SED status of our Storage devices connected to our NS204i-u boot controller.
-
Click on 1-Get Storage Status to get the status of the storage devices in question.
-
By clicking on the step, you load the script and are ready to then click Send to send the command to the devices.
-
After the command is received, the status of the command is returned. You are looking for
200 OKin the results area.
-
We will now take the second step, 2-Local- PATCH Encryption Mode UseLocalKey. Click on the script to make it active and then click Send. This changes the encryption to use a local key. You must reboot for changes to take effect.

-
Our next step, 3-SetEncryptionKey, sets the keys to be used. Select the step and again click Send to commit the changes. Look for
200 OKto know the steps worked.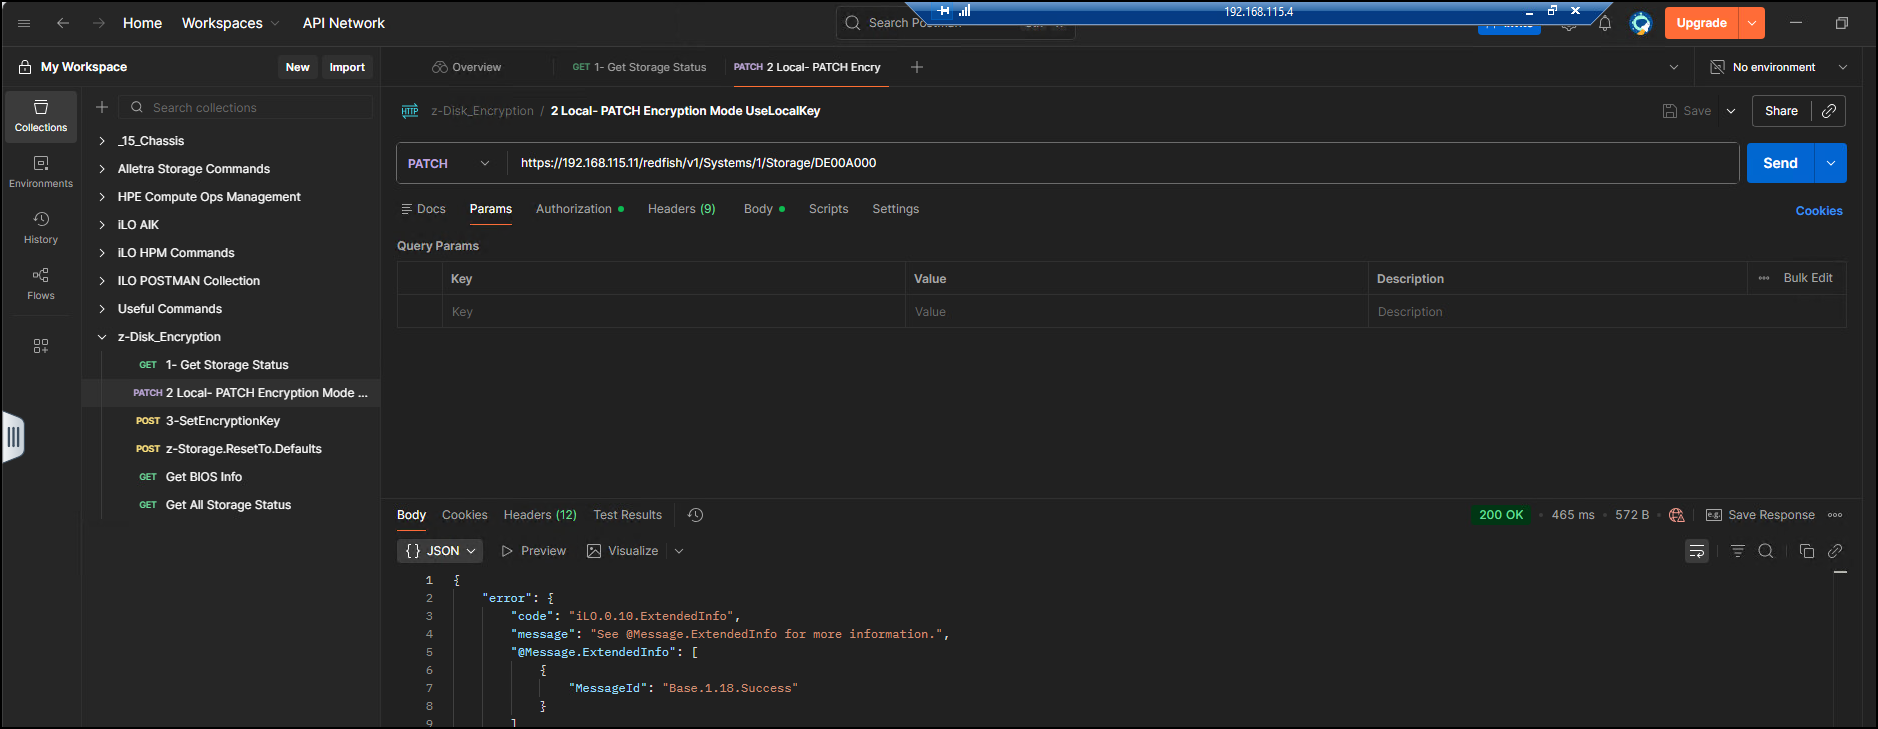
-
Now return to the iLO7 in the Gen12 system and reboot to the System Configuration utility.
-
Take a tour of the ILO to show that Encryption is now enabled. First, note that the Storage controller is now set to
UseLocalKey.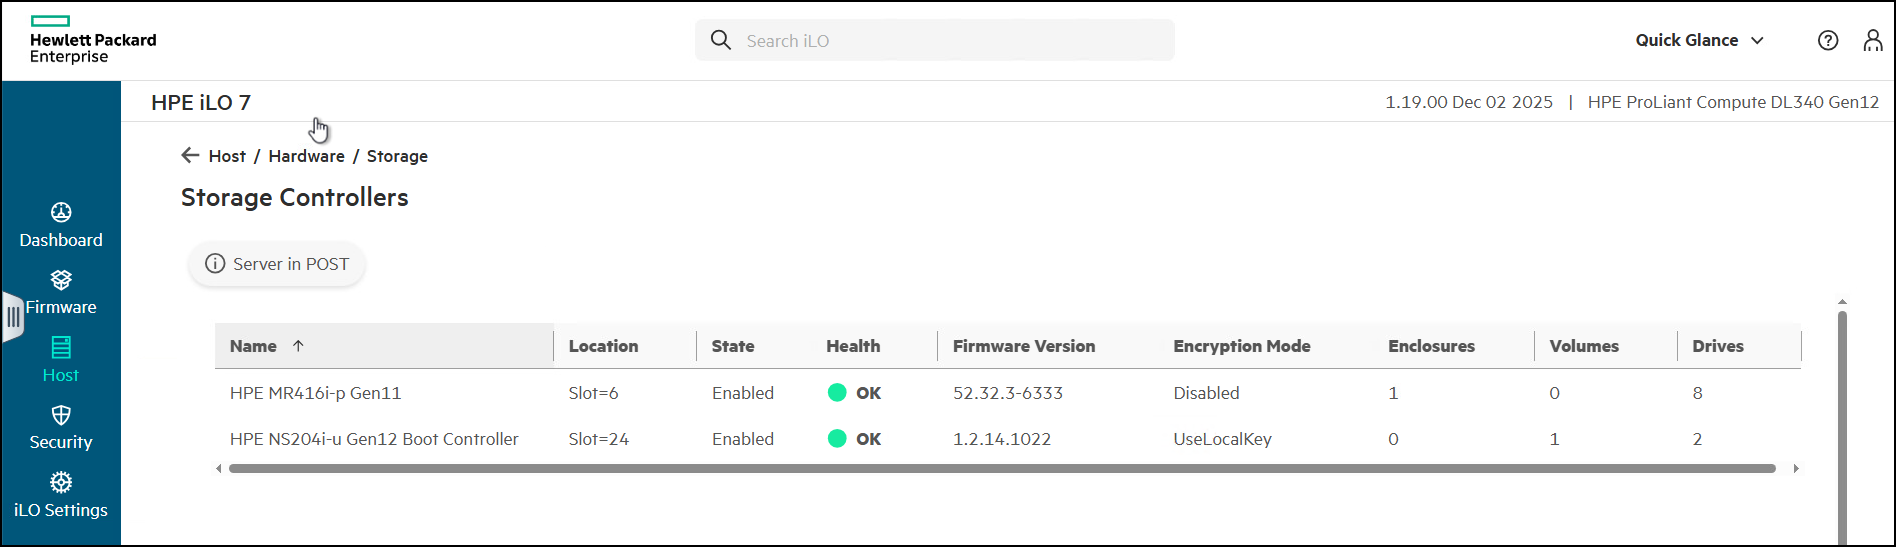
-
Click on the controller and then when you “View More” of the information for the NS204i-u, the Logical Volume has the Encrypted value set to
True.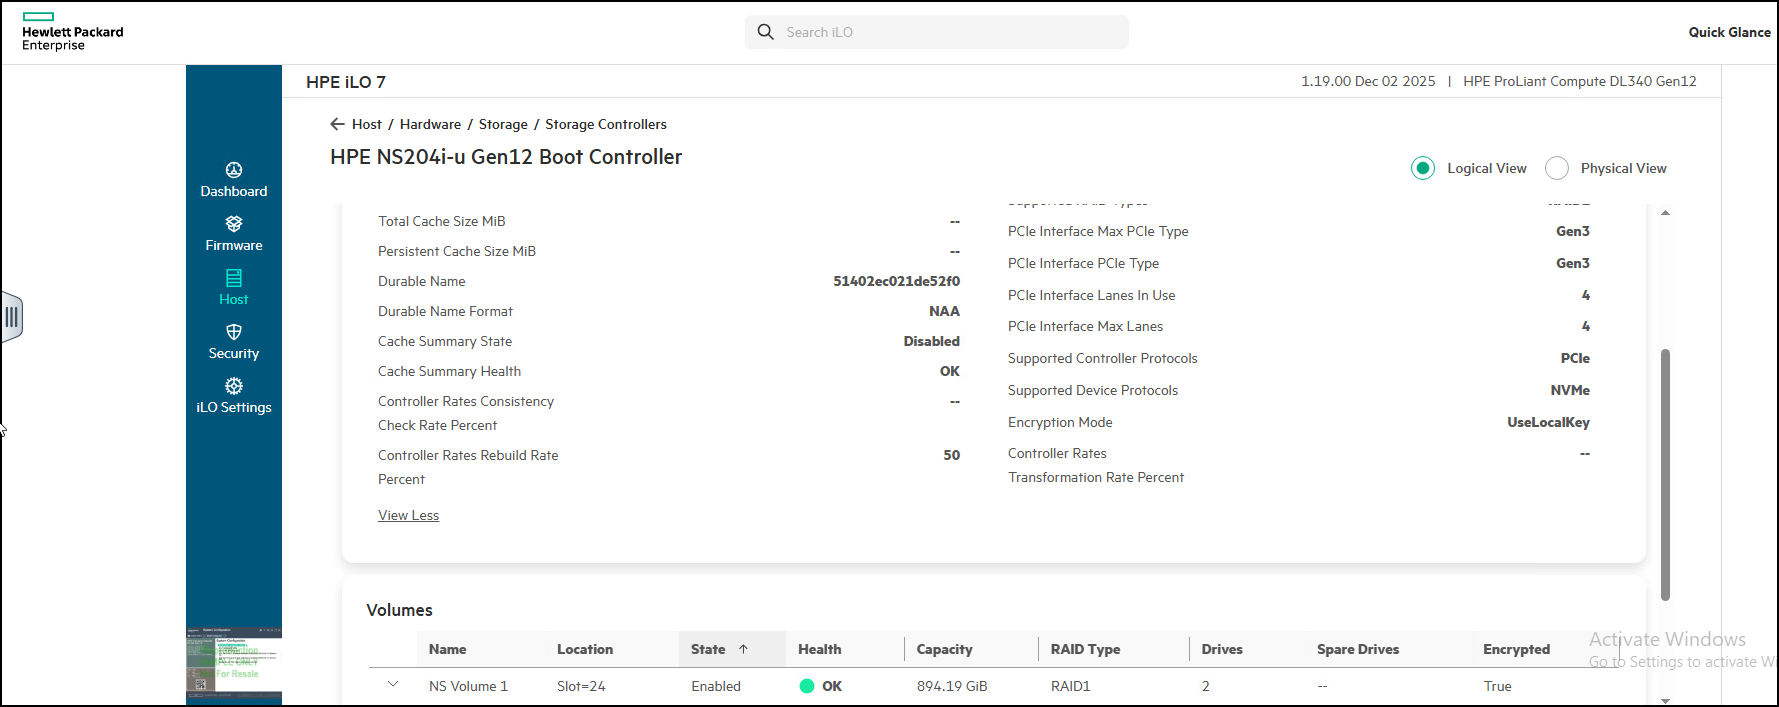
-
When you drill down on the logical volume, you see that for each device the Encryption Status is
Unlocked.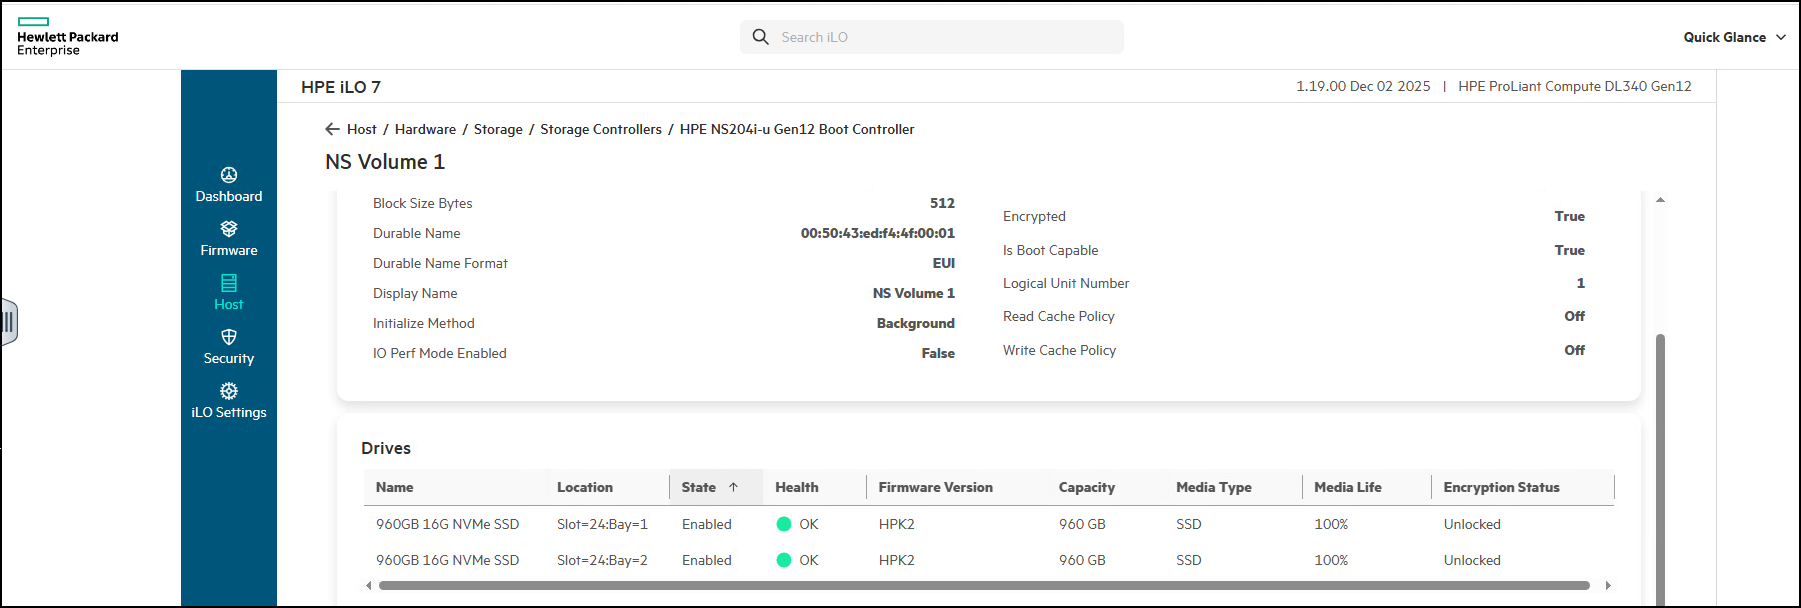
- At this point you have completed the demonstration.
This Ends this Section.
Resetting the security demonstration environment
Hopefully throughout this document we stressed the “before” and “after” nature needed to effectively show this demonstration.
The way you delete the iLO7 from the Thales server is basically the reverse of the steps you took to add the Thales server to iLO7. Go to Security -> Remote Key Manager and then remove the entries we had you add.
-
From the Dashboard go to Security.
-
Go to Remote Key Manager card
-
Edit the Servers card and remove the IP address and the Port information.
-
Edit the Configuration card. Remove the information about the Thales solution.
-
For the MR416i-p harddrive controller, you return to the System Configuration -> Click on the Controller -> Main Menu -> Controller Management -> Advanced Controller Management and then disable drive security. Basically, reversing the steps you took to enable security.
-
Finally, for the 960GB SED devices connected to the NS204i-u controller, from your Postman console, run the final command z-Storage.ResetTo.Defaults, make sure you click Send. This time you should get a
202 Acceptedmessage.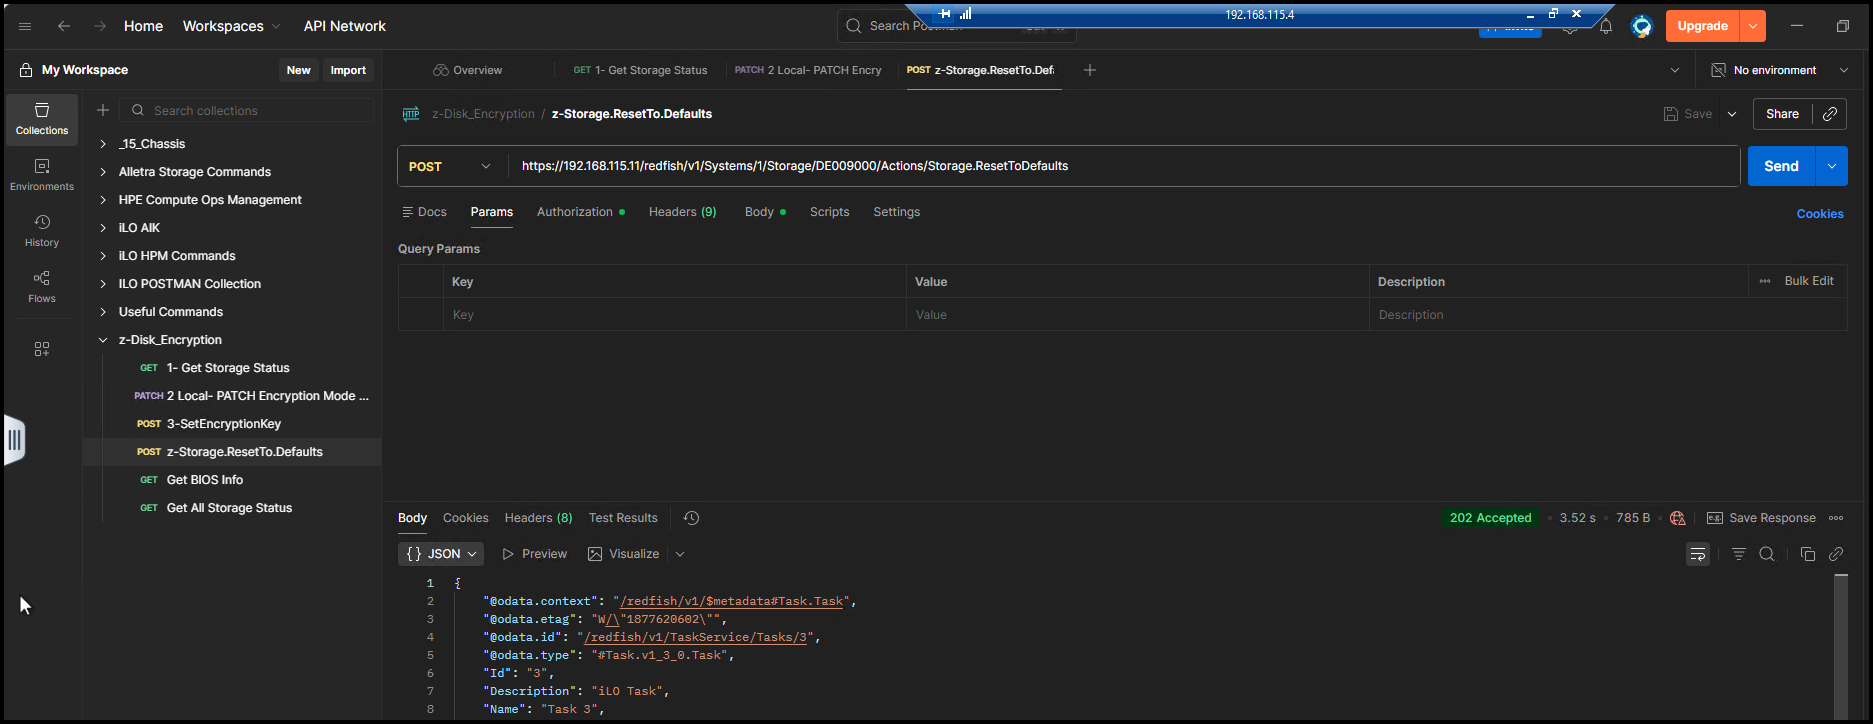
- In all these cases, changes are not made until you reboot the server.
This Ends this Section.
Summary of what was shown
You performed the following basic steps:
-
You showed the environment before any of the encryption elements were implemented
-
You connected the iLO7 to the Thales CTM
-
You configured a MR416i-p to use an external key manager with a UEFI utility
-
You configured an NS204i-p to a UseLocalKey configuration
-
You unlocked SED enabled NVMe storage devices
-
You restored the environment for the next user
This Ends this Section.
Want more?
🔔 To learn more, see the HPE Compute Security Reference Guide