Use GitHub Copilot to help with your infrastructure automation with COM
Jump to:
- Introduction
- HPE Compute Ops Management PowerShell Library
- Connecting to the Lab
- Task 1 - Getting familiar with Visual Studio Code
- Task 2 - Your first prompt
- Task 3 - Create a workspace
- Task 4 - Onboarding devices
- Task 5 - Configuration of Compute Ops Management
- Task 6 - Review the script
- Task 7 - Execute the script
- Summary
Hands-On Lab Guide
Experience the power of AI and get code written for you by GitHub Copilot, providing just plain English prompts, using a PowerShell library for Compute Ops Management.
Introduction
Welcome to this Hands-On Lab (HOL). For the next two hours you will complete a self-paced lab using HPE ProLiant DL-series servers, HPE GreenLake Compute Ops Management, and GitHub Copilot AI.
Lab Objectives
Get GitHub Copilot to write PowerShell code for you, even if you don’t know much about PowerShell, using a library that wraps the APIs provided by the GreenLake Platform and Compute Ops Management (COM). This can help you add automation to server management at scale. Automation is crucial for server management in datacenters because it reduces manual effort, minimizes errors, and ensures consistent, reliable operations. Automated processes speed up routine tasks like provisioning, monitoring, and updating servers, which improves efficiency and scalability while lowering operational costs. This allows IT teams to focus on strategic work and helps maintain high availability and security across the infrastructure.
Team Assignments
This lab has 25 stations. Each station will have its own HPE DL-series server to be onboarded into COM. You will be working in a Virtual Machine using Visual Studio Code with GitHub Copilot integration.
Your team assignments will be on a separate sheet of paper issued to you by your lab proctor. Please return the team assignment sheet to your proctor when finished with this lab.
Virtual Lab Environment
Upon access to the lab, you will be presented with a Windows desktop.
Each team will have the following physical and virtual infrastructure:
-
Windows virtual machine with Visual Studio Code
-
One ProLiant DL-series server
HPE Compute Ops Management PowerShell Library
This library offers a robust set of cmdlets (PowerShell functions) designed to manage and automate your HPE GreenLake environment efficiently. By leveraging this library, users can seamlessly interact with HPE GreenLake and Compute Ops Management services directly from the PowerShell command line, integrating effortlessly into existing automation workflows.
This module is available in the PowerShell Gallery under the name HPECOMCmdlets, following the naming convention used by most HPE modules.
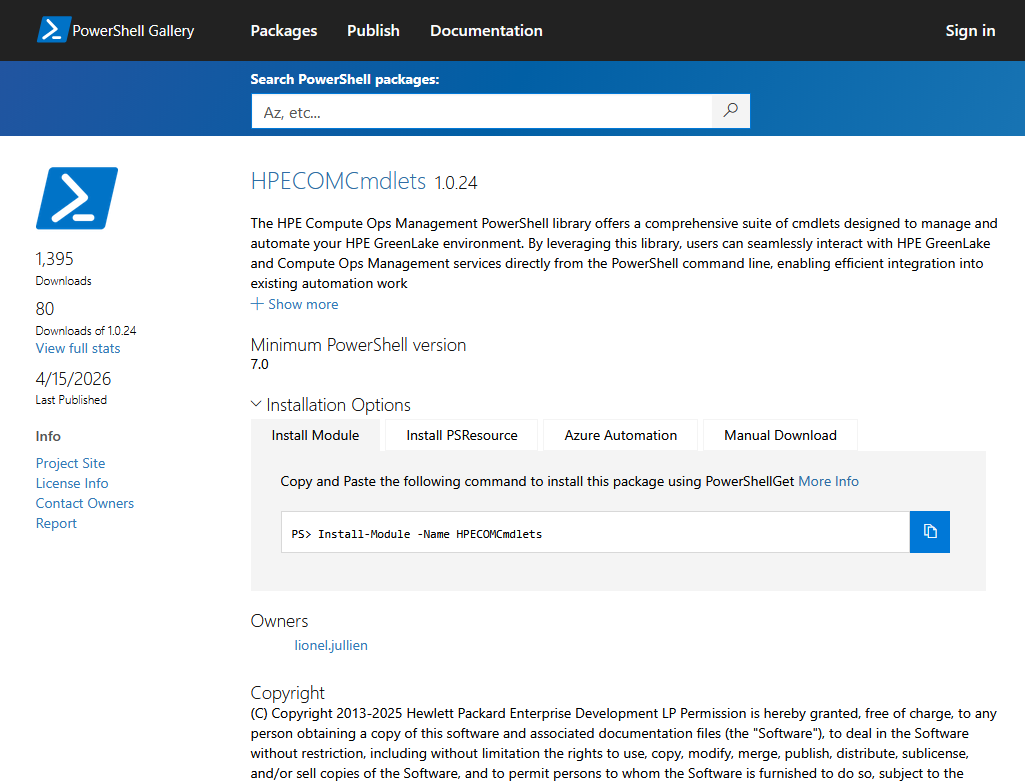
The PowerShell Gallery is a repository for sharing and distributing
PowerShell modules and scripts. It’s a community-driven platform that
provides access to various PowerShell resources, enabling you to easily
discover, install, and publish your own PowerShell content. The
PowerShell Gallery can be accessed through the PowerShellGet module
(includes Install-Module, Find-Module, etc.), which comes
pre-installed with Windows PowerShell 5.0 and above.
This project is also associated with a public GitHub repository from our community contributor, Lionel Jullien from HPE. This repository is where the source code is developed. You can also track releases, report and view issues, and participate in discussions.
This library provides a variety of key features for managing HPE GreenLake and Compute Ops Management. Here are the main features:
-
Authentication: Connect to HPE GreenLake using single-factor or multifactor authentication with or without an existing workspace.
-
Workspace Management: Create and manage HPE GreenLake workspaces.
-
Session Tracking: Automatically track sessions with the global session tracker $HPEGreenLakeSession.
-
User Management: Invite and manage users within your HPE GreenLake environment, assign roles.
-
Resource Management: Manage resources such as servers, storage, and networking within your HPE GreenLake environment.
-
Service Provisioning: Provision services like Compute Ops Management, manage service roles and subscriptions.
-
Device Management: Add devices individually or in bulk using CSV files, manage device subscriptions and auto-subscriptions, set device locations and connect devices to services.
-
Server configuration Management: Create and apply BIOS, storage, OS, and firmware settings. Manager group and apply configurations to groups of servers.
-
Security and Compliance: Manage iLO security settings and run inventory and compliance checks.
-
Job Scheduling and Execution: Schedule and execute various tasks like firmware updates, OS installations, and sustainability reports.
-
Notification and Integration: Enable email notifications for service events and summaries, integrate with external services like ServiceNow.
-
Appliance Management: Add HPE OneView and Secure Gateway appliances, upgrade HPE OneView appliances.
-
Monitoring and Alerts: Monitor alerts for your resources to ensure optimal performance and uptime.
-
Reporting: Generate detailed reports on resource usage, performance, and other metrics.
-
Automation: Automate repetitive tasks and workflows using PowerShell scripts and cmdlets.
-
Integration: Seamlessly integrate with other tools and platforms using REST APIs and webhooks.
-
Security: Implement security best practices and manage access control for your HPE GreenLake environment.
These features collectively provide a comprehensive set of cmdlets to manage various aspects of your HPE GreenLake environment and any existing Compute Ops Management service instances.
Connecting to the Lab
One of the HPE HOL instructors will be happy to assist with getting you setup for this lab.
-
Open a Chrome or similar HTML5 capable browser and navigate to: https://labs.compute.cloud.hpe.com/
-
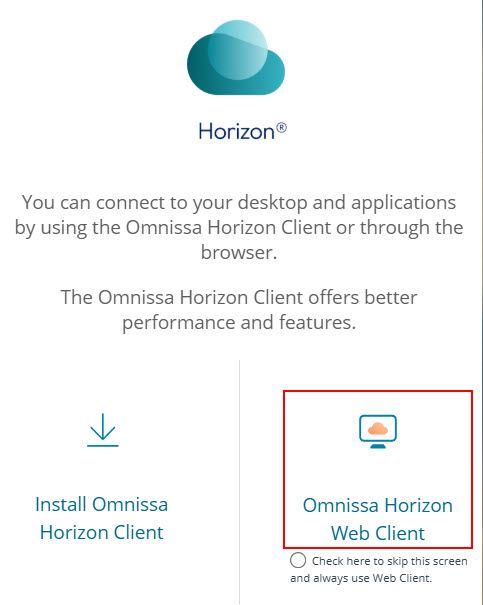
Choose Omnissa Horizon Web Client:
-
Login with your provided credentials from the team assignment sheet.
-
Click the GitHub Copilot icon.
-
At the warning message “You need to grant microphone and camera permission to use RTAV”, click OK.
-
At the Fullscreen message: “Click OK to grant permission for full screen”, you can click OK or not, based on your preference and the display setup in front of you, and you can click on Allow at the message “labs.compute.cloud.hpe.com wants to manage windows on all your displays”.
-
After a few moments, a Horizon-Published Windows desktop will appear.
Task 1 - Getting familiar with Visual Studio Code
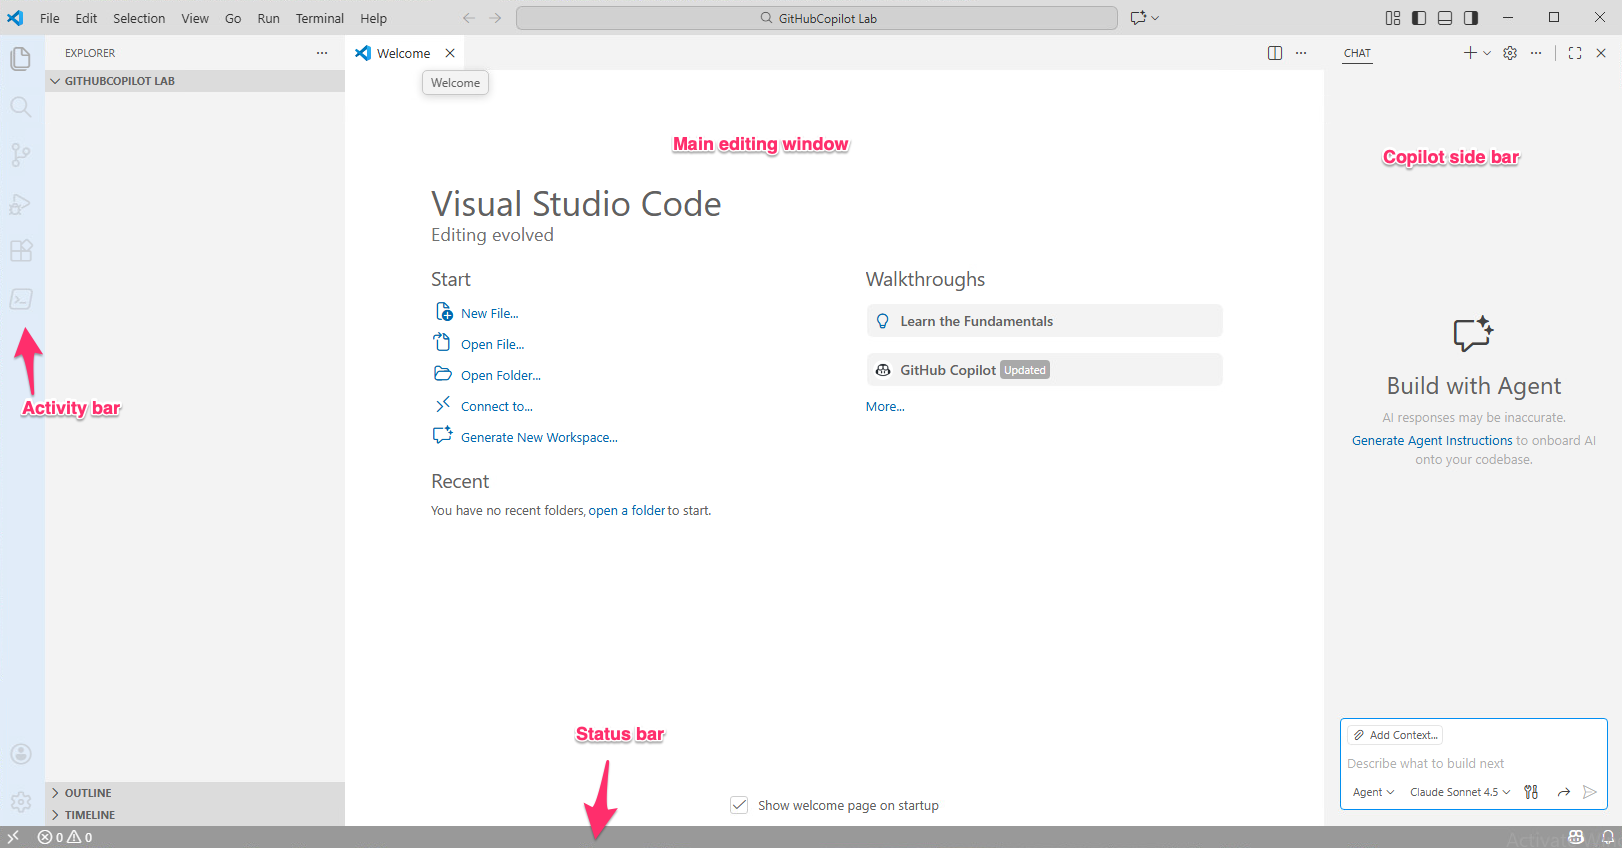
Visual Studio Code (VS Code) is a free, open-source code editor developed by Microsoft. It is widely used for writing, editing, and debugging code in many programming languages. VS Code offers features like syntax highlighting, intelligent code completion, integrated terminal, version control, and a rich ecosystem of extensions. It is available for all major operating systems, Windows, MacOS and Linux.
-
To start VS Code, click its icon in the taskbar:

-
This is what the window should look like:
-
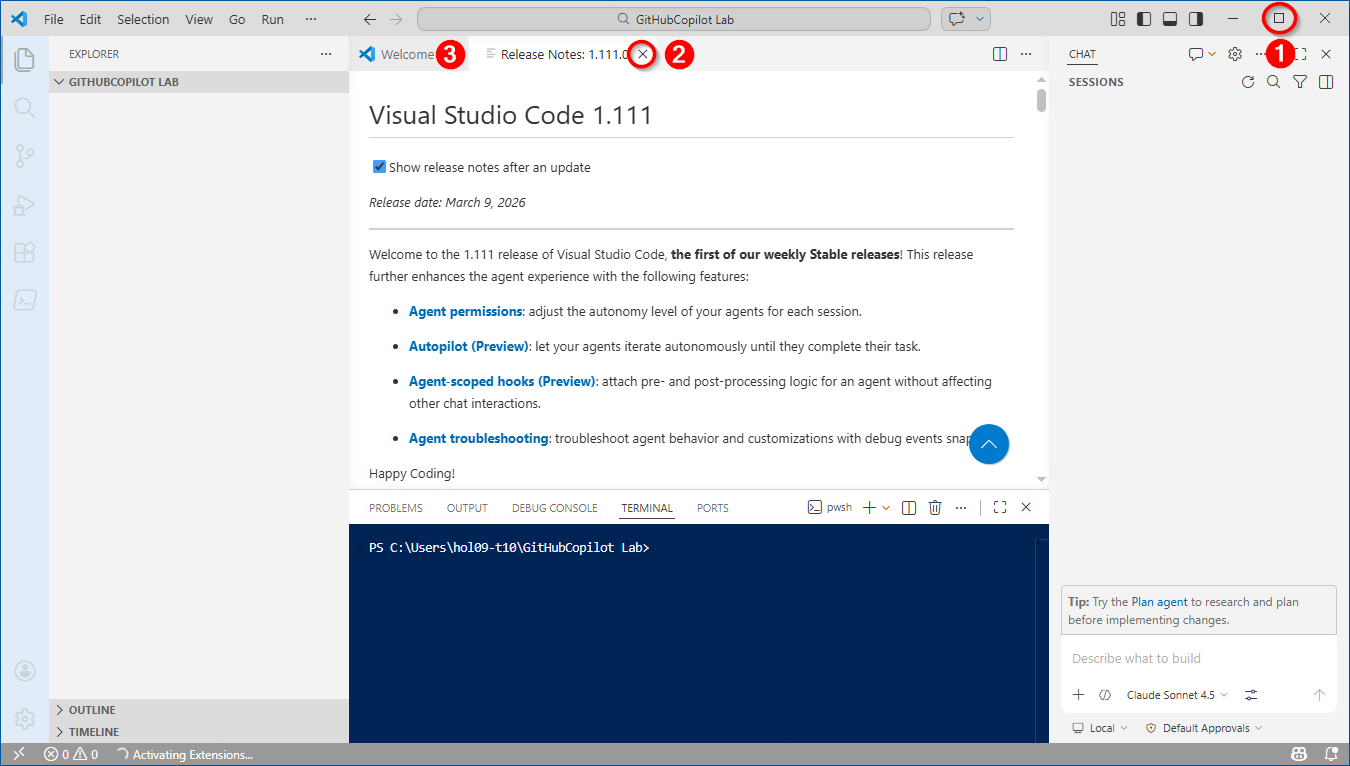
You can start by expanding the window ❶, closing the Release Notes ❷ and Welcome pages ❸:
-
Most of your work will be to type or paste text in the Copilot prompt field at the bottom right:
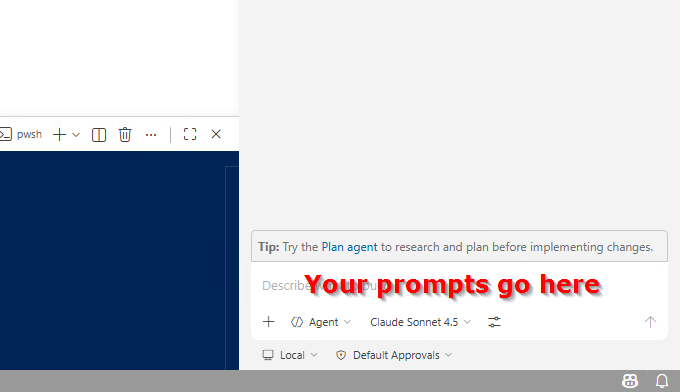
💡 Tip:
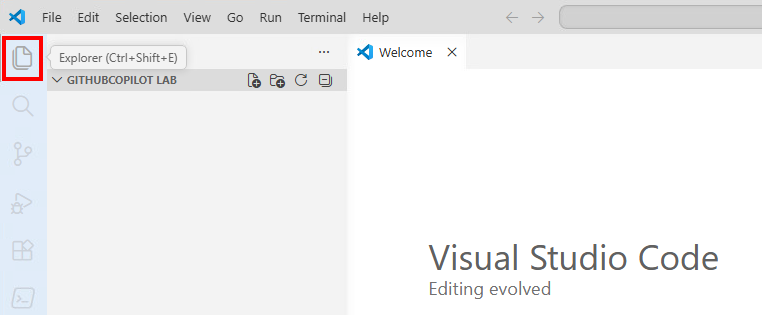
You can drag the edge of the Copilot pane to make it wider for a more comfortable view. You can also free up more horizontal space by collapsing the Explorer panel — click the Explorer icon in the Activity bar to toggle it:
-
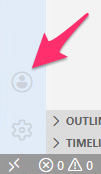
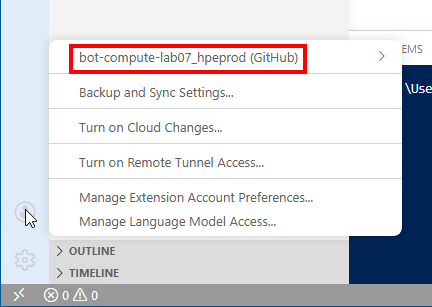
But first, let’s make sure VS Code is properly configured for Copilot. Click the user icon at the bottom of the Activity bar:
A menu should open with at the top bot-compute-labnn_hpeprod (GitHub) where nn is your team number. This is the user with which you are logged into GitHub, ensuring your rights to Copilot.
-
You should also look at the bottom right, just below the area where you will enter Copilot prompts:
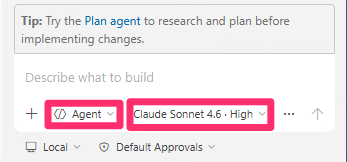
It shows the mode you will be using Agent and the LLM (Large Language Model) set to Claude Sonnet 4.6.
An LLM, or Large Language Model, is a type of artificial intelligence that uses deep learning to understand and generate human-like text. LLMs are trained on massive amounts of data and can perform tasks such as answering questions, summarizing information, translating languages, and generating content. In this lab, we will be using the LLM to write PowerShell code. While you are free to change the LLM, in our experience Claude Sonnet offers the best results for this particular task.
Task 2 - Your first prompt
We are now ready to start coding.
⚠️ Important note
In the rest of this document text like this represents a prompt that
 you should type or copy and paste into the Copilot prompt area.
In AI, a prompt is the input or instruction you give to an artificial intelligence model—such as a question, command, or statement—to guide it in generating a specific response. The prompt provides the AI with context or directions, helping it produce output that matches your intent, whether that’s text, code, images, or other results.
The quality and clarity of your prompt directly affect how useful and relevant the AI’s response will be. If you feel adventurous, you can change the prompts slightly, but this lab has been tested with the prompts provided. Results will be different with other prompts, and could also be different even with the exact same prompts, that is the nature of AI.
-
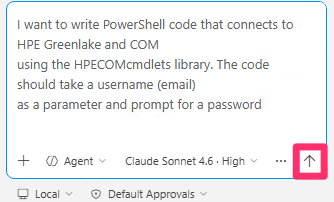
Here is our first prompt that you can copy using the
Copybutton:I want to write PowerShell code that connects to HPE Greenlake and COM using the HPECOMcmdlets library. The code should take a username (email) as a parameter and prompt for a password -
You can then paste it into the Copilot prompt field then press the Send icon:
-
Copilot may ask for your permission to fetch some documentation about the module we want it to use. If you see a prompt like the one below, click the down arrow next to Allow Once:
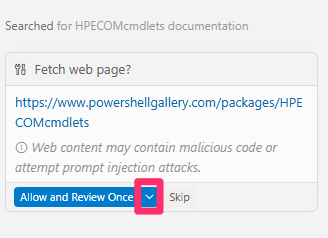
-
Then click the response highlighted in red in the screenshot to give Copilot the widest permission.
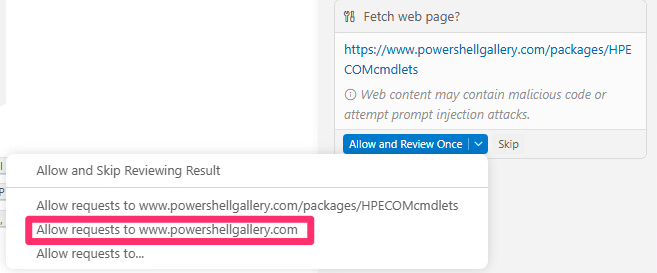
It may ask you for permission multiple times as it navigates through links to fetch information. Repeat the steps above to grant it permission to different sites
-
After a few seconds, Copilot will respond in plain English, summarizing what it did. Your response may look slightly different — that’s expected with AI.

-
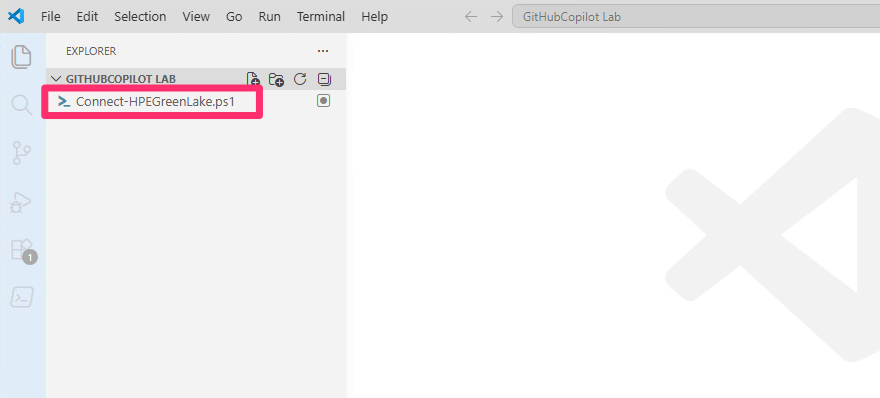
Note that the code itself is in a file that Copilot created. Click on the file it created in the Explorer window, as depicted below:
-
The
 icon next to the file name means the file
has pending changes from Copilot.
icon next to the file name means the file
has pending changes from Copilot.
-
The generated code is on green background. Click on Keep (either at the top or at the bottom) to accept the changes. Later when Copilot wants to make multiple changes in one strike, the Keep/Undo at the top relates to the particular change where it is displayed, and the one at the bottom relates to all the changes (that’s why here it says 1 of 1 at the bottom, later you will see 1 of n). So, you will click Keep at the bottom to accept all changes.

-
The green background will go away, as well as the icon next to the file name in the tab header. If you are ever unhappy with the changes proposed by Copilot, you can click Undo instead of Keep, to ignore the latest suggested change and write another prompt.
You can see that with this simple first prompt, Copilot wrote fairly comprehensive code with comments (text in green), error handling (try/catch blocks), parameter binding, etc.
⚠️ Note
Do not run the script yet. The goal of this lab is to build it incrementally from Task 2 through Task 6, then review and polish it in Task 7, before finally executing it in Task 8.
If this code looks like gibberish to you, that’s OK, your Copilot assistant is here to handle the technical details!
-
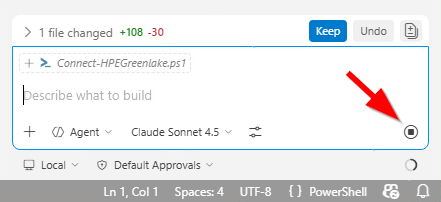
Get used to watching the bottom right of the prompt area, this will give you a clue whether Copilot is still thinking or if it’s ready to accept the next prompt. When it’s thinking it will show this icon:
-
When it’s ready for your next prompt, it will show this icon instead, that you can click to submit your prompt (pressing Enter has the same effect):

-
Before moving on, instruct Copilot to make the script idempotent — meaning it can be safely re-run without side effects. This is essential: if the script fails midway and you need to restart it, steps that already succeeded will be skipped rather than repeated.
I want my script to be fully idempotent so it can be safely run multiple times.
From now on, apply this idempotency principle to every piece of code you generate:
always check whether a resource already exists before creating it, and skip creation if it does.
Task 3 - Create a workspace
In HPE GreenLake, a workspace is an environment where users can organize and manage resources, such as servers, storage, and services, for specific projects or teams. Workspaces help separate and control access to different sets of resources, making it easier to manage permissions, monitor usage, and automate tasks within a defined scope.
-
⚠️ In the following prompt, replace nn in
GHCPWorkspaceTnn_randomwith your team number, for example09for team 9, before sending the prompt to Copilot:Create or reuse a workspace named GHCPWorkspaceTnn_random where random is a random numeric suffix generated once and hardcoded as a constant in the script. If the workspace already exists, connect to it instead of creating a new one. Use the following parameters: Type: Standard enterprise workspace Email: the email address used to connect Street: make up an address City: make up a city Country: United StatesThe hardcoded random suffix ensures the workspace name stays consistent across script runs, and the “create or reuse” logic means re-running the script won’t create duplicate workspaces — it will simply reconnect to the existing one.
-
Review the diff highlighted in the editor: red = removed code, green = added code. Click Keep to accept.

🔔 Note
Always click Keep (or the bottom Keep all button) to accept pending changes before sending your next prompt. If you don’t, Copilot will merge the old and new diffs together, making it harder to follow what changed.
-
Copilot sometimes declares constants using
Set-Variable -Option Constant, which is not idempotent. Re-running the script in the same PowerShell session will fail with: “Cannot overwrite variable WORKSPACE_NAME because it is read-only or constant”. If this happens, enter:Are you sure that your Set-Variable commands are idempotent? Remember I want my script to be fully idempotent to ensure the script can be run multiple times safely.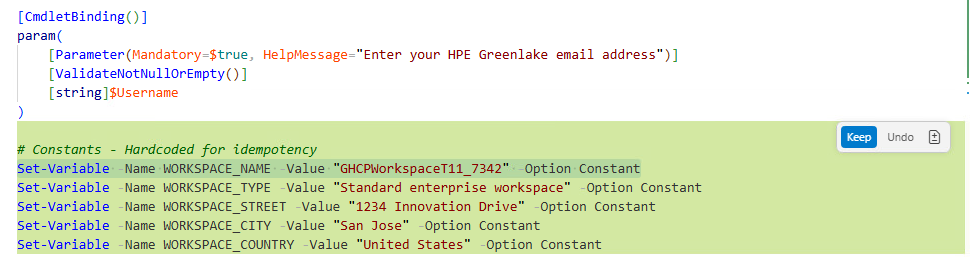
🔔 Note
Copilot might want to make another script for the create workspace script. We want everything in the same script that we will execute at the end. If it did create another script, tell it not to:
Do not create a second script, integrate everything into the existing scriptMake sure you close the tab for the second script
Create-HPEWorkspace.ps1to avoid confusion, and delete the file (right-click it in the left-hand sidebar and click Delete). Copilot might also offer to delete the file itself, but it will ask for permission before doing so. If you see a question “Run pwsh command?” with a command likeRemove-Itemfollowed by the path to the second script file, click Allow and Copilot will delete the file.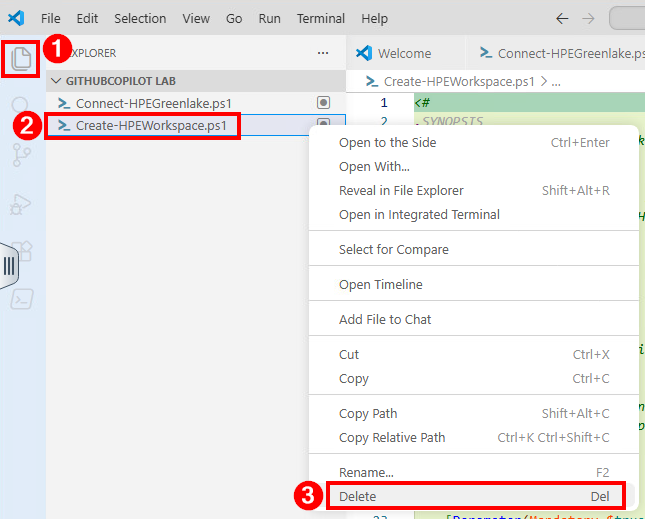
Provision Compute Ops Management in the workspace
-
We need to make Compute Ops Management available in our workspace, this is called provisioning a service in Greenlake. All services can be provisioned in multiple regions and we need to specify which region we want.
Provision service Compute Ops Management in region eu-central -
We also need to give our user Administrator role for the COM service:
Add Compute Ops Management Administrator role to the user in the workspace
Create a location
Locations are part of the Service Delivery Information (SDI) that is available to automate support workflows. Locations capture addresses, contacts, and service delivery information for operations, management, and commerce. Assigning a device to a location is the process of attaching a device to a physical location to automate support and services for this device.
-
Use the following prompt to create your location:
Create a location with name Mydatacenter and these parameters
Country, Street, City and PostalCode the same as the workspace
State "none"
Primary Contact Email the user's email
Because the script is designed to be idempotent, Copilot should add a pre-check to verify the location does not already exist before attempting to create it.
Add a subscription
-
To activate compute devices that will be added later to your workspace, you need to install a COM subscription key (a license to use COM). Be sure to replace the string <key found on your login sheet> before submitting your prompt to Copilot!
Add subscription key <key found on your login sheet>Set automatic subscription assignment and reassignment for Compute. The COM subscription tier is STANDARD
Task 4 - Onboarding devices
We are now ready to add a server to our COM workspace. We will use a method that would work just as well if we had dozens or even hundreds of servers to add, even though in this lab you will only add one. We should prepare a file with the details of the server(s) we want to add.
-
In VS Code menu click File -> New File:
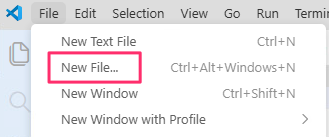
-
Type the file name ilos.csv and Enter:

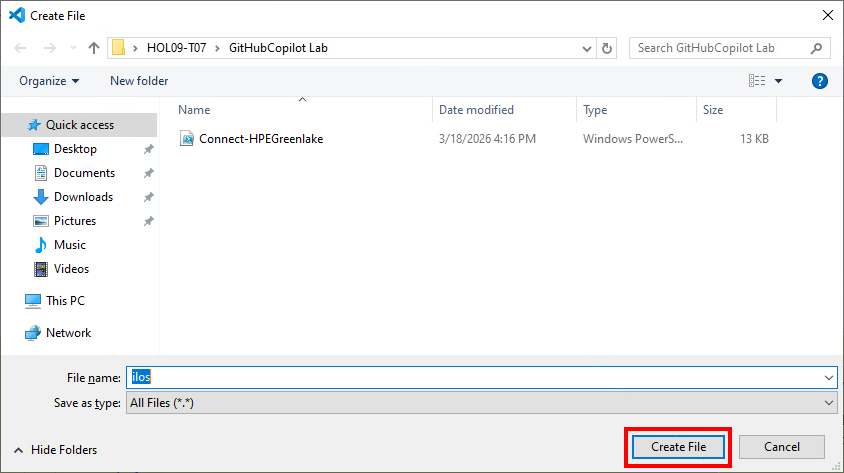
A standard Windows dialog will appear to choose the location where you want to save the file. It should be in folder HOL09-Tnn > GitHubCopilotLab.
-
Click Create File.
-
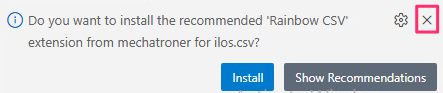
Decline VS Code’s suggestion to install an extension to handle CSV files (at the bottom right of the screen), we don’t really need it for the simple work we have to do:
-
Copy the following data into the ilos.csv file and replace the placeholders in <brackets> with your team's information from the login sheet:
IP, Username, Password
10.18.26.<xx>, Administrator, <iLO's password>
Make sure the data is on 2 lines like shown above, with no extra space at the beginning or end of either line (space after a comma is OK).
-
Save the file with Ctrl-S or File->Save in VS Code’s menu.
If we had more servers to onboard, we would simply add more lines into this file and our script would iterate over each line.
-
Go back to your PowerShell script tab in VS Code and tell Copilot to import the csv file:
Import file ilos.csv. Double check the field names in the csv file.You should see it generated code to import the file into a variable
$iLOs(it even figured out on its own the proper case for the name iLO!). It may have put the code in the middle of the script, before creating the workspace, but that’s OK. -
To add servers into COM, we need an activation key that we can ask COM to generate. This key encodes all the information (such as the workspace id) that an iLO will need, to know what it should connect to.
Generate a COM activation key -
And now we have everything we need to bring our server into COM:
Connect all the iLOs from the CSV file to COM. Make sure the activation key is created before this stepYou can see how it created a
ForEach ($iLO in $iLOs)loop, then created a Credentials object for the username and password imported from the CSV file and used it with the properConnect-HPEGLDeviceComputeiLOtoCOMcmdlet.
Set device location and tags
We want to assign our server to the location we created previously. This is needed to ensure that support cases are automatically created in the event of device failures.
-
Enter:
Assign the location we created previously to the deviceTags in HPE GreenLake are metadata labels—key-value pairs—that you can attach to cloud resources. Their main purpose is to help you categorize, organize, and manage resources based on criteria like purpose, owner, environment, cost center, or other custom attributes.
Add tag "Country=US, App=AI" to the device⚠️ Important note
Time Check
Now would be a good time to look at the clock and determine how much time you have left before the end of the lab. If you have less than ~20 minutes, consider skipping to Task 7 - Review the script. You have generated enough PowerShell code already to be able to run it and get meaningful results. If you still have time, you can continue generating more code, but be sure to keep an eye on the clock and allow enough time to run the script and see the results of your (and Copilot’s) work.
Task 5 - Configuration of Compute Ops Management
Now that we have a server onboarded, we are going to use some of the features that COM provides for server management.
Create server settings
Server settings are predefined or custom configuration templates that define how servers should be configured. They allow administrators to apply consistent configurations—such as firmware baselines, BIOS settings, workload profiles, or other system parameters—to one or more servers at scale.
-
First create BIOS settings:
Create a BIOS setting with name Custom-Bios-For-AI, Workload Profile "Virtualization -- Max Performance", Automatic Server Recovery on with a timeout of 10 minutes -
Next, create settings for internal storage:
Create an internal storage setting with name RAID-1, RAID level 1, take the entire disk -
Create firmware settings:
Create firmware settings with the latest firmware bundles for Gen11 and Gen12
Create a server group
A server group containing the settings we just created will allow to keep configuration consistent across all servers added to that group.
-
To create a server group, enter:
Create a server group named AI_Group with the 3 settings we created
previously. Make sure the settings are not applied automatically when a
server is added to the group
Add servers to the group
-
Now we add our server to the group:
Add our server to the group
Set iLO auto firmware update
-
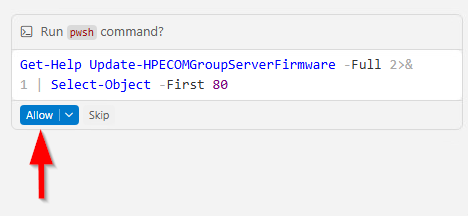
To automate the iLO firmware update, run:
Set our server to automatically update iLO firmware to the newest availableCopilot may struggle to find the right cmdlet and may ask you to run a PowerShell command to help it look it up. If that happens, click on Allow:
Update server firmware
The firmware update step is crucial to ensure that servers are up to date. Administrators typically need to perform this task regularly to maintain optimal performance and security.
-
In this step, you will create a scheduled task to run a firmware update during the next weekend for all servers in your group. Do NOT try to run a firmware update immediately, keep the schedule to next Sunday:
Schedule a server firmware update through the group for next Sunday at 5am
This concludes our code writing exercise. We are now ready to test our coding skills by running the script we created.
Task 6 - Review the script
Before running the script, it is worth taking a moment to have Copilot review and validate what it has generated. AI models are often better at catching their own mistakes when given a second pass — this step can save you significant debugging time during execution.
-
Ask Copilot to verify all cmdlet names and options against the official library:
Double check the code to make sure the cmdlet names and options you used from HPECOMcmdlets are all correct. Use everything you find at <https://github.com/jullienl/HPE-COM-PowerShell-Library> as a reference. -
If you didn’t get it previously, you are likely at this step to get a prompt asking you for permission to fetch contents from the GitHub repository:

-
Click the down arrow next to Allow Once and click the response highlighted in red in the screenshot to give Copilot the widest permission.

-
You may also get multiple prompts for permission to run specific commands as Copilot progresses through its understanding of the HPECOMCmdlets PowerShell module. Click Allow each time, or click the arrow to give a wider permission
-
At some point, Copilot may even present you the following prompt. Click Continue, the process can take a long time (10 minutes or more) but it should complete eventually and do a thorough job of reviewing and correcting the code it generated.
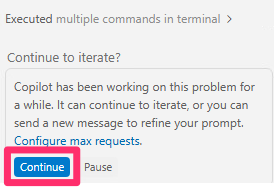
You will likely see multiple edits throughout the file. Unlike humans, an AI agent can be quite good at fixing its own errors if we give it appropriate data. It may even create a
CORRECTIONS_NEEDED.mdfile which lists all the corrections it made. -
A scripting best practice is to halt execution as soon as a failure is detected, rather than letting the script continue in an error state. Ask Copilot to add this behavior:
Can you modify my script so that after each step, if the returned status is "Failed",
the script stops execution immediately? Statuses "Warning" and "Complete" should be
treated as success and allow execution to continue.
This way, as the script runs and you encounter errors, you can ask Copilot to fix them and re-run the script, one issue at a time.
-
As a final check before running, ask Copilot to do a quick review of the entire script:
Quickly assess the script and fix any issues -
Copilot may offer additional improvements at the end of its response — feel free to accept or skip them. The key point is that these last three prompts have already brought the script to a state where it is ready to run.
Task 7 - Execute the script
With all the code now generated and reviewed, it is time to put it to the test. In this section, you will run the script you built with Copilot’s assistance and observe it automating the full workflow—from workspace creation and device onboarding to server configuration and firmware scheduling—all without writing a single line of code manually.
-
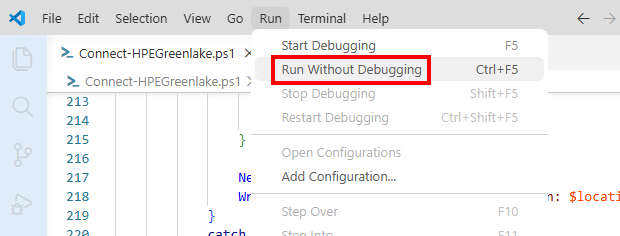
Switch back to the PowerShell script tab in VS Code, then go to the menu Run > Run Without Debugging to execute it:
💡 Note
If the Run menu is greyed out, save your script first (
Ctrl+S), then close and reopen VS Code.
-
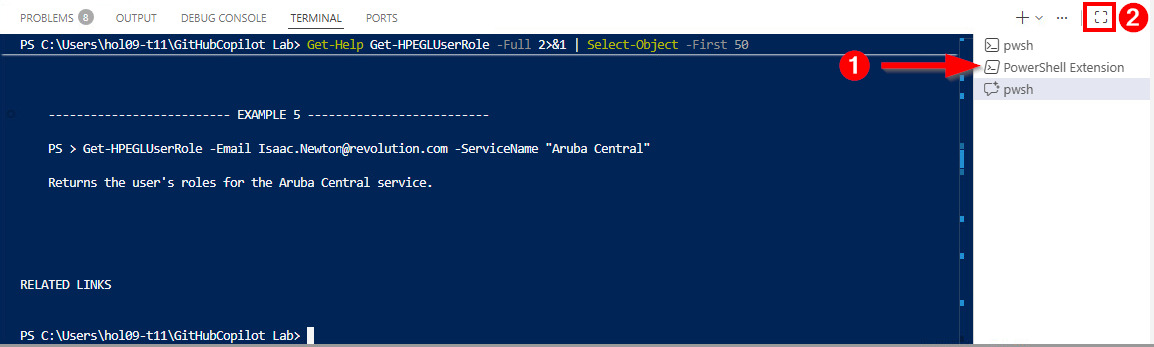
Make sure you are on the PowerShell Extension terminal tab (not the pwsh tab used by Copilot). Expand the terminal panel using the ❷ icon for a better view:
-
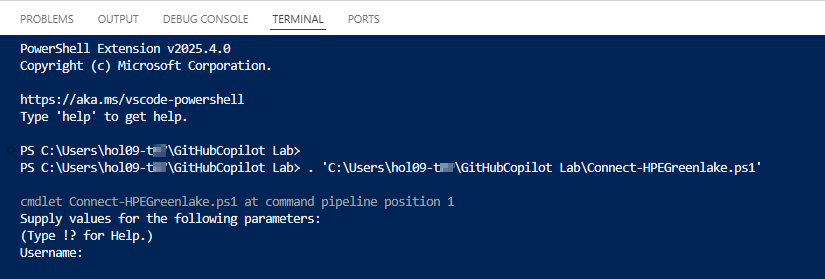
Watch the PowerShell terminal at the bottom of the VS Code window. It should prompt you for a username, type the email address for the Greenlake account found on your team login sheet.
💡 Note
Do not confuse the Horizon credentials you used at the beginning to connect to the lab environment, and the Greenlake credentials you are using now, they are not the same.
-
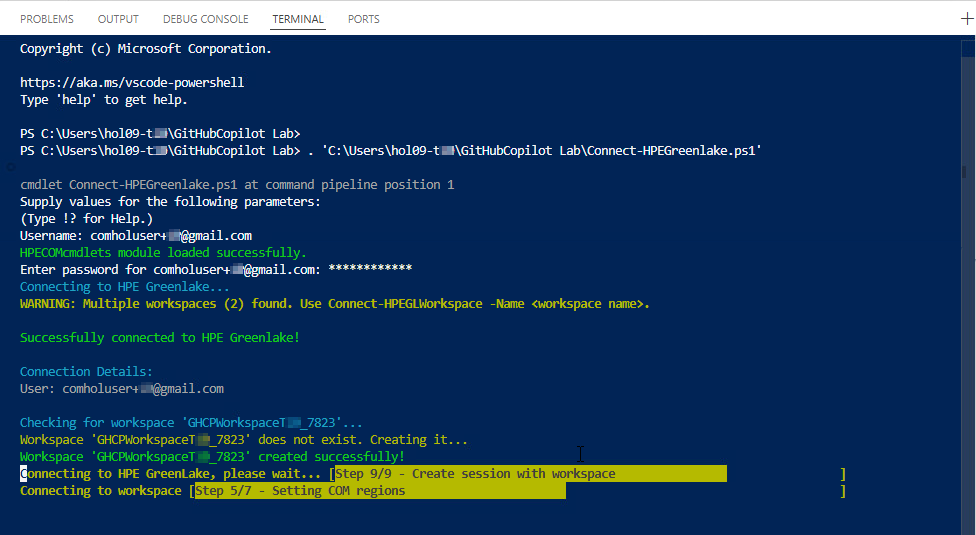
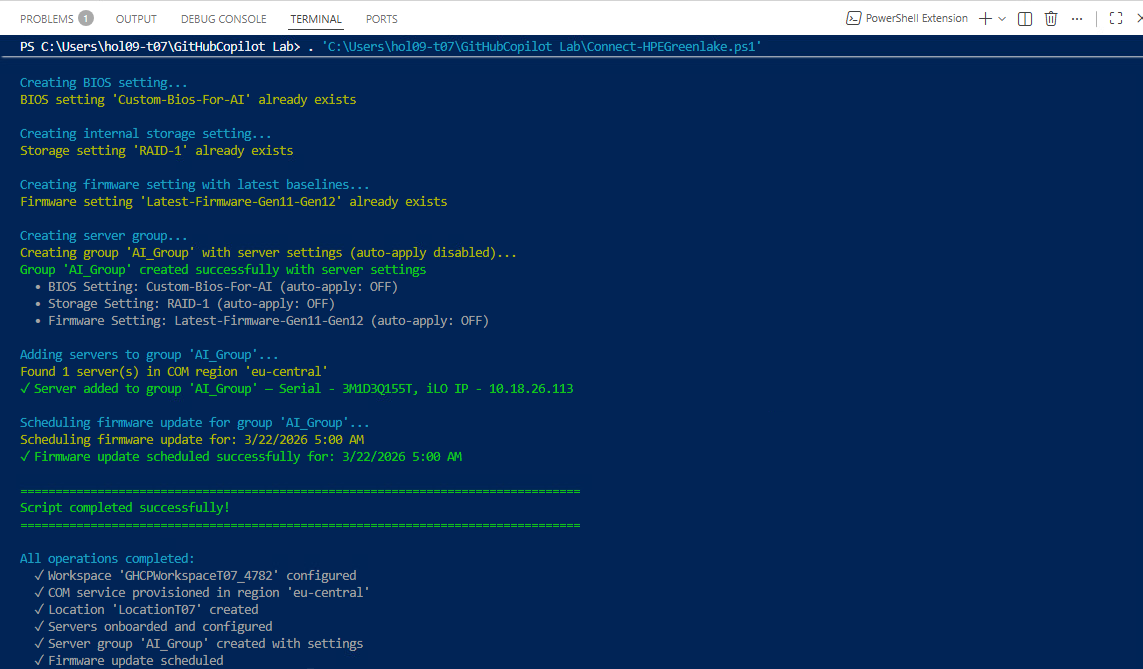
Then enter the password, the rest of the script will run, displaying what it is doing.
-
Examine the terminal output to look for any errors. If there are any, the next step would be to understand and fix the errors.
💡 Note
For any error you encounter, copy and paste the full error message from the terminal into the Copilot pane and send it — that is usually enough context for Copilot to understand the issue and automatically fix your script.
-
Once Copilot has fixed the error, re-run the script from the beginning — it is safe to do so since the script is idempotent.
💡 Note
At some point, human expertise might be needed. AI is a great help, but it’s not perfect!
-
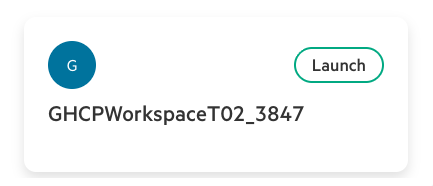
In parallel, you can use the Graphical User Interface (GUI) of COM to follow the script’s actions. In a browser go to https://common.cloud.hpe.com/ and logon with the same credentials you used in the script. You should see a screen showing a list of workspaces and you should click Launch next to the workspace that was just created:
💡 Note
If you do not see a workspace with a name following the template used in this lab, it would indicate that the workspace creation did not work. In this case you should inspect the terminal window in VS Code and look for any errors.
-
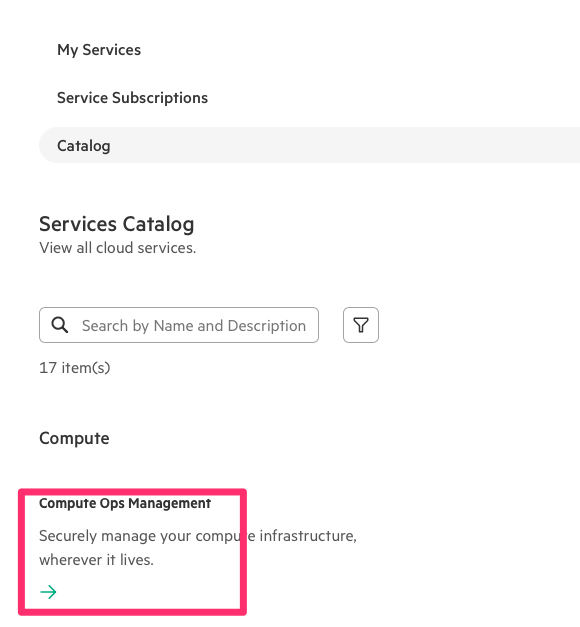
Once you are in the lab’s workspace, launch the COM service:

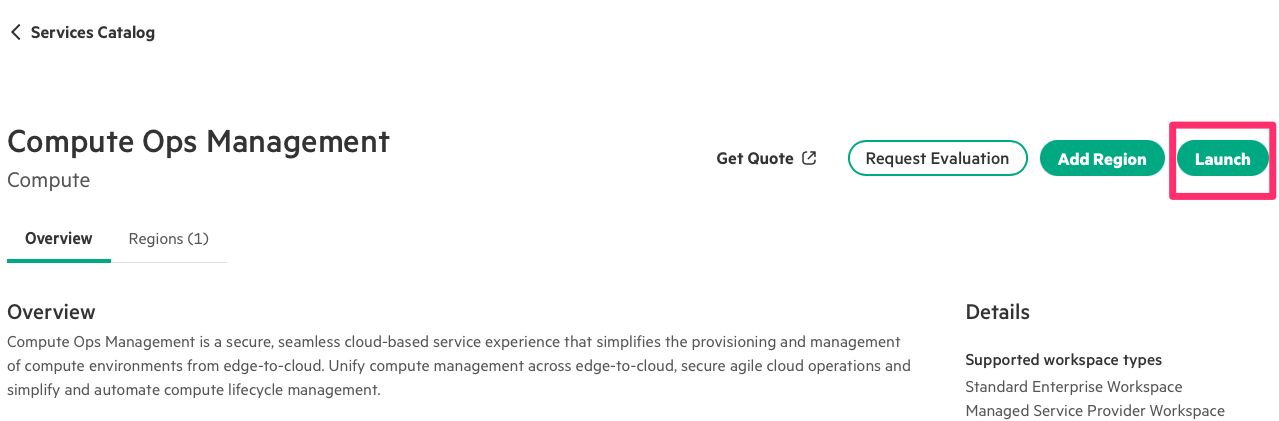
💡 Note
If you don’t see it, either the script didn’t reach the step where it provisions the service yet, or it encountered an error.
-
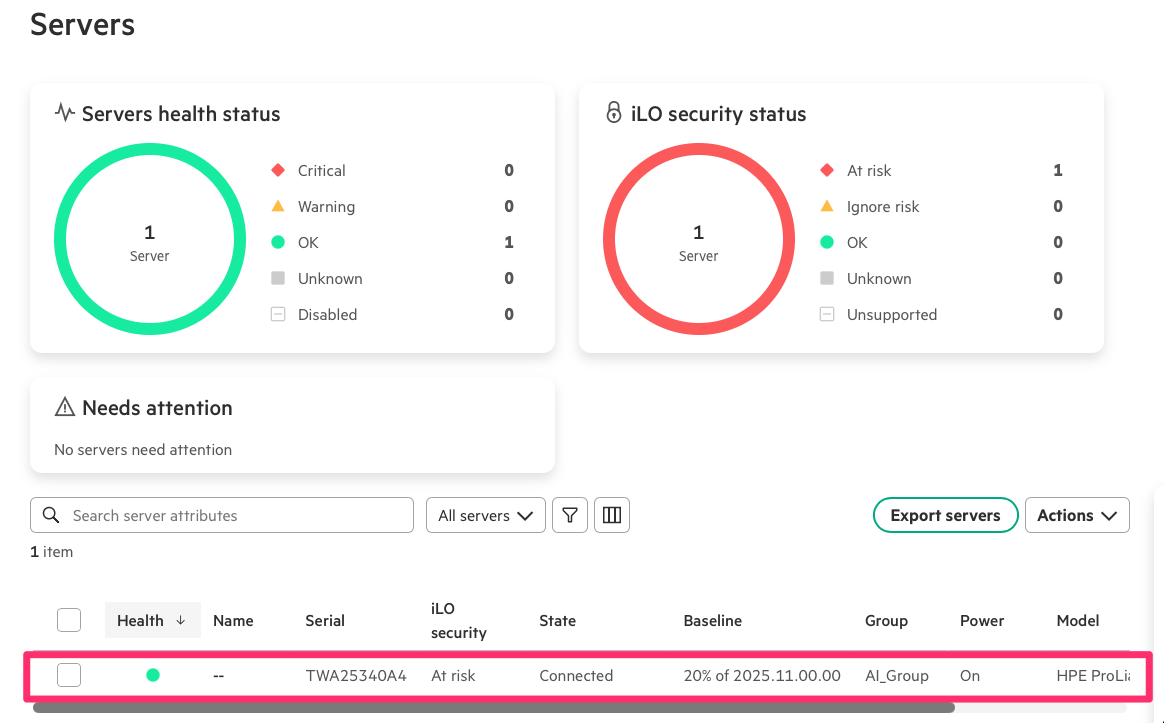
When you are in COM, go to Servers and see if your server is there
-
Even after the script has finished without errors, it can take several minutes before the server shows State
Connectedin COM as in the screenshot above. You can also go to the iLO: make a new browser tab and connect to https://10.18.26.xxx/ taking the proper IP address from your login sheet. Login with Administrator and the password provided on your login sheet. Click the HPE Compute Ops Management tile on the dashboard. Do NOT click the Launch HPE Greenlake button as you already have a tab connected to Greenlake.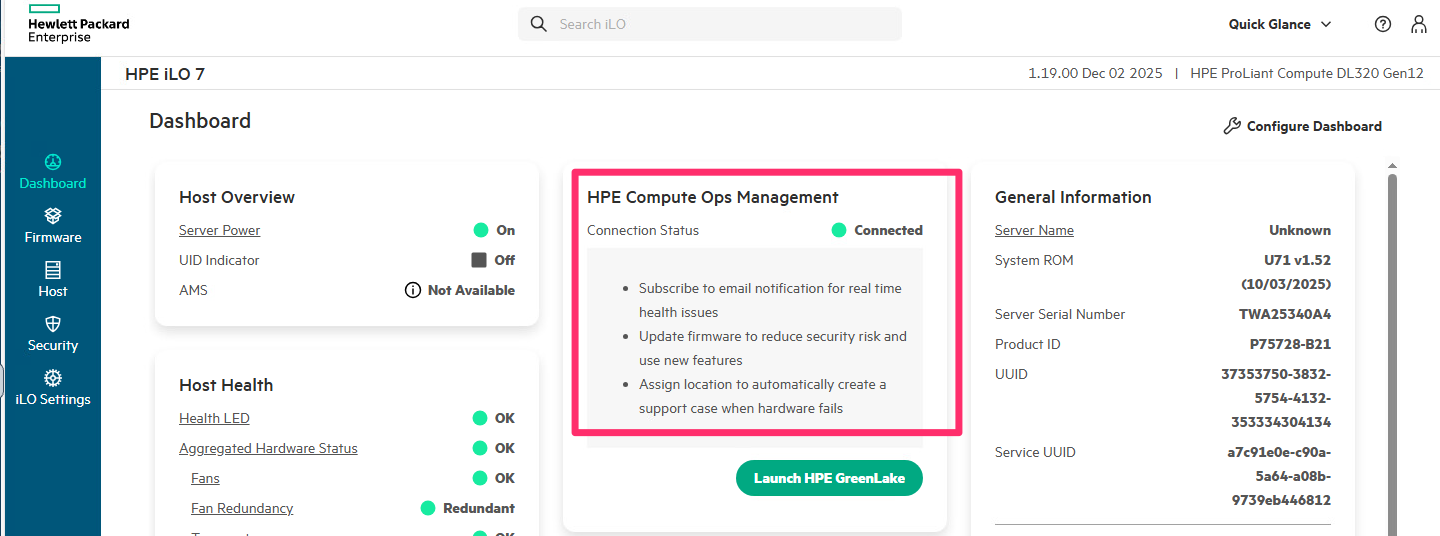
-
In the page that opens you can see the connection status and potentially the different steps it goes through before reaching
Connected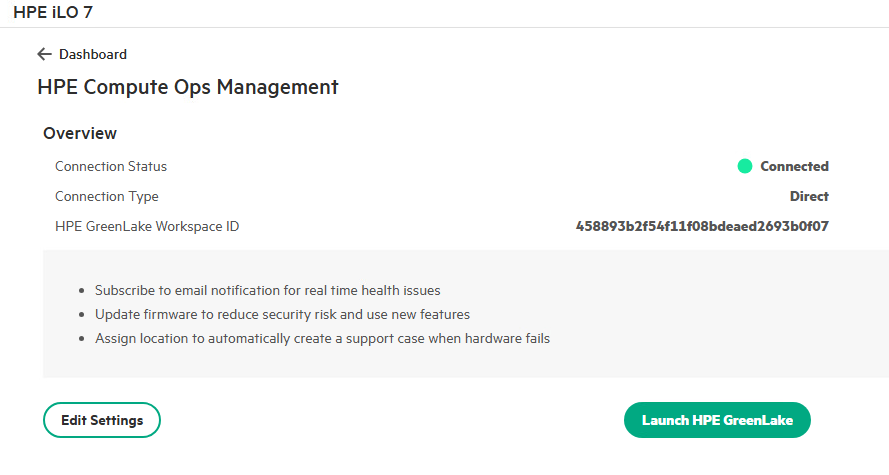
-
In COM, go to Manage then Settings to explore the Groups and Settings you have created with the script. In particular on the Settings page you should observe the settings that do not show
HPE pre-definedin the Type column. These are the 3 settings you defined with the script,BIOS/Workload profile,Server internal storageandServer firmware. You may note thatServer firmwareandServer internal storageareUser defined, whileBIOS/Workload profileisAPI defined. This is because it is currently not possible to create BIOS settings via the GUI. You must use the API (which is what the script does) to create that type of settings.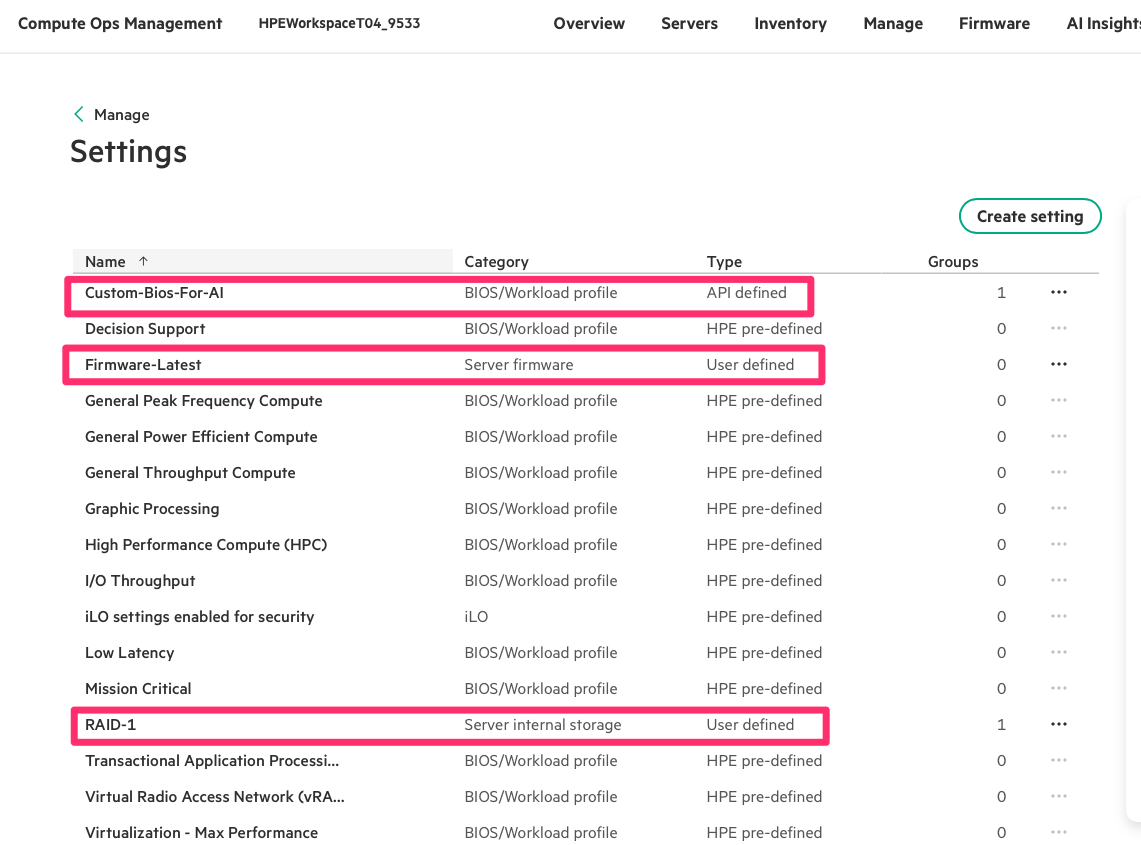
-
If the script completed without errors, you may see a success message at the end of the terminal output, depending on what Copilot generated:
Summary
This Hands-On Lab is now complete. Thank you for taking the time to participate, hopefully you received a deeper understanding of how you could use GitHub Copilot to help you automate server management with HPE GreenLake Compute Ops Management.
Over the course of the lab, users leverage AI‑assisted code generation and the HPECOMcmdlets PowerShell library to build a complete automation workflow that provisions a workspace, configures services, and onboards and manages an HPE ProLiant server through COM.