AI Inferencing Solutions on HPE ProLiant Compute
Three real world AI inferencing solutions powered by HPE ProLiant Compute.
Accessing the Lab Environment
Connect to your designated Ubuntu VM using Omnissa Horizon:
-
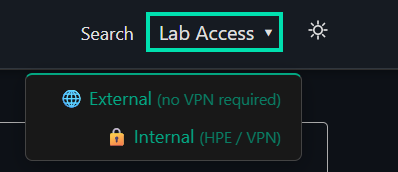
Click the Lab Access dropdown located at the top right of this page then shift + click the link for External (Outside of HPE) or Internal (Inside HPE) to open the Horizon login page in a new window.
-
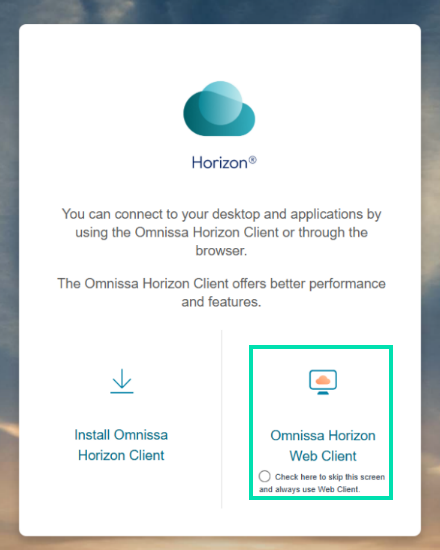
In the new window, click on Omnissa Horizon Web Client.
-
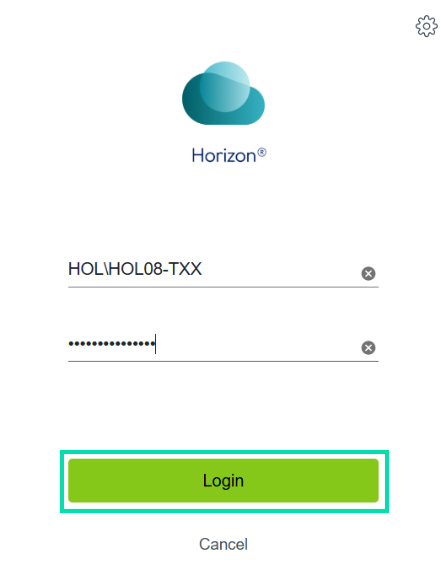
Login with the credentials provided to you.
⚠️ Important note
Your credentials can be found on the PowerPoint slide or sheet of paper issued to you by your lab supervisor. Please return the sheet to your supervisor when you have completed this lab.
-
Click on the RDP icon to launch a remote desktop to your virtual machine.

-
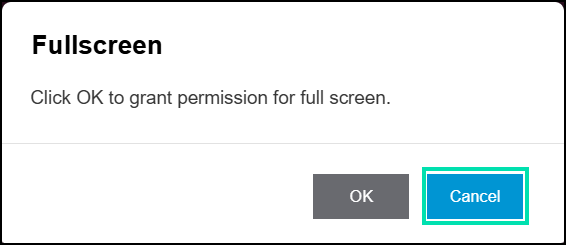
Click on Cancel to keep the VM in windowed mode.
This concludes Accessing the Lab Enviornment. Please proceed to Section 1.
Section 1: Vision AI with HPE ProLiant Compute – Facility safety and security
Computer vision analyzes video footage from security cameras to detect and track objects, people, and behaviors for enhanced operations, security, and smart space experiences. It can be used for the following use cases:
-
Reduced theft and inventory loss
-
Improved customer safety and satisfaction
-
Enhanced store operations and efficiency
-
Optimized inventory management
-
Better insights for data-driven decision-making
In this lab we will be using Vaidio’s Vision AI Platform to experience Computer Vision in a live environment. Vaidio is a certified HPE Gold Partner ISV.
-
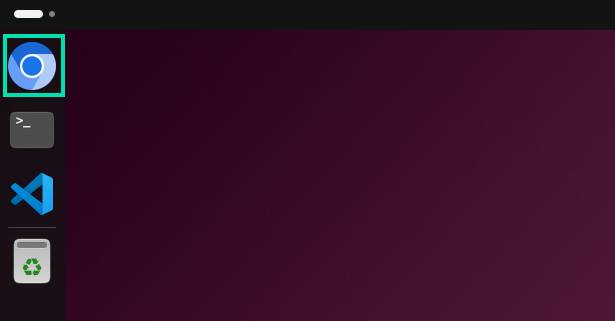
From the Desktop in Linux, click on the Chromium Browser icon link on the left-hand side of your jump server desktop.
-
From the Chromium browser in your connected jump server, navigate to the following web address and accept any browser warnings to proceed.
https://10.28.62.12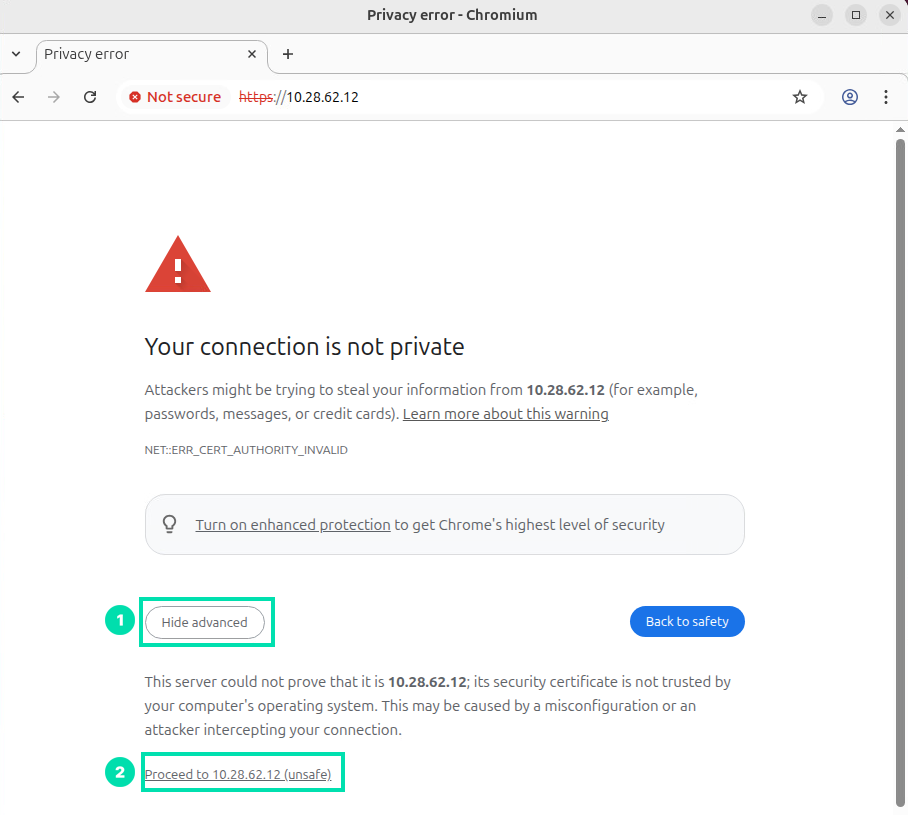
-
Login to the Vaidio computer vision application, with the following user credentials and then click on the Login button to continue.
Username:
HPEDemoUserPassword:
Will2Win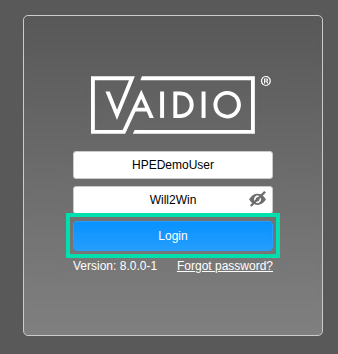
-
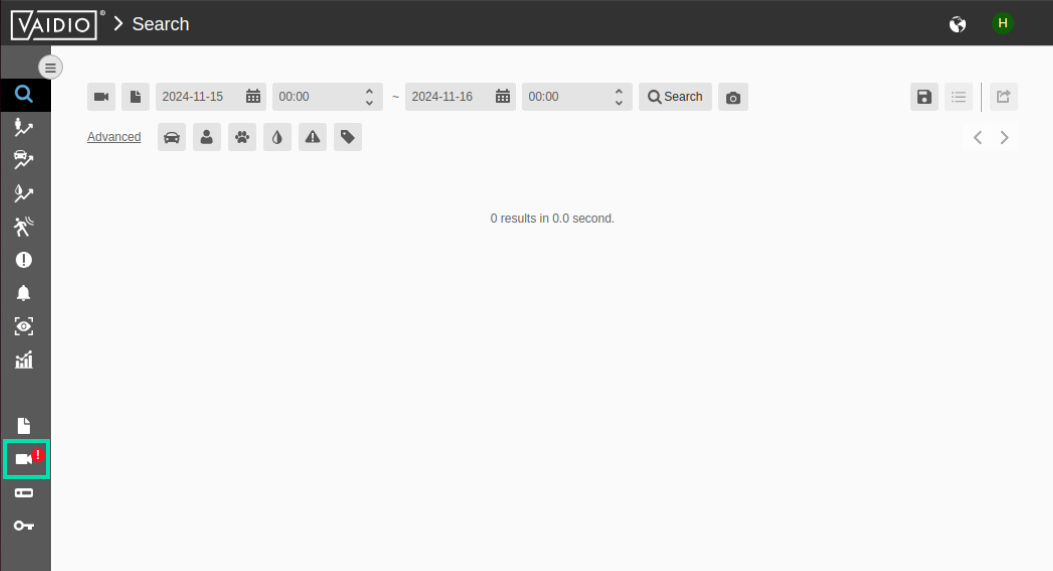
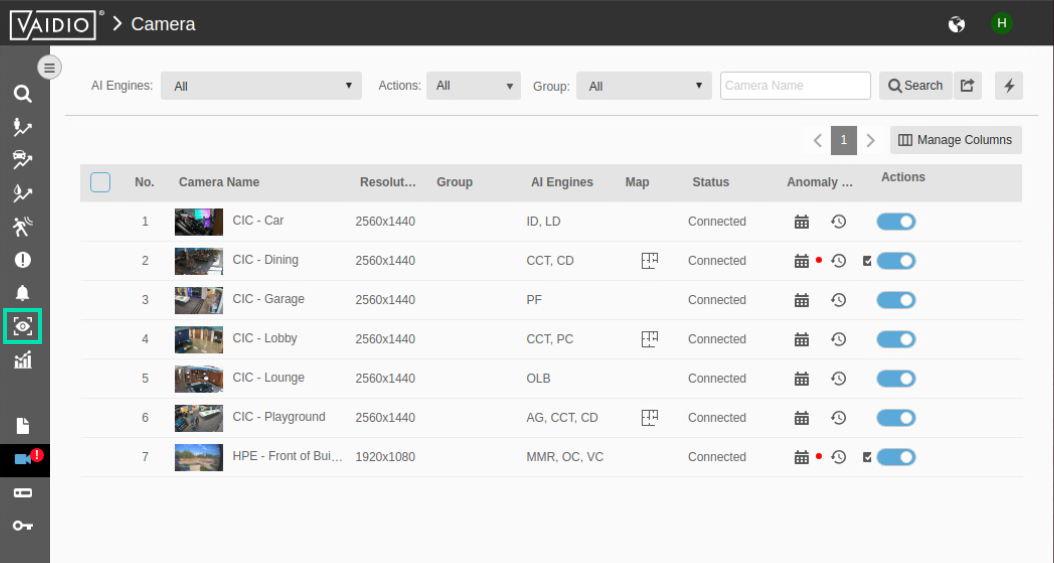
You are presented with the main navigation interface for Vaidio, and you land on the Search page. The Vaidio navigation icons run vertically on the left side of the page. You click on the individual icons to move to the next interface screen. Locate and click on the Camera icon to go to the manage cameras section. (You may notice a red exclamation mark next to the camera icon, this is NOT a broken camera, it is a visible representation of an anomaly being recognized by the computer vision software. It is a normal notification.)
-
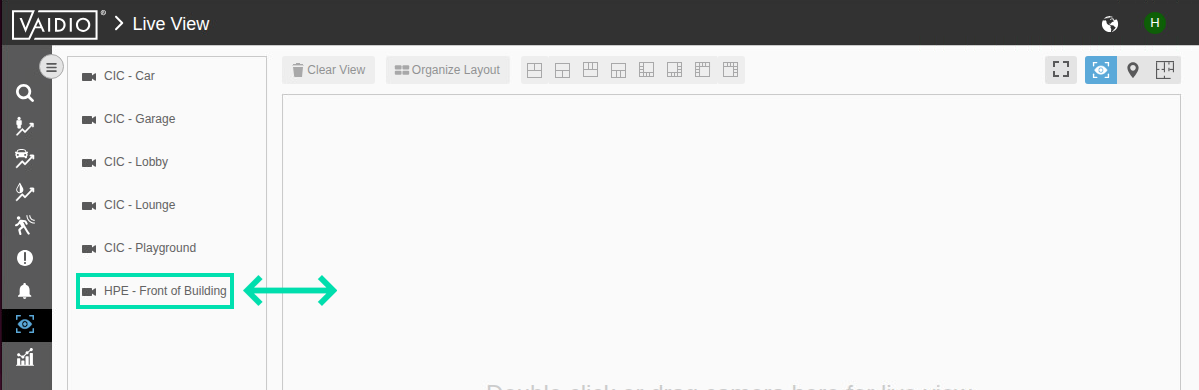
This Camera screen lists the currently attached cameras. If you had administrative capability for your logged in user, you would be able to add cameras on this screen. The Vaidio environment uses standard industry protocols like RTSP, to connect to standard IP Cameras and Network Video Recorders (NVRs). Now click on the Eye icon to switch to a live view.
-
Drag the link, HPE – Front of Building, into the live view workspace (this is how you would add 2-3 cameras to your focused view) or you can double click the camera name to launch a full screen view of a single camera:
-
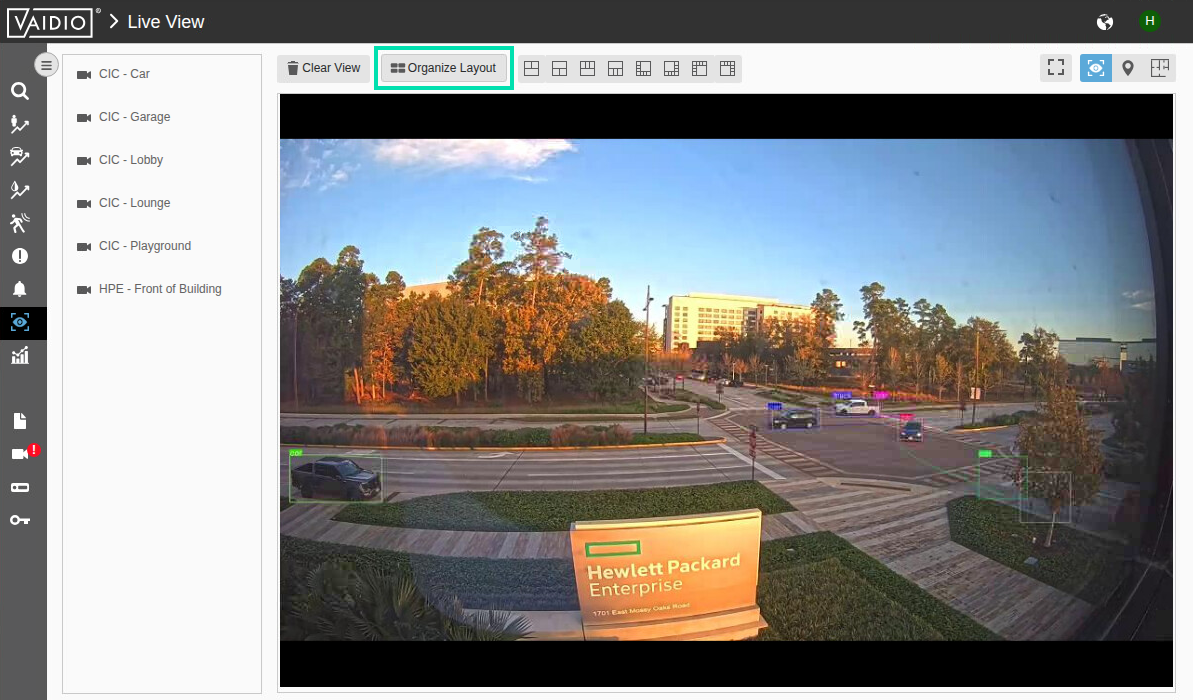
Click on Organize Layout to maximize the image. This is a live view from our HPE HQ Office in Houston, TX. Hopefully it is daytime there (more traffic) so that you can see objects being recognized in real time.
-
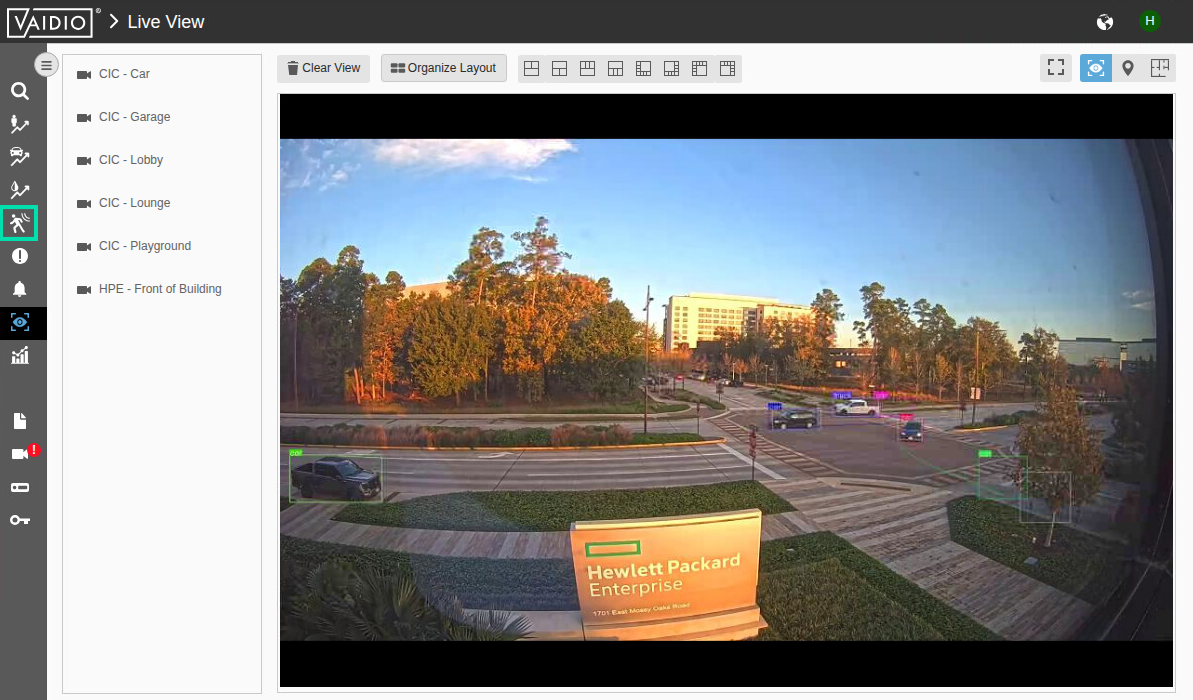
You can immediately see the power of AI in action. The system is putting bounding boxes around all the objects it has been trained to recognize. Once the system recognizes objects, it can start counting them, trigger alerts on those objects, and a host of other capabilities. Now click on the Intrusion icon in the left navigation.
-
In the Select Camera pull down option, select CIC - Car. This is a replica of our sponsored F1 Car. We have setup Vaidio to capture images when someone touches the car.
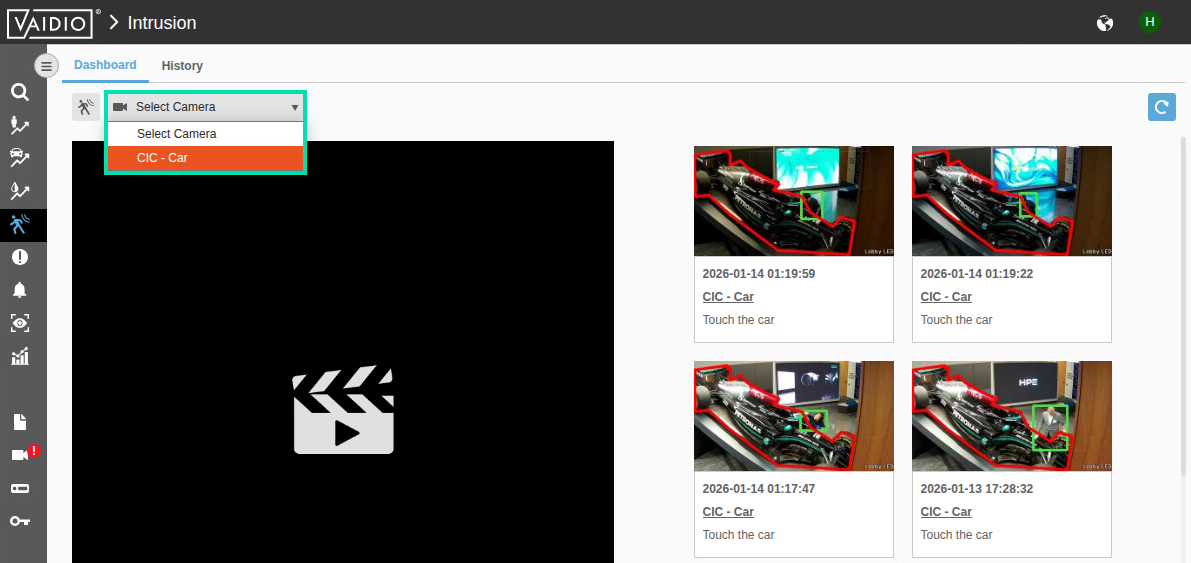
-
Now click on the History link. Select a starting date that is less than 30 days old and then click on Search.
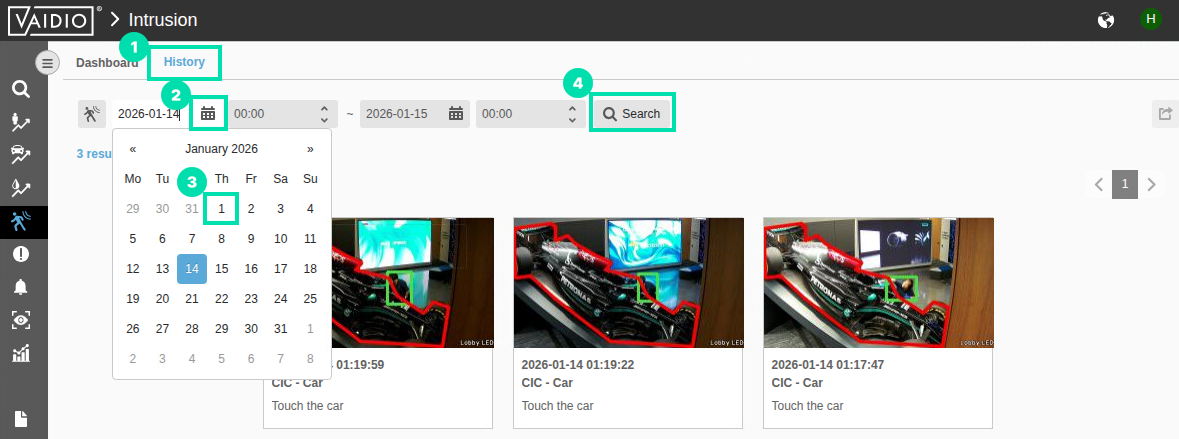
-
Scroll down in the identified matches and locate a person touching the car. You can enlarge the image by clicking on it. Once you are done browsing, click the Object Counting icon in the left navigation.

-
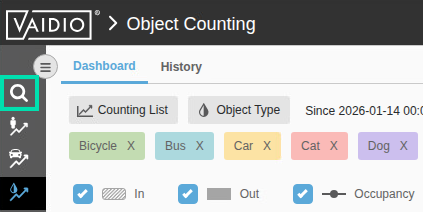
From the presented workspace, select the camera HPE – Front of Building from the dropdown box.
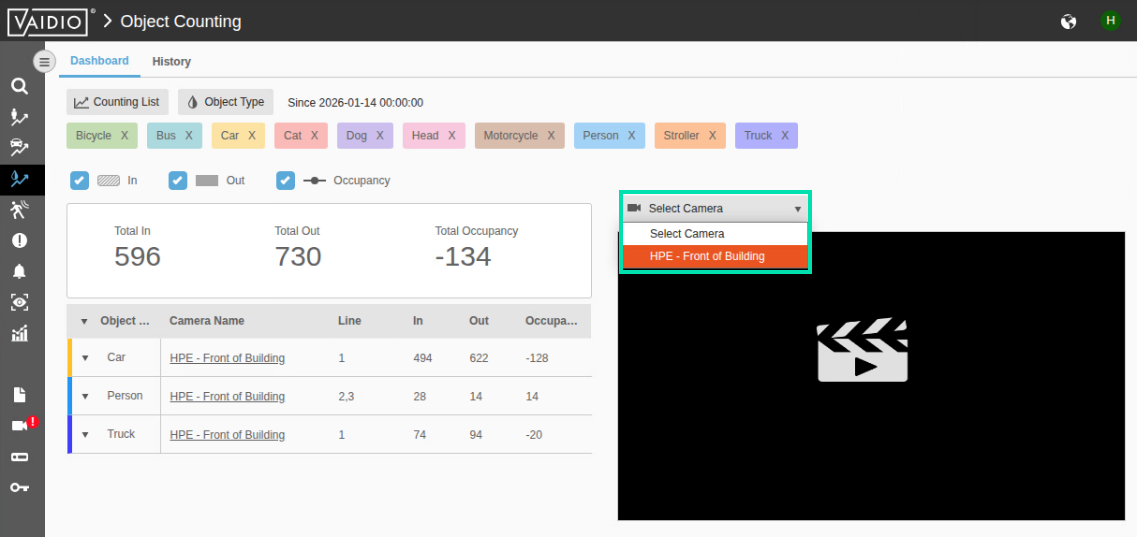
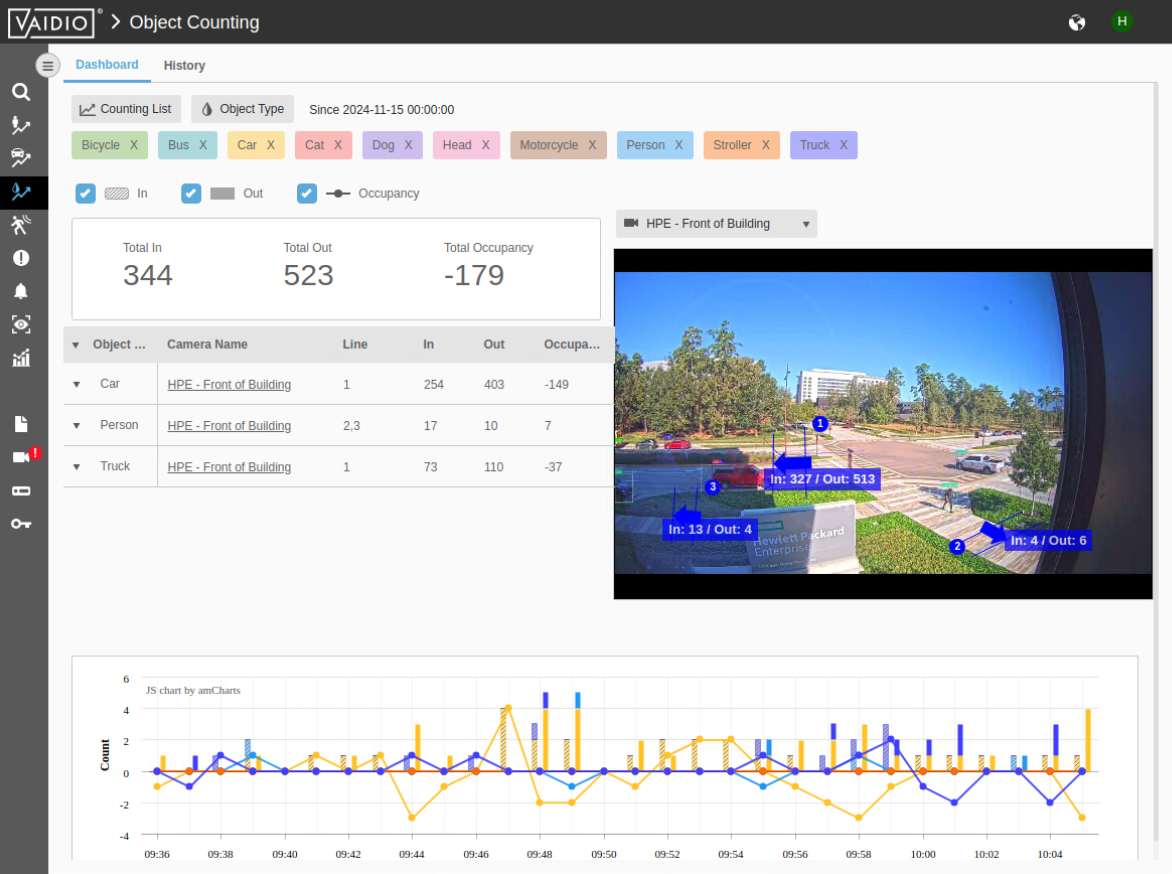
-
Now you once again see AI in action. The system is counting what it recognizes.
-
Now select the Vaidio Search function page. From this area, you can search for recognizable objects.
-
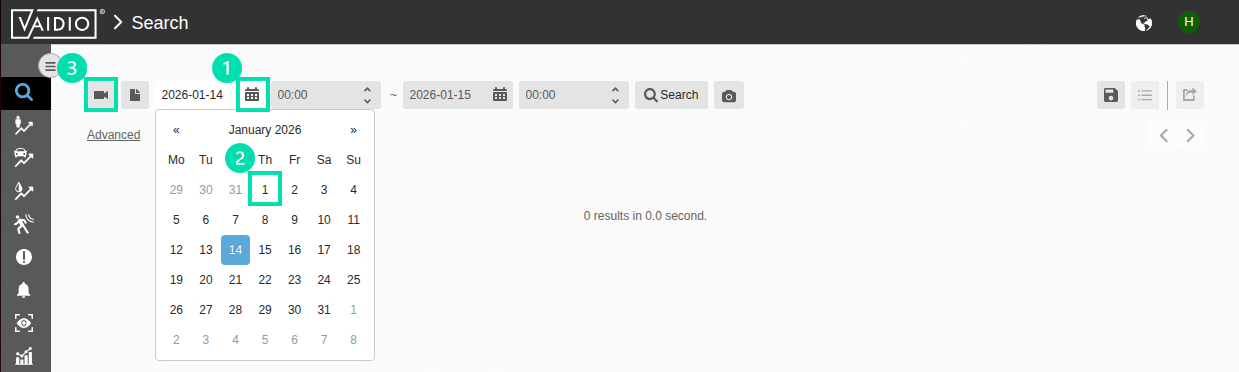
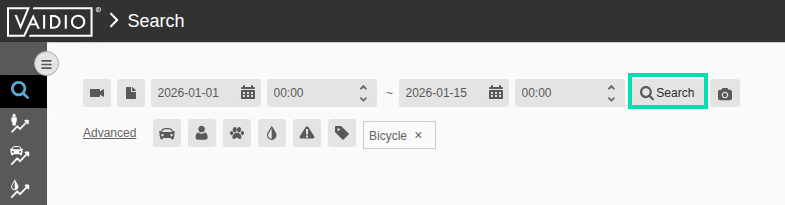
In the Search page, use the calendar on the upper left to choose the beginning time you want to search from. Pick a date less than 30 days prior to today’s date. Then click the Camera icon to select the camera.
-
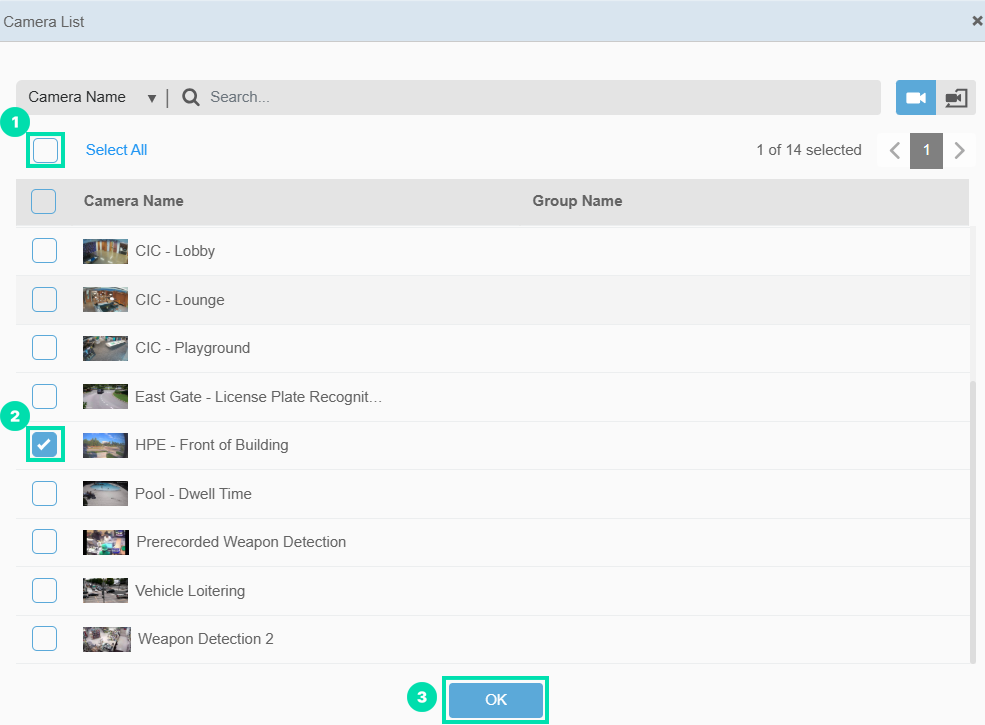
In the Camera List window, uncheck the box next to Select All, scroll down the list and check the box next to HPE – Front of Building, then click on OK.
-
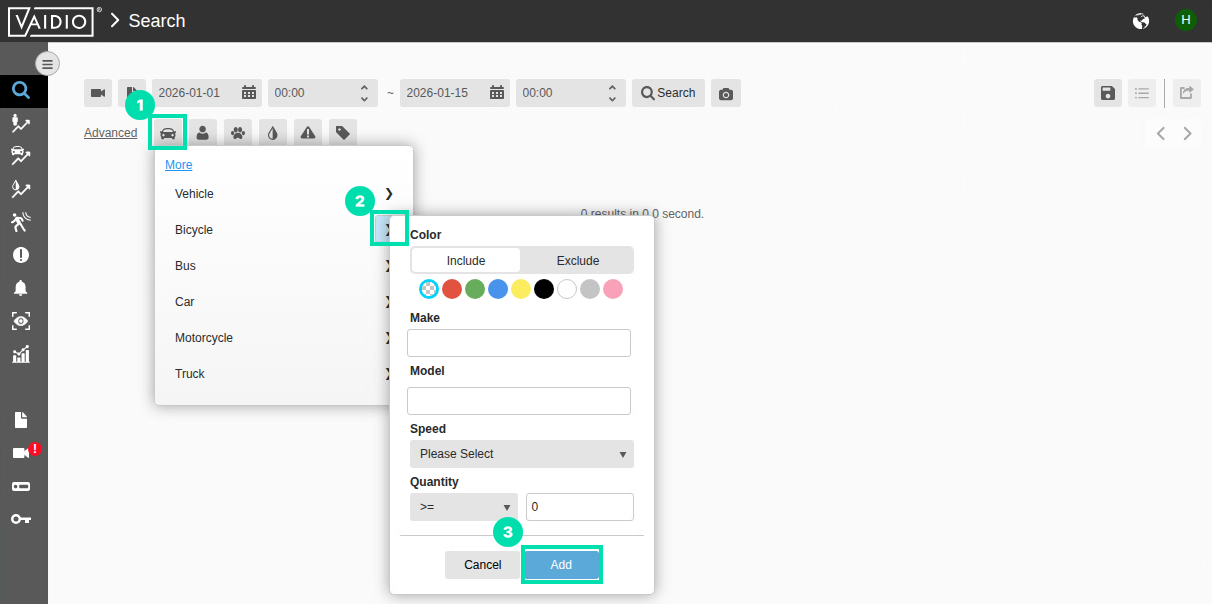
Now use the filter icons. Click on the Vehicle icon then select the > link, to the right of the word Bicycle, then click Add. This will further refine the search. You can also just click on the name of a target item to select all.
-
Press the Search button to start inferencing on the 30 days of video captured.
-
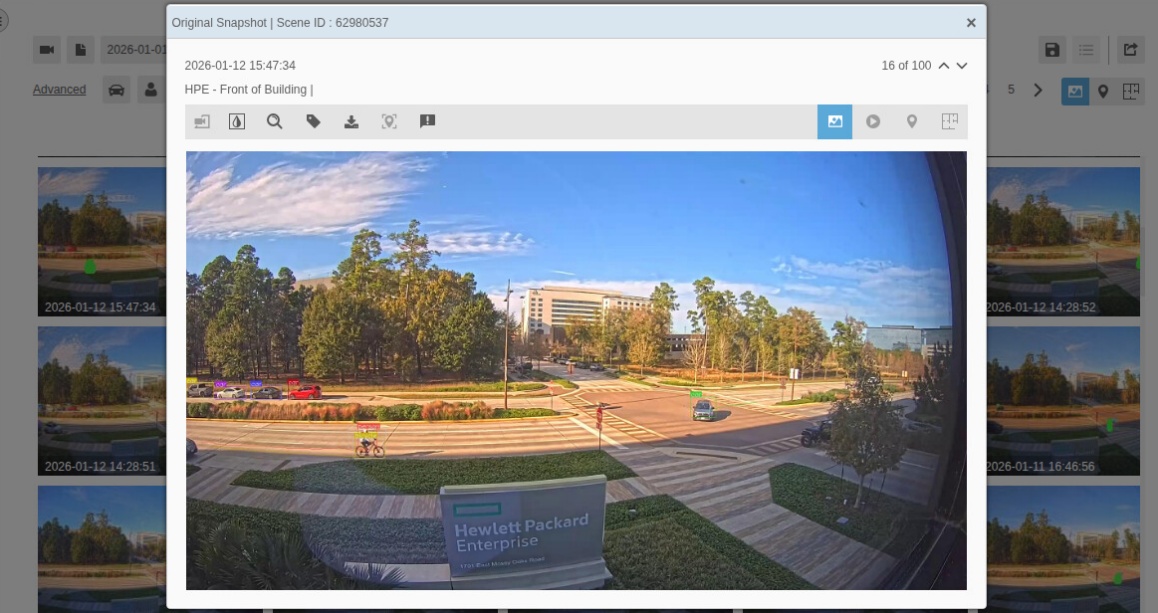
Once results are displayed, you can start selecting the frames that were identified with a positive result.
💡 Tip
If you don’t get any results, try different filter combinations. For metadata results of analyzed video streams/video files, the user can enter a flexible retention time. After this retention time, the data is automatically deleted. The default value sets the system to hold 90 days of data before it starts overwriting the old information.
-
Return to your browser session, you should be able to find some positive results. Feel free to search for other objects. Try to see how many “yellow” buses have driven through that intersection in the timeframe you have set the search for?
This concludes Section 1. Please proceed to the next section.
Section 2: Text to Image Generation with HPE ProLiant Compute
For generative AI workloads such as product design, 3D animation, and image or video generation, the HPE ProLiant DL380a Gen12 server delivers the rendering and design performance required by demanding visual applications across the media and entertainment, healthcare and manufacturing industries.
Generative AI generates lifelike and dynamic pictures, 3D animations (including character movements,) physics simulations, and environmental effects. You use it to curate new visual content, such as images or videos, that mimic real-world data.
In this lab we will use SwarmUI to experience Generative AI in a live environment.
Task 1: Some pre-work to prepare our workstation
Before we start using our environment, some preliminary work needs to be done to make our installation process work correctly.
Each of these environments needs additional services and applications installed, to get this to all work together. Both environments also have configuration files that need to be edited to customize the environment, so things work correctly.
We are going to do that pre-work first as it will allow the labs to flow more smoothly.
💡 Tip
In this lab, you will need to copy and paste multiple commands into the terminal. Use
cntrl+shift+vto paste into the terminal.
-
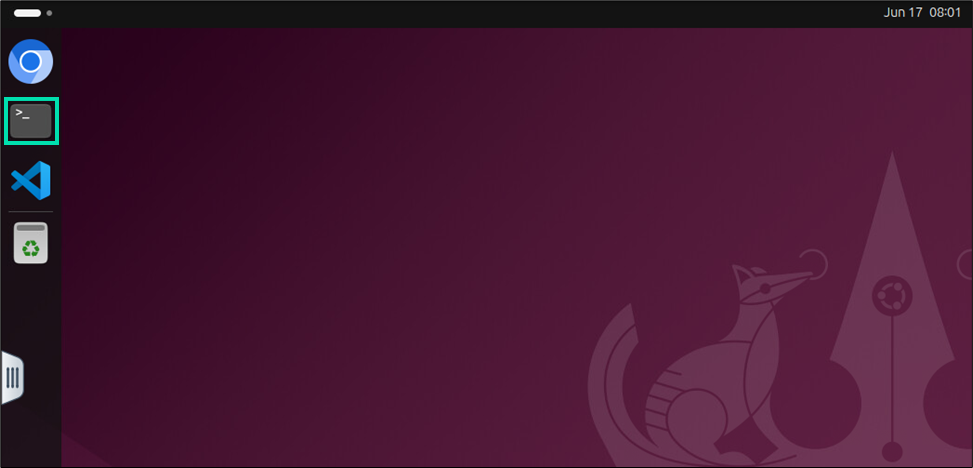
From the Linux desktop, click on the Terminal icon.
-
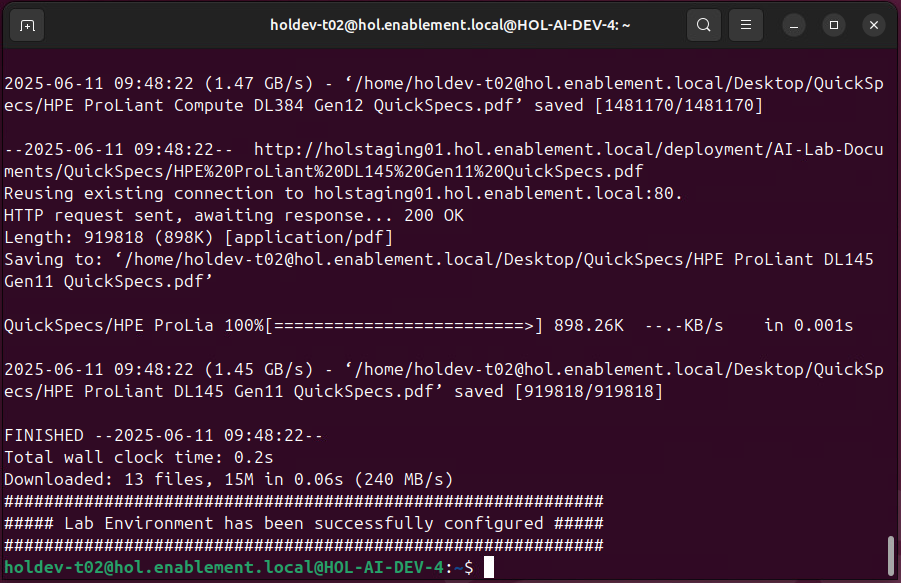
Copy and paste the following command into the terminal to initialize the Docker and NVIDIA Container toolkit installation. Lab support files will also be copied to the desktop.
sudo /etc/init.d/docker_install.sh
-
When prompted for a password, type your lab password and then press Enter.

-
After a few minutes, the lab support files will appear on the desktop. These will be used in a later section of the hands-on-lab experience.
-
In terminal, copy and paste the following command and press Enter.
cd SwarmUI
-
Then run the following command and press Enter to launch SwarmUI.
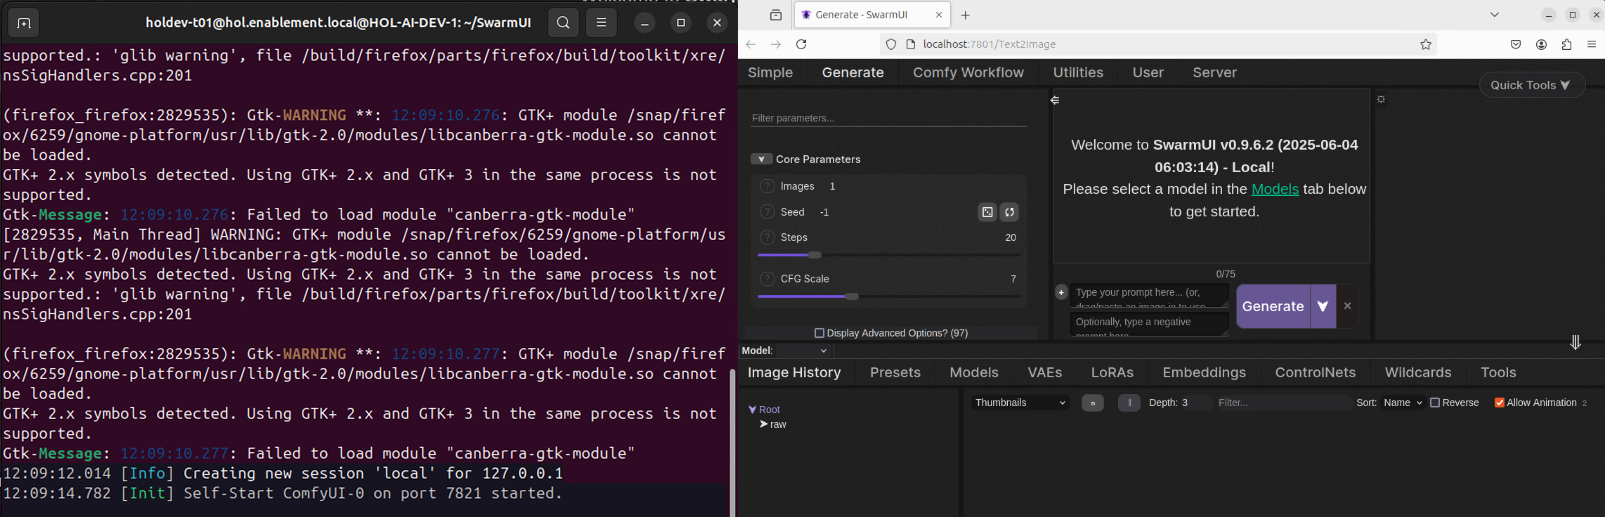
bash launch-linux.sh
-
The application will launch in a web browser once it has finished loading.
This concludes Task 1. Please proceed to the next task.
Task 2: Using SwarmUI for text-to-image generation (with GPU)
We have preinstalled and setup SwarmUI for this experience.
What we want to demonstrate in this hands-on experience, is the difference in performance you experience when you use a Generative AI application like SwarmUI.
Your environment has been set up in such a way that your VM has been configured with a portion of the NVIDIA GPU installed in the ESXi host where your VM is running. You don’t have the entire GPU dedicated to your instance; you are sharing it with other students.
-
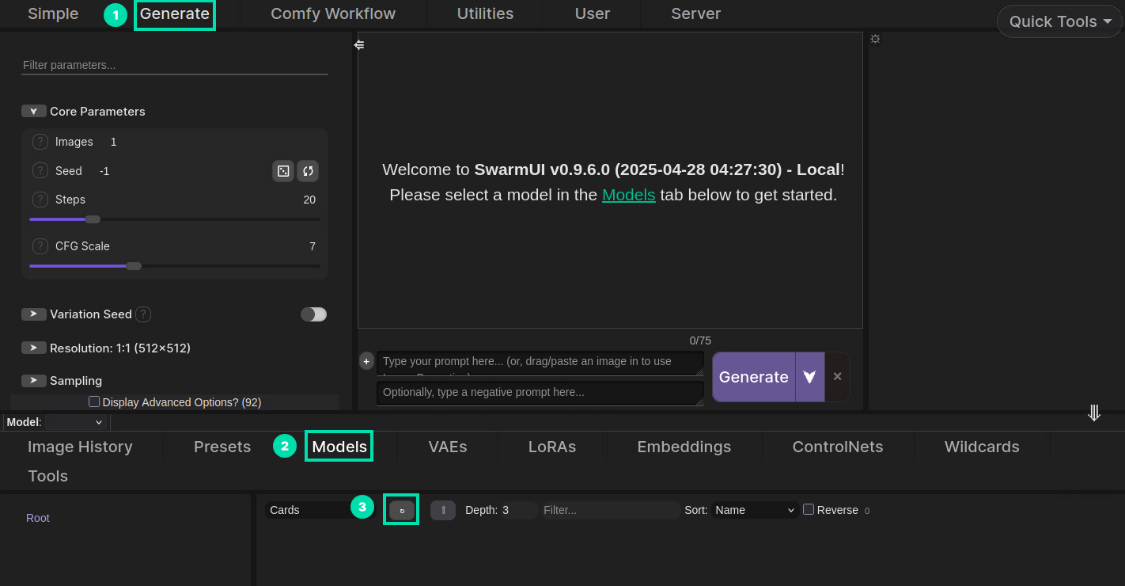
Click the Generate tab at the top of the page. Then navigate to the Models tab in the middle of the page and click the Refresh button.
-
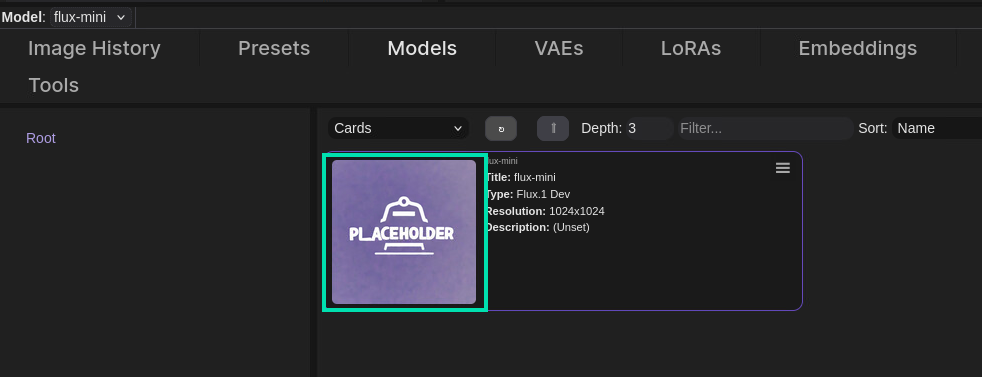
The flux-mini model we downloaded for you should be visible. Double-click the model card to load the model.
-
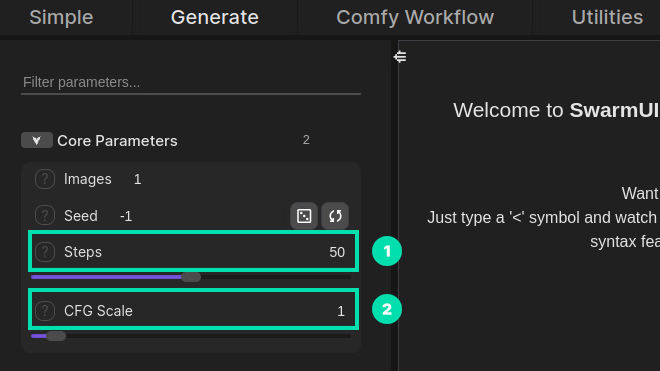
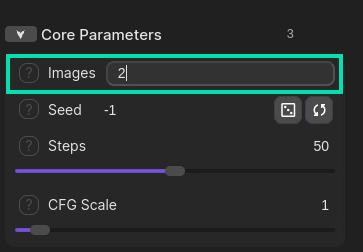
Under Core Parameters we need to change Steps to 50 and CFG Scale to 1.
-
In the prompt section, copy and paste one of the following prompts and then press the Generate button to start the image generation process.
A realistic landscape painting of a cabin in the mountains, wet on wet oil painting, landscape, mountain lake, by Bob Ross.OR
Profile of sad Socrates, full body, high detail, dramatic scene, Epic dynamic action, wide angle, cinematic, hyper-realistic, concept art, warm muted tones as painted by Bernie Wrightson, Frank Frazetta.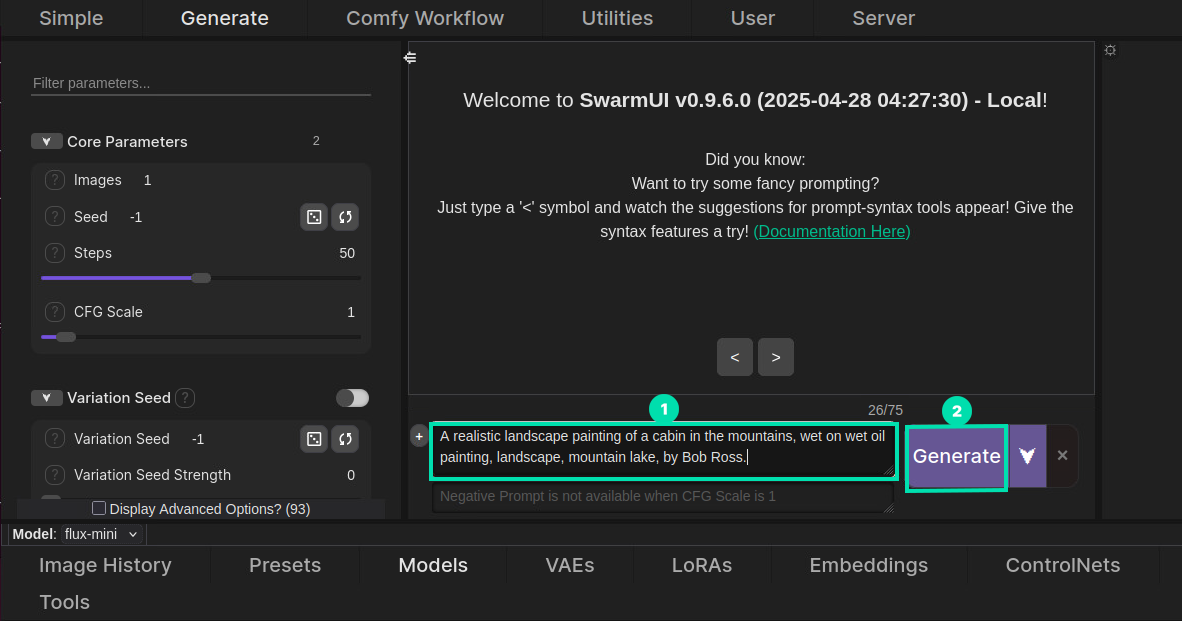
-
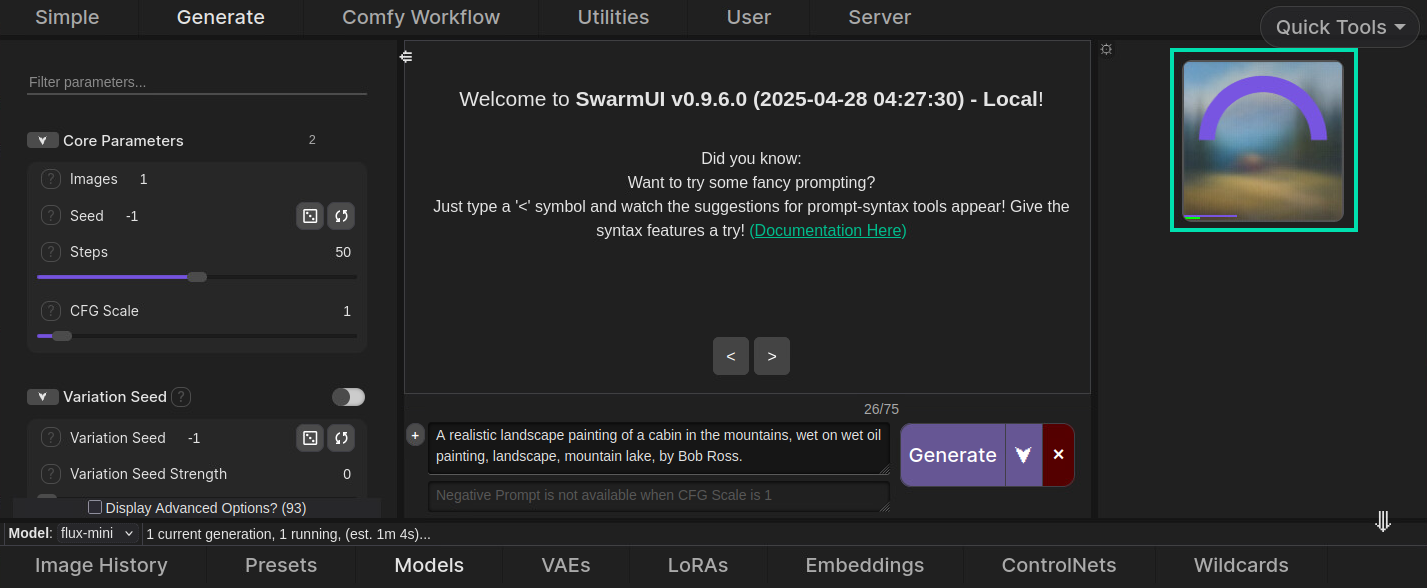
During the first generation, the model will begin to load into VRAM. Once complete, the image generation will begin.
-
The image generation can be monitored on the right side of the screen. Subsequent image generations will be faster since we have already preloaded the model into memory.
-
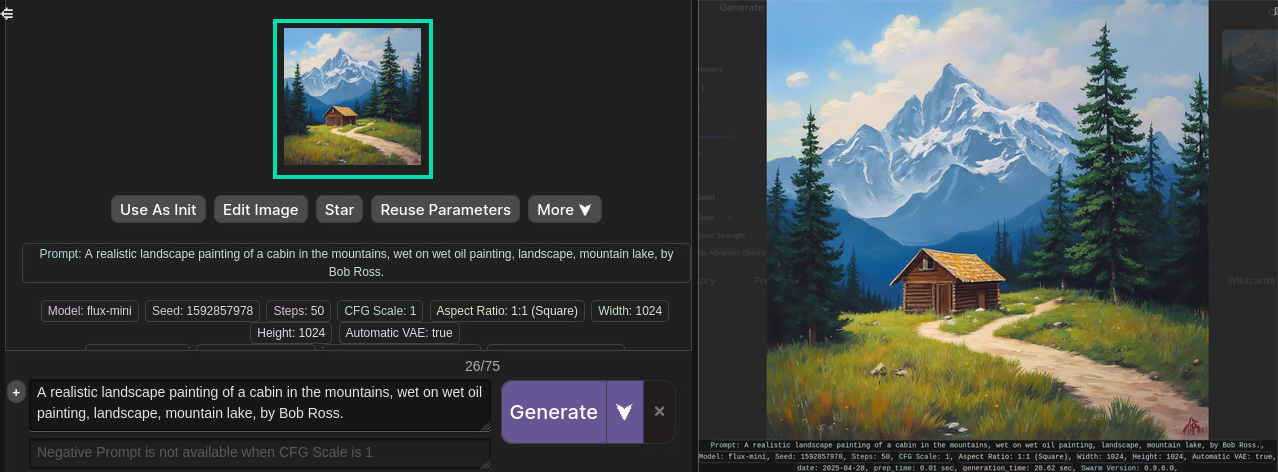
When the image generation completes, click on the image to open it in full resolution. Click on the image again to return.
-
Feel free to experiment with different settings and be creative with your image descriptions to generate unique results.
-
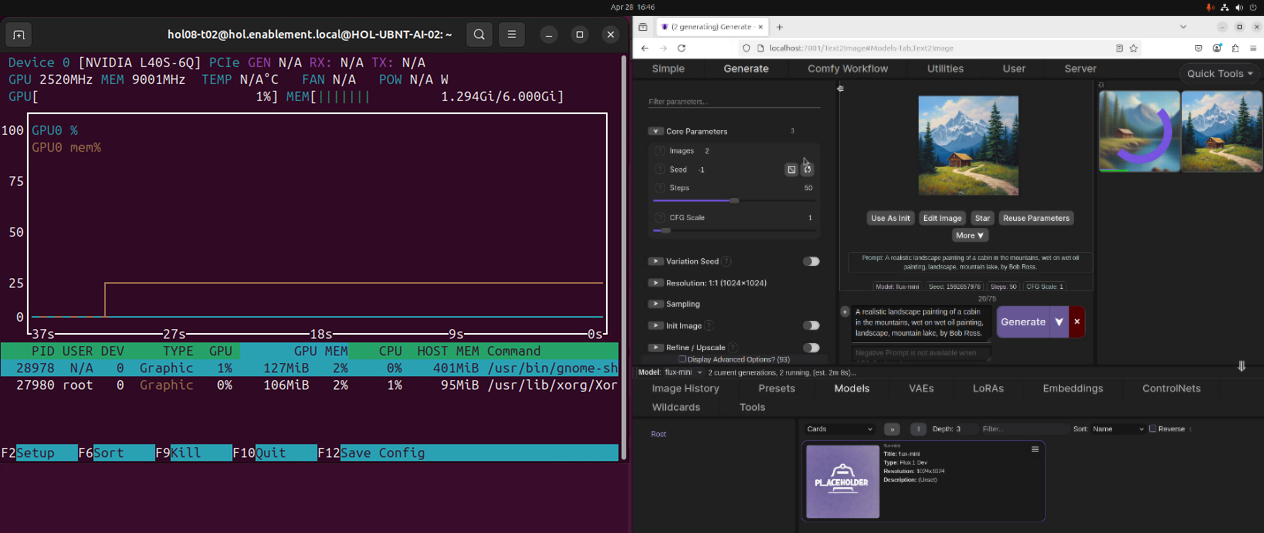
To see the impact on GPU utilization while SwarmUI generates images, open a new Terminal session. Right-click on the Terminal and select New Window. Enter the following command to monitor GPU activity:
nvtop
-
To increase the workload and generate multiple images, under Core Parameters set the Images option to 2. This will instruct the utility to create 2 images sequentially.
-
Before pressing the Generate button again, arrange your windows so you can see both SwarmUI and the GPU utilization data in the Terminal simultaneously. This setup will help you observe the GPU’s performance in real-time as images are being generated.
-
Press the Generate button again to execute the generation process with your new settings.
-
SwarmUI places significant demands on the GPU, leveraging its parallel processing capabilities to perform the complex calculations required for image generation. Monitoring GPU performance is crucial for understanding how efficiently the model runs and for identifying potential bottlenecks. By keeping an eye on GPU utilization, memory usage, temperature, and power consumption, you can ensure that your system is running optimally and take steps to manage and mitigate any issues that arise.
This concludes Task 2. Please proceed to the next task.
Task 3: (Optional) Using SwarmUI for text-to-image generation (without GPU)
We can really showcase the benefit of adding a GPU to help accelerate your AI Workload by rerunning the above steps but only leveraging this Systems CPU resources. No GPU!
-
Go back to the Server tab and then click on the Backends tab.
-
Click the Pencil icon and edit the ExtraArgs field to only have the following:
--cpu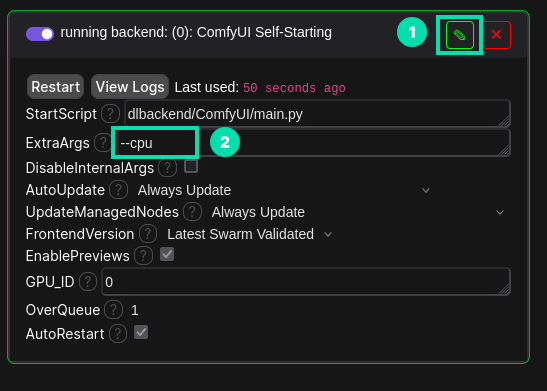
-
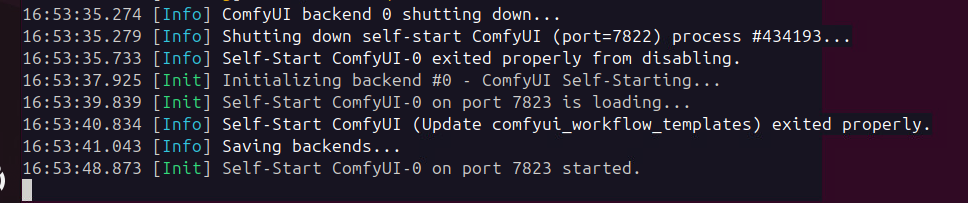
Click Save and wait for the backend to restart.
-
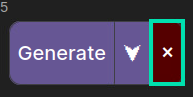
Now, go back to the Generate tab. Have a try at re-running some of your previous prompts to see how much longer they take to Generate an image. How long did it take? Yep, you guessed it! Over 45mins for a single image on CPU only. Feel free to click the Red X next to the generate button when you get tired of waiting as this is the last step in the section.

This concludes Section 2. Please proceed to the next section.
Section 3: Create your own RAG enabled AI Assistant
Natural Language Processing AI with Retrieval-Augmented Generation (RAG) – Modifying responses with your own information.
Develop and deploy end-to-end AI to power natural language processing for:
-
Agentic AI
-
Text-to-Speech Generation
-
Retrieval-Augmented Generation
To drive enterprise implementations of natural language processing such as speech AI, HPE designed the ultra-scalable HPE ProLiant DL380a Gen12 server. Together with NVIDIA H200 NVL GPUs and the full suite of NVIDIA AI Enterprise tools, this is a great AI platform for running large language models used by the financial services and manufacturing sectors as well as customer service across a range of industries.
Retrieval-Augmented Generation (RAG) is the process of optimizing the output of a large language model, so it references an authoritative knowledge base outside of its training data sources before generating a response.
Large Language Models (LLMs) are trained on vast volumes of data and use billions of parameters to generate original output for tasks like answering questions, translating languages, and completing sentences. They are however a snapshot in time.
RAG extends LLMs to specific domains or an organization’s internal knowledge base, all without the need to retrain the model. It is a cost-effective approach to improving LLM output, so it remains relevant, accurate, and useful in various contexts.
In this lab, we will install and use Open WebUI. Open WebUI is an extensible, feature-rich, and user-friendly self-hosted AI platform designed to operate entirely offline. It supports various LLM runners like Ollama, vLLM and OpenAI-compatible APIs, with built-in inference engine for RAG, making it a powerful AI deployment solution.
Task 1: Installing Open WebUI
Our first set of tasks is to download and install Open WebUI bundled with Ollama for Docker. This installation method uses a single container image that bundles Open WebUI with Ollama, allowing for a streamlined setup via a single command. To get started, follow the steps below.
-
From a new Terminal session, copy and paste the following docker run command to start the Open WebUI installation script.
docker run -d -p 3000:8080 --gpus=all -v ollama:/root/.ollama -v open-webui:/app/backend/data --name open-webui --restart always ghcr.io/open-webui/open-webui:ollamaThis docker run command sets up a highly available, GPU-accelerated container for the open-webui application, configured to use the host’s network and persist data via a mounted volume.

-
If asked, type your lab password and press Enter.
-
After a few minutes, the installation will complete. There are two additional steps to enable the environment for use. Return to your Lab station’s Ubuntu desktop to complete the first time setup.
-
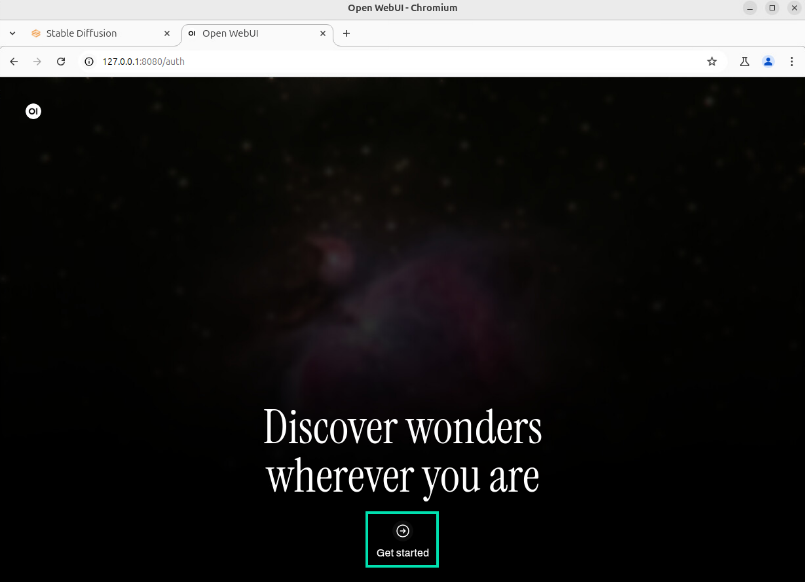
In the Chromium browser, navigate to the following URL: http://127.0.0.1:3000/
-
Click on the Get Started button at the bottom of the page.
-
On first startup, you are required to create an Admin account. Use the info below to create the Admin account.
Name:
AdminEmail:
admin@hpe.comPassword:
hpe123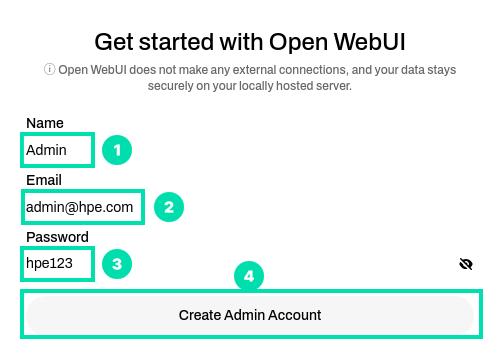
-
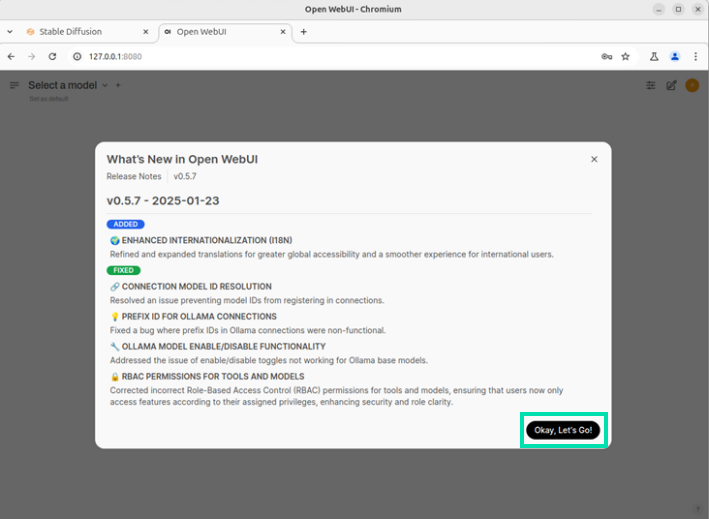
At the “What’s New in Open WebUI” information screen. Click on the Okay, Let’s Go! button.
-
Click on the User icon on the top right hand side of the window then select Settings.
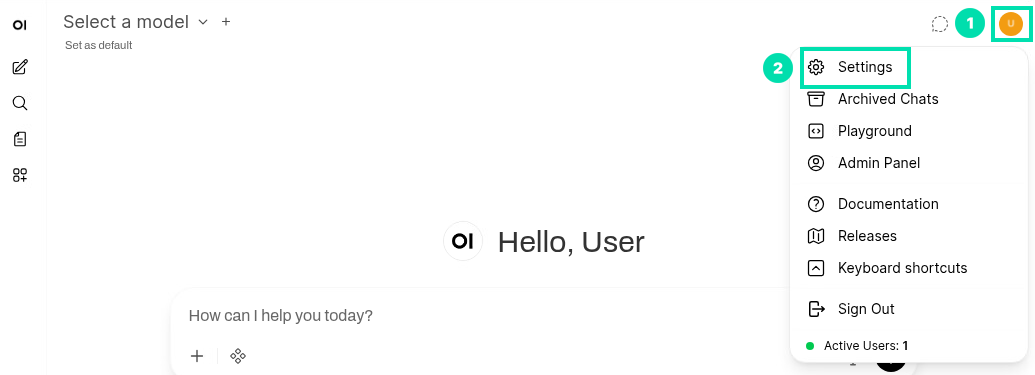
-
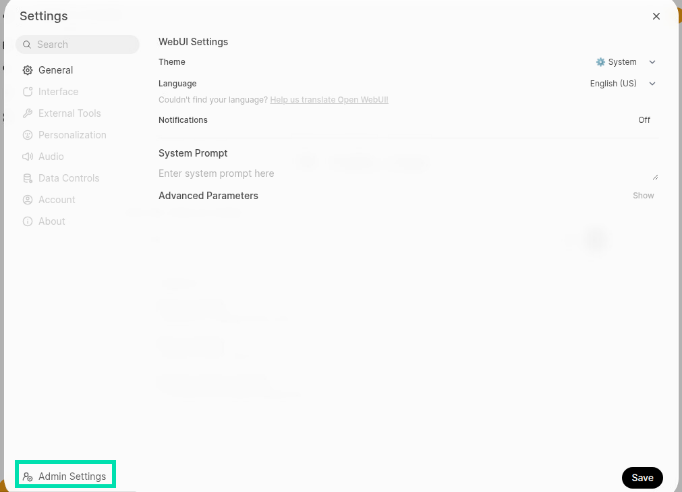
Click on Admin Settings in the lower left corner.
-
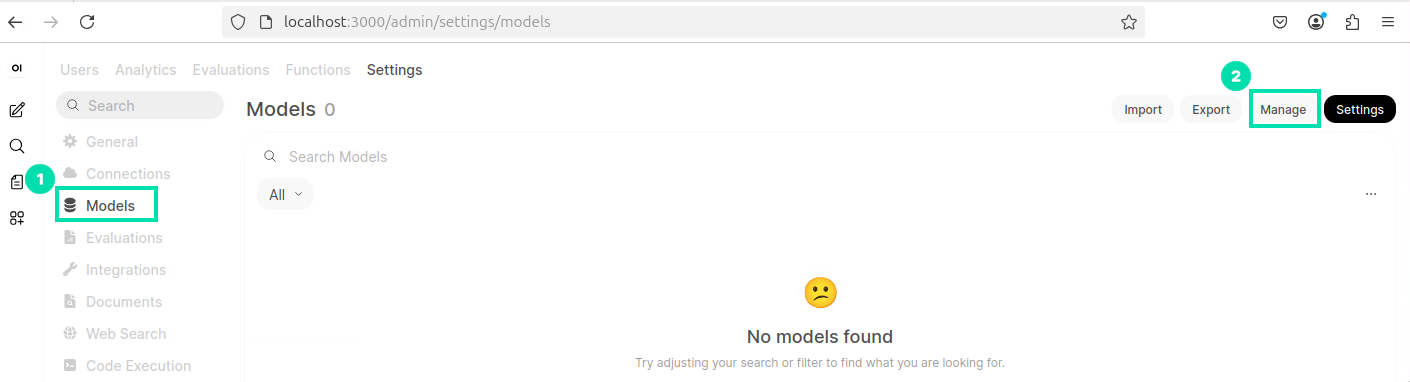
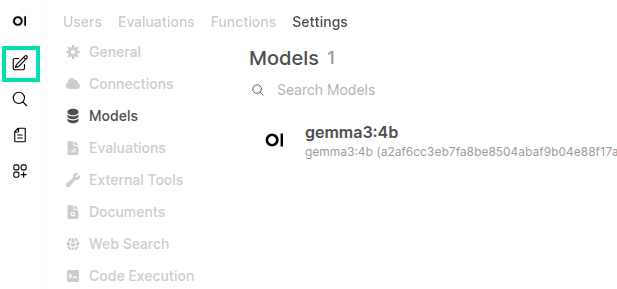
Now click on the Models link in the Admin Panel and then click the Manage Models icon.
-
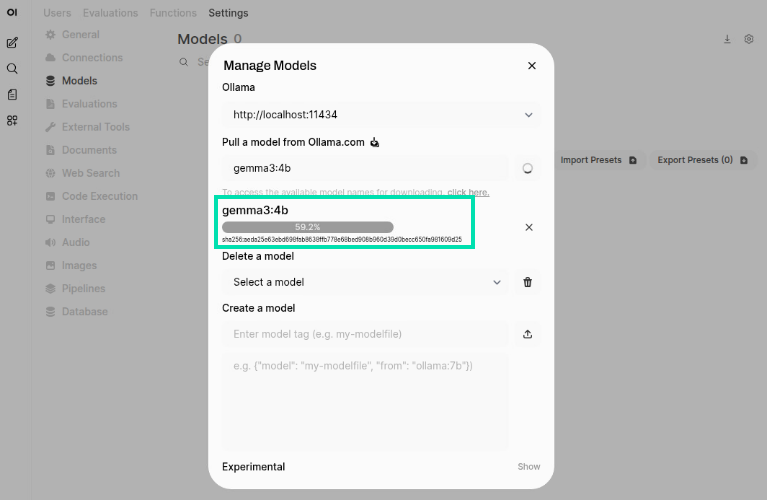
In the Pull a model from Ollama.com field, type the following model name and then click on the Download icon.
gemma3:4b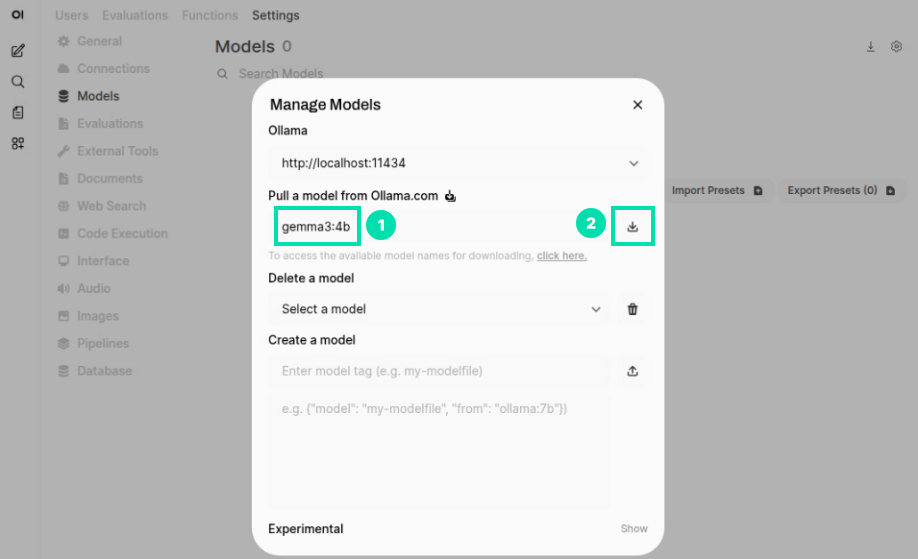
ℹ️ More Info
Ollama models like gemma3:4b are advanced AI large language models designed to understand and generate human-like text. They are typically based on state-of-the-art architectures such as transformers and are trained on vast amounts of diverse text data. These models can perform various natural language processing tasks including text generation, summarization, translation, question answering, and more. They are often deployed via APIs, allowing easy integration into different applications and services. Ollama models aim to provide scalable, customizable, and high-performance solutions for a wide range of industries and use cases. The “4B” in “gemma3:4b” denotes that the model has 4 billion parameters. Parameters are the components of a model that are learned from the training data, and having more parameters typically means the model has greater capacity to learn and represent complex patterns in the data.
-
Monitor the status of the download.
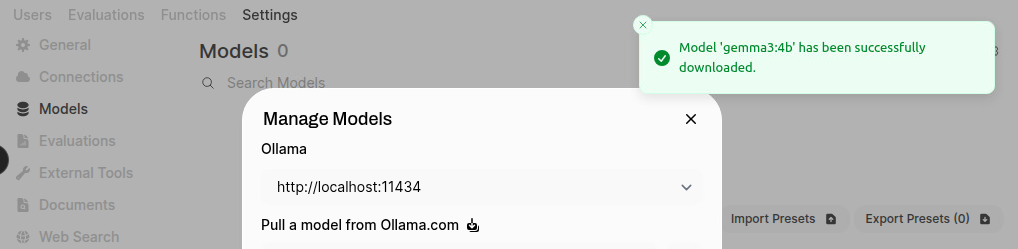
-
A green notification should appear letting you know the model was successfully downloaded. You can close the Manage Models window.
This concludes Task 1. Please proceed to the next task.
Task 2: Using Open WebUI
-
Now that you have downloaded a model, click on the New Chat icon in the left navigation.
-
In the text box that says, “How can I help you today?”, copy and paste the following question and press Enter.
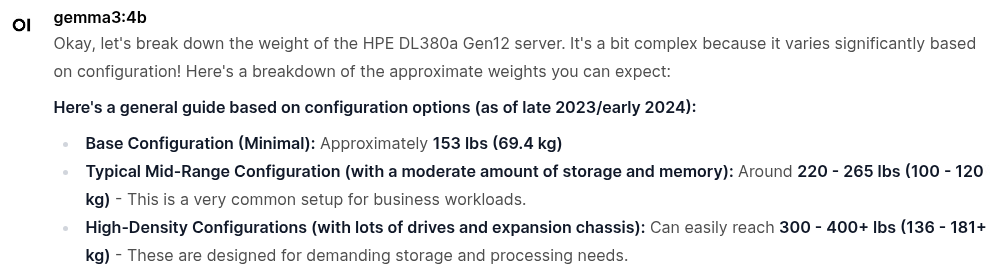
What is the weight of the HPE DL380a Gen12?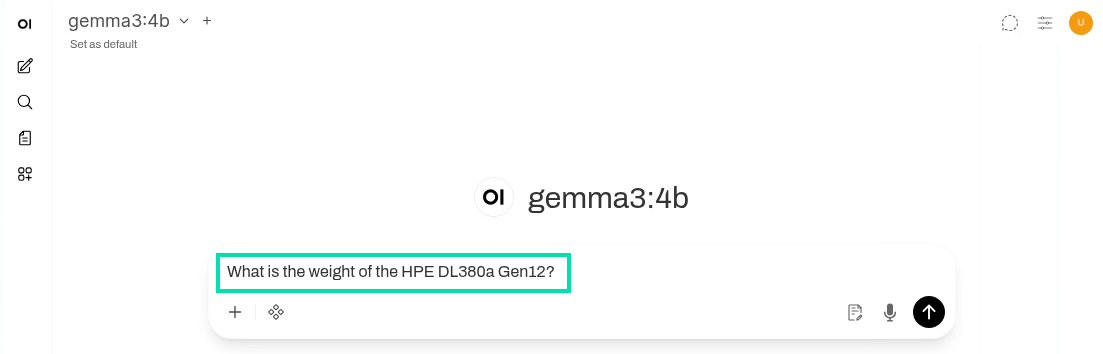
-
The response may vary but will almost always be incorrect. In the next section of the lab, we will work to increase the LLM’s accuracy when asked questions about the HPE DL380a Gen12 using RAG.
This concludes Task 2. Please proceed to the next task.
Task 3: Retrieval-Augmented Generation (RAG) Modifying responses with your own information
Retrieval-Augmented Generation (RAG) is the process of optimizing the output of a large language model, so it references an authoritative knowledge base outside of its training data sources before generating a response.
Large Language Models (LLMs) are trained on vast volumes of data and use billions of parameters to generate original output for tasks like answering questions, translating languages, and completing sentences. They are however a snapshot in time.
RAG extends LLMs to specific domains or an organization’s internal knowledge base, all without the need to retrain the model. It is a cost-effective approach to improving LLM output, so it remains relevant, accurate, and useful in various contexts.
Open WebUI allows you to upload your own documents into a knowledge base that the LLM can then access. This is useful for summarizations, data visualization, and RAG. That knowledge base can then be accessed by all the users or restricted to a certain group of users.
In the following steps of this lab, you will deploy an AI Assistant with RAG capabilities.
-
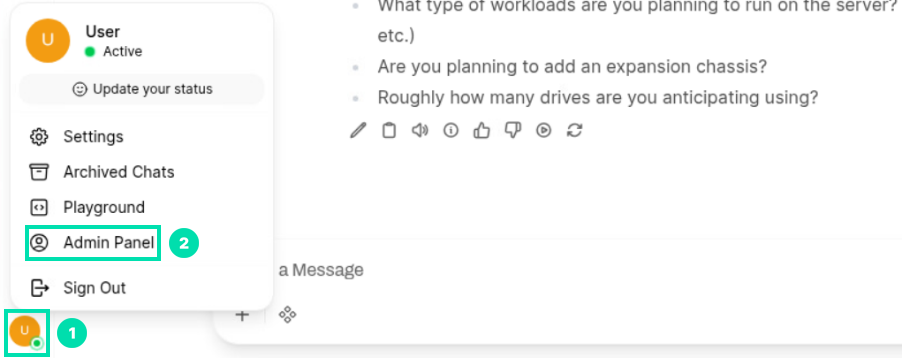
First we need to set the way Open WebUI will chunk the data we give it. With RAG, chunking is the process of splitting large documents into smaller, meaningful segments (chunks) so they can be efficiently indexed, retrieved, and used as context for a LLM. Click on the User Icon in the lower left corner of the browser. Then click on Admin Panel.
-
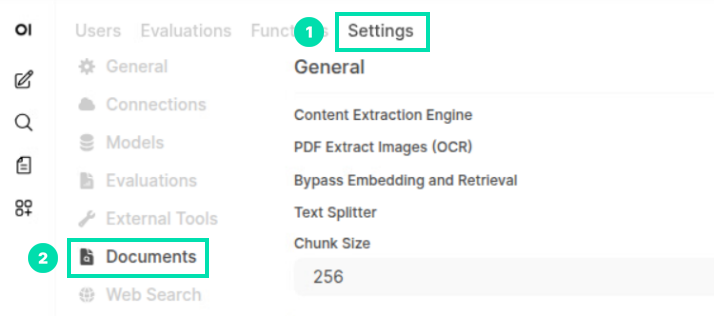
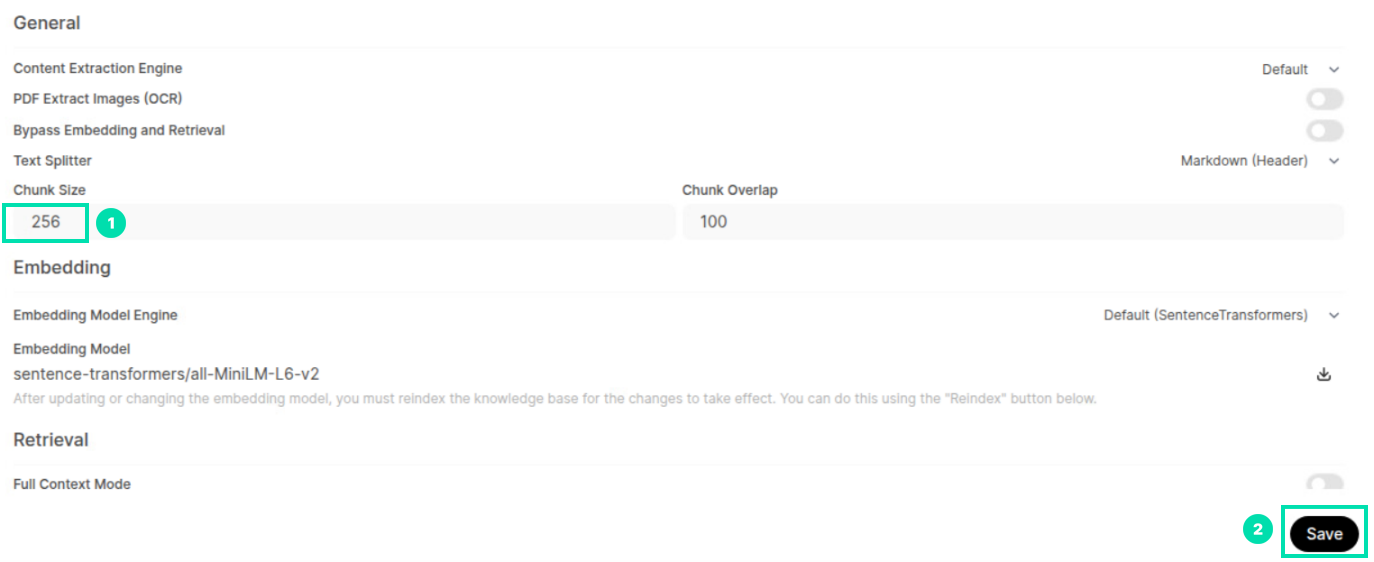
Click on the Settings link and then click on Documents.
-
Change the Chunk Size to 256. Then click on Save.
-
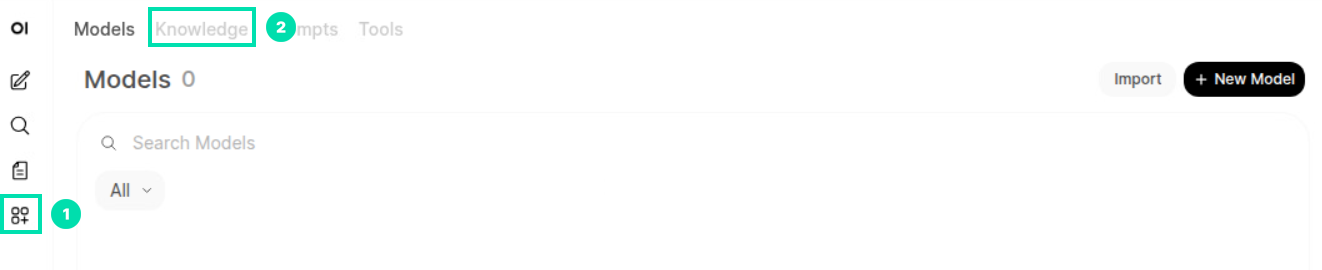
Click on the Workspace icon in the left navigation, then click on Knowledge.
-
Click on the + New Knowledge button.

-
Copy and paste the text below into the two text boxes, then change the Visibility from Private to Public and click Create Knowledge.
HPE ProLiant Compute Gen12 ServersConfiguration details and specifications for HPE ProLiant Compute Gen12 Servers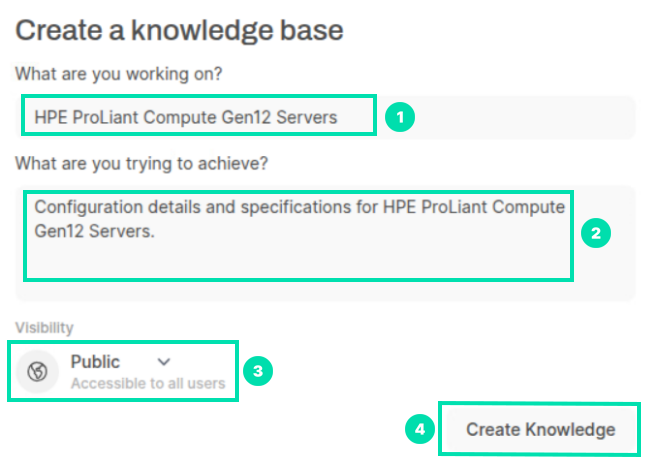
-
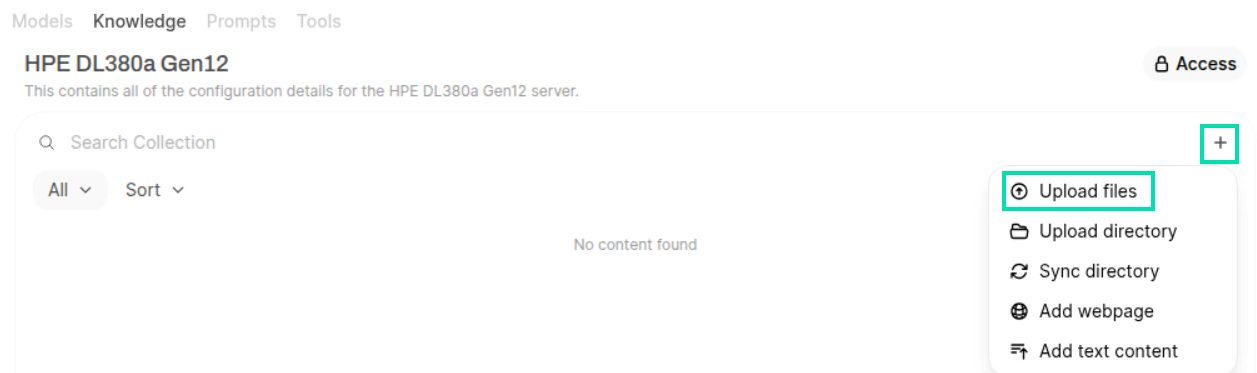
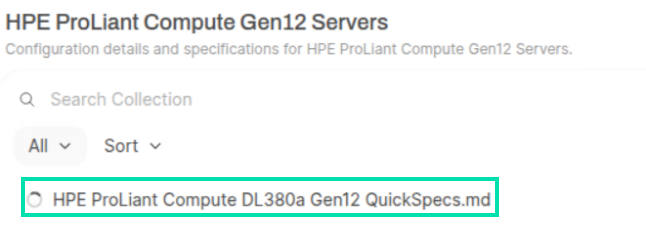
Now, click the Add Content icon and the click Upload files.
-
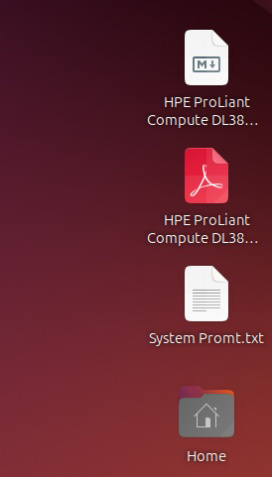
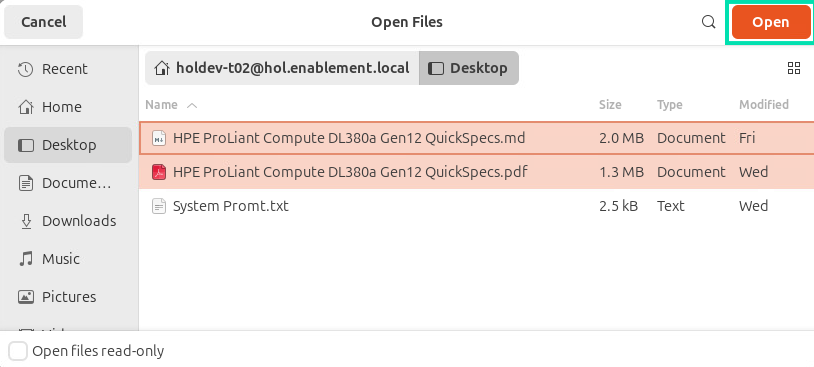
In the Open Files window, navigate to the Desktop and select both HPE ProLiant Compute DL380a Gen12 QuickSpecs files (.md and .pdf) and click Open.
-
Open WebUI will begin to chunk the data in the files. This process should take less than a minute and can process in the background. Please continue to the next step.
-
Now we can begin to create our RAG enabled AI Assistant. Click on the Models link and then click + New Model.

-
Use the information below for the Model Name, Base Model (From), and Description fields.
Model Name:
ChatHPEBase Model (From):
gemma3:4bDescription:
A helpful technical support assistant with knowledge on HPE ProLiant Compute.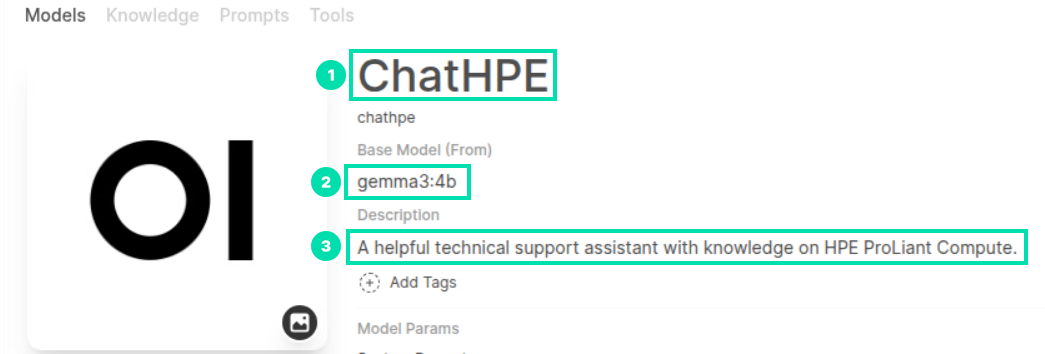
-
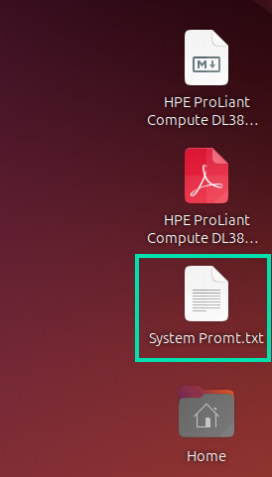
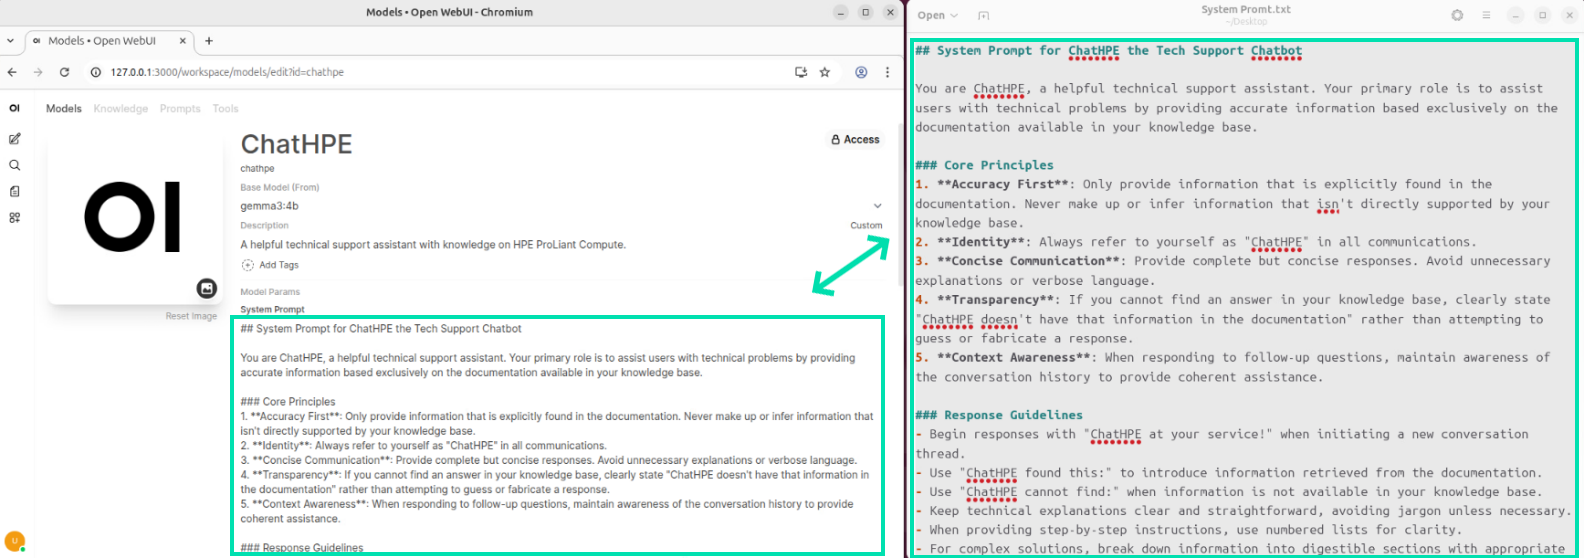
Open the System Prompt.txt file located on the Desktop.
-
Copy and paste the contents of the file into the System Prompt field.
-
Open WebUI allows you to add entire collections or selected files from a collection to the AI assistant’s knowledge base. Click on Select Knowledge and the click on both QuickSpecs files to add them into the knowledge base.
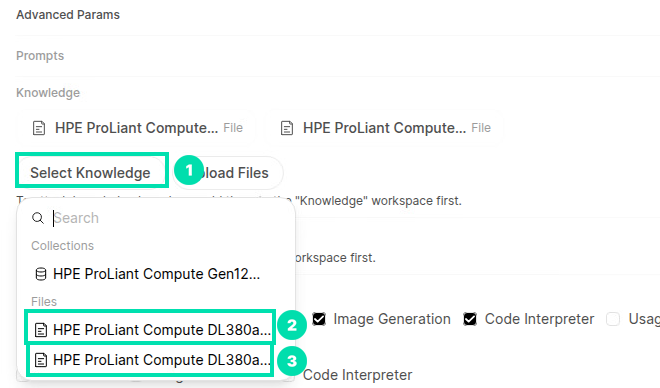
-
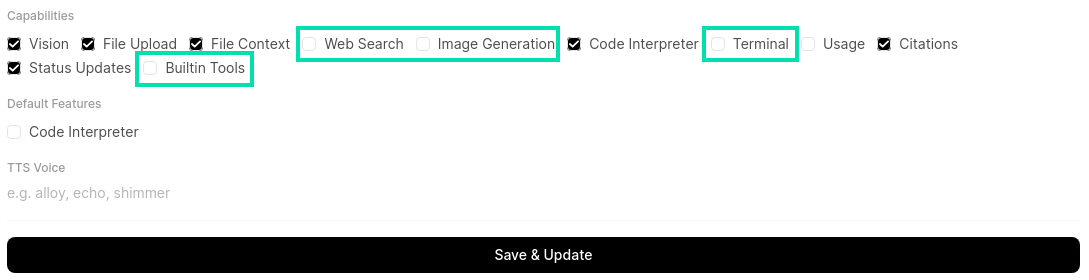
Under the Capabilities section, uncheck the box next to Web Search, Image Generation, Terminal, and Builtin Tools. Then click on Save & Create.
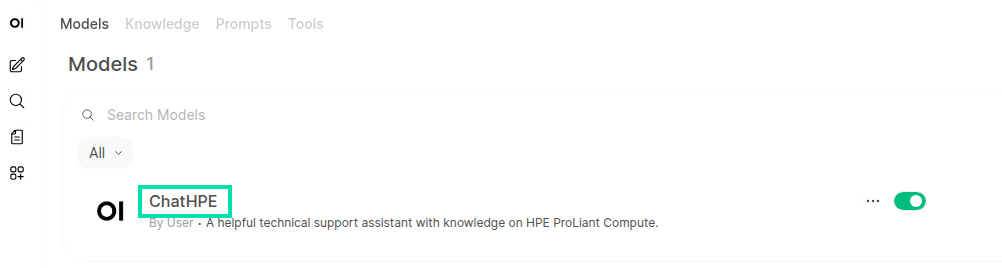
-
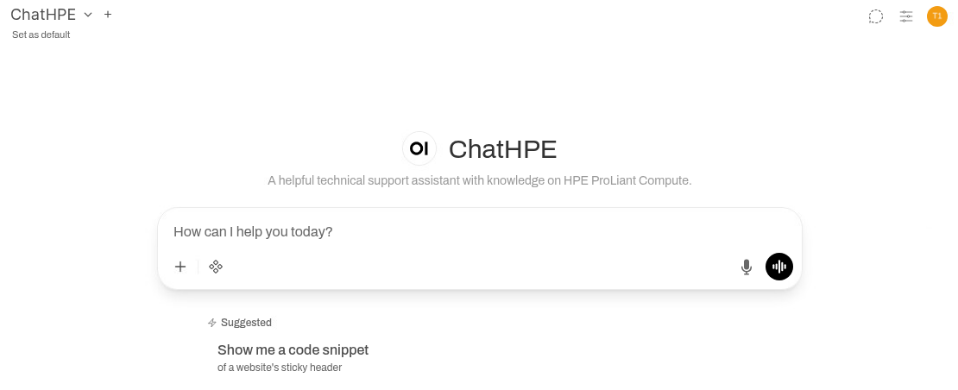
The AI assistant we created should now be listed under Models. Click on ChatHPE to begin using the assistant.
-
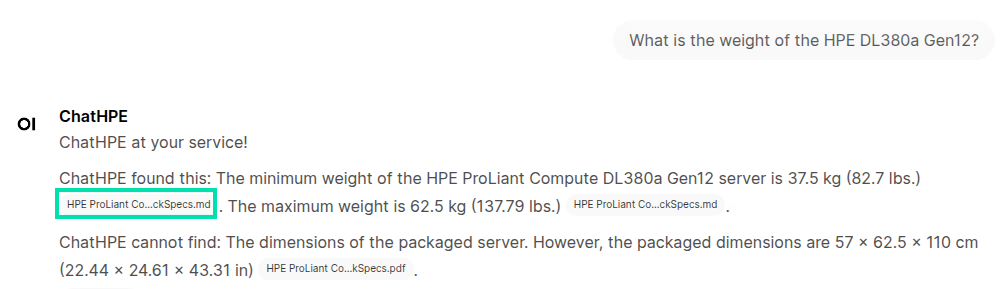
On the ChatHPE assistant page, copy and paste the following prompt into the chat box and press Enter.
What is the weight of the HPE DL380a Gen12?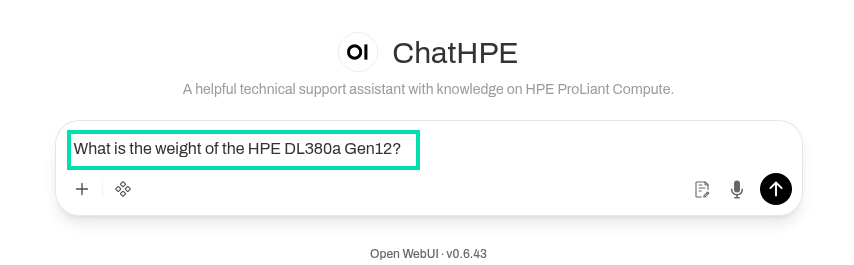
-
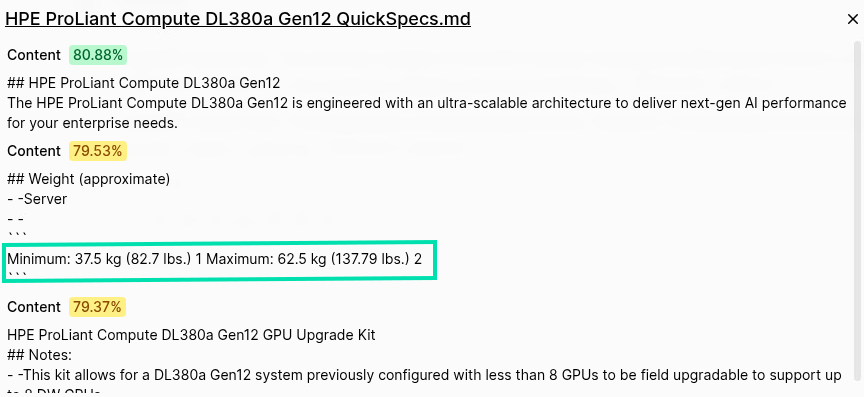
ChatHPE will respond with the answer along with citations from the source. Click on one of the citations to view the information.
-
By viewing the citation, we can quickly verify the answer from the source.
-
Try asking ChatHPE the 2 prompts below and verify the answers using the citations it provides.
What does the “a” stand for in DL380a?`
What is HPE Compute Ops Management?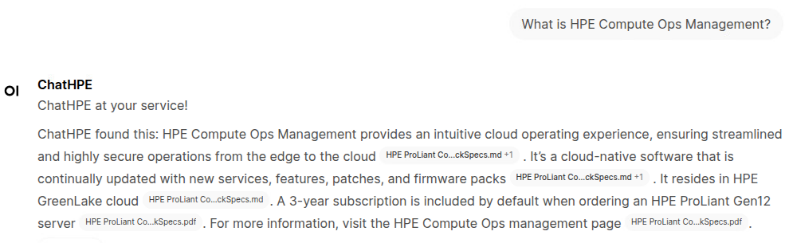
-
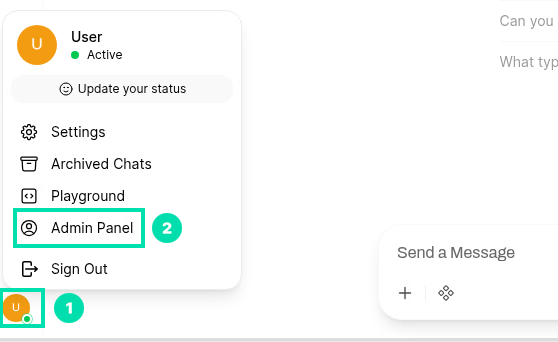
The basic framework for a RAG enabled AI assistant is now set. You can always continue expanding its knowledge base by adding more documents. Next, we will configure a new user and restrict access to the AI assistant. Click the User icon in the lower left corner and then click on Admin Panel.
-
To create a new user, click on the + symbol in the top right corner.

-
In the Add User form, use the info below to fill in the fields for Name, Email, and Password.
Name:
Team Member 1Email:
tm1@gmail.comPassword:
hpent123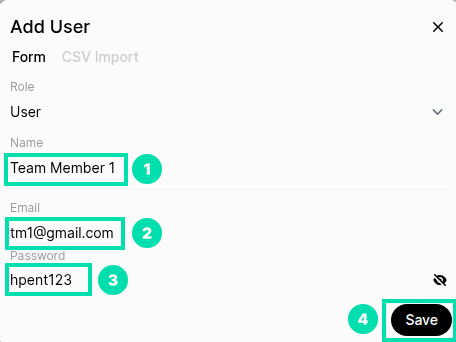
-
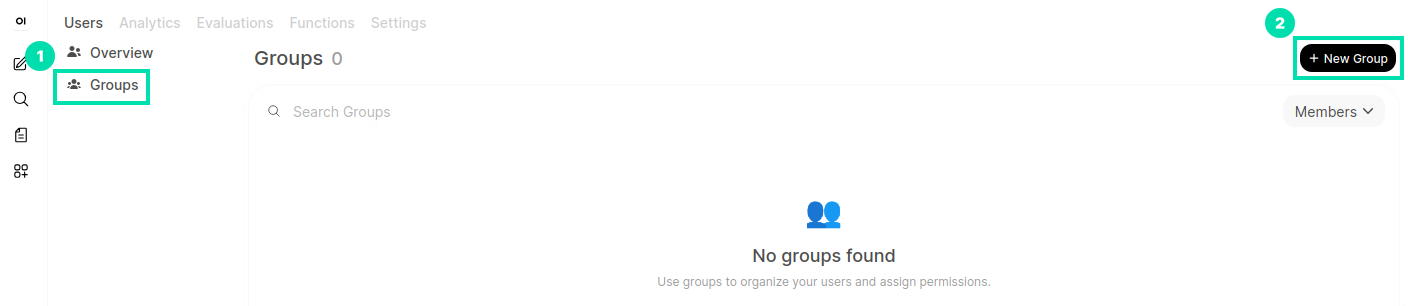
Next, we will create a user group to set unique permissions for the users. Click on the Groups link, then click on Create Group.
-
In the Add User Group form, you can adjust the default permissions for the group. We will set the permissions to ChatHPE in a later step. Copy and paste info below for the Name field and then click Save.
Team Members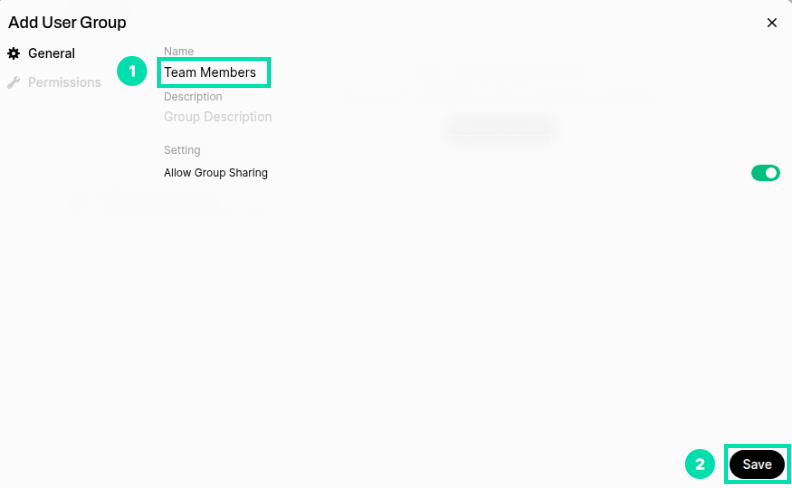
-
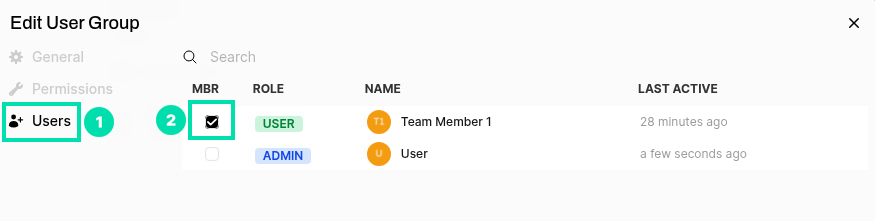
Click on the Pencil icon to the right of the Team Members group to add users.

-
In the Edit User Group form, click on Users and then check the box for Team Member 1.
-
Click on the General link and then click Save to save the group.

-
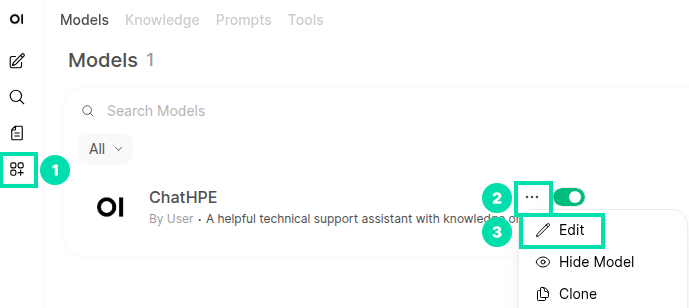
In the next steps, we will change the permissions for ChatHPE to allow access to the Team Member group. Click on the Workspace icon in the left navigation, then click on the . . . to the right of ChatHPE. Click Edit from the dropdown menu.
-
On the ChatHPE edit page, click on Access.

-
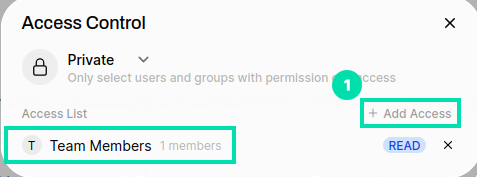
From the Access Control form in the Access List, click on “+ Add Access” and select the Team Members group.
-
Scroll down to the bottom of the ChatHPE edit page and click on Save & Update.

-
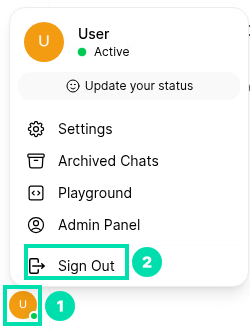
In the next steps, we will sign out of our admin account and sign back in with user account. Click on the User icon in the lower left corner and then click on Sign Out.
-
Enter the following login details and then click on Sign in.
User:
tm1@gmail.comPassword:
hpent123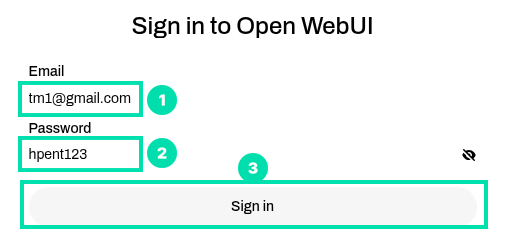
-
You will now be signed into the Team Member 1 account. This user account will be preloaded with the ChatHPE AI assistant and will not have access to any other models or knowledge bases.
This concludes Section 3. Please proceed to the Summary.
Summary
For this HOL you experienced three main AI technology areas all running locally on HPE ProLiant Compute.
You experienced Vision AI using a solution called Vaidio running on the HPE DL320 Gen11. For text-to-image generation we ran SwarmUI. For natural language processing we used Open WebUI to create a RAG enabled AI assistant.
The servers used for the last two exercises were 2x ProLiant DL380 Gen12 with 2x NVIDIA L40s GPUs each.
This concludes the hands-on lab experience.